Carrots are a household favorite—crispy, sweet, and packed with nutrients. What many people don’t realize is that carrots are not only easy to grow, but you can also start the process with scraps you’d usually toss in the bin. If you’ve ever peeled a carrot and wondered what you could do with the top, you’re in luck. That leftover piece is your starting point for growing new carrots, even if you have zero gardening experience.
This guide will walk you through the surprisingly simple method of growing carrots from kitchen scraps and caring for them with ease in your garden, containers, or windowsill.
Understanding What Can Be Grown from a Carrot Top
It’s important to know that while you can’t regrow the entire carrot root from a scrap, you can grow the leafy tops and produce seeds if left to flower. The greens themselves are edible and make a tasty addition to soups, pesto, and salads. But more importantly, you can use the top of a carrot as a starting point to sprout greenery, which can eventually lead to harvesting seeds to grow new carrots from scratch.
If you’re interested in a fun and low-effort way to engage with gardening using only food scraps, carrot tops are a great place to begin.
Step 1: Save Your Carrot Tops
When cooking, instead of discarding the top part of the carrot (the end with the green stem attached), save it. Make sure it’s at least 1 inch thick so it can hold enough energy to sprout new growth.
Ideally, use organic carrots. Many conventionally grown carrots are treated to prevent sprouting, so results may vary.
Step 2: Place in Water to Sprout
To start the regrowth process:
-
Fill a shallow dish or bowl with water.
-
Place the carrot tops cut-side down and green-end up.
-
Keep the water level just high enough to touch the cut surface.
-
Set the bowl in a sunny windowsill or bright spot.
Change the water every two days to prevent mold and bacteria buildup. In a few days, you’ll notice green shoots emerging from the top and small root hairs forming underneath.
Step 3: Transfer to Soil
Once your carrot tops have developed noticeable roots and green shoots (usually after 7–10 days), they’re ready to move into soil.
For planting in containers:
-
Choose a pot at least 8–10 inches deep.
-
Use loose, well-draining potting soil.
-
Plant the carrot top with the green shoots above the soil and the rest buried.
For garden beds:
-
Loosen the soil to a depth of at least 10 inches.
-
Mix in compost to encourage healthy growth.
-
Space tops about 3 inches apart and water gently.
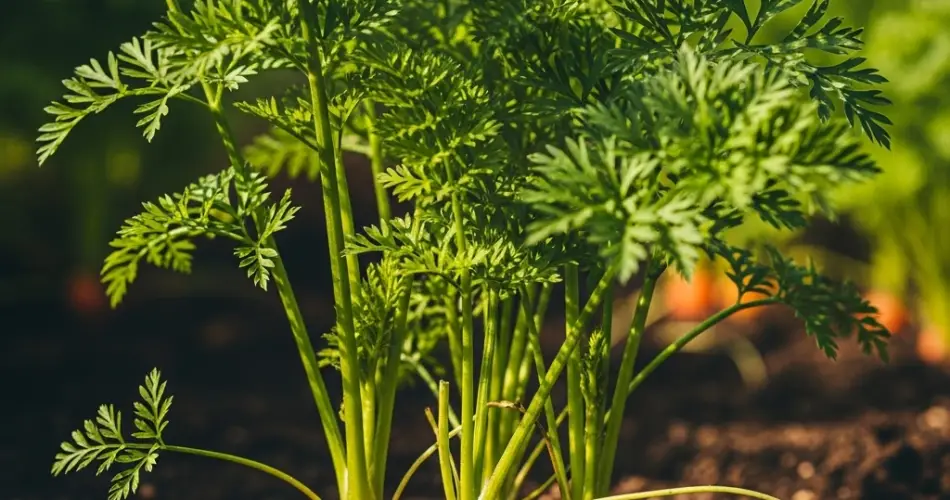
Step 4: Provide the Right Care
Caring for carrots from this stage is relatively simple:
-
Light: Carrots love sunlight. Aim for 6–8 hours of direct sun per day.
-
Water: Keep the soil evenly moist but not soggy. Water regularly, especially in hot weather.
-
Soil: Loose, sandy soil helps roots grow straight and long. Remove stones and debris to prevent misshapen carrots.
-
Fertilizer: Use a balanced organic fertilizer every few weeks. Avoid overdoing nitrogen, which encourages leaves over roots.
While these carrot tops won’t grow full roots again, the greens will continue to grow, and with time, the plant may bolt (flower). If you’re patient, this leads to seed production—your pathway to growing real carrots from seed next season.
Step 5: Harvest Greens or Collect Seeds
The carrot greens are ready to harvest once they reach 6 inches or more. Use clean scissors to snip them just above the base, allowing the plant to keep growing.
If your plant produces flowers, let them mature and dry out on the stalk. You’ll see small seeds form in clusters, which you can gently shake loose and save for planting.
These seeds can then be sown directly in the garden or in containers for growing actual carrot roots—a full cycle beginning with a simple kitchen scrap.
Bonus Tip: Companion Planting
Carrots grow well alongside other vegetables and herbs. Try pairing them with:
-
Tomatoes (which provide a bit of shade)
-
Onions (help repel pests)
-
Parsley and lettuce (similar soil and water needs)
Avoid planting near dill or cilantro, which can compete for nutrients and stunt growth.
Final Thoughts
You don’t need a green thumb—or even a bag of seeds—to start growing your own food. With just a leftover carrot top, a sunny spot, and a bit of attention, you can enjoy fresh greens, harvest your own seeds, and eventually grow new carrots from scratch.
This easy method brings sustainability, creativity, and a sense of accomplishment right to your kitchen and garden. It’s a perfect introduction to low-waste gardening and a great activity for adults and kids alike. Give it a try—you’ll be amazed at what a humble scrap can grow into.


