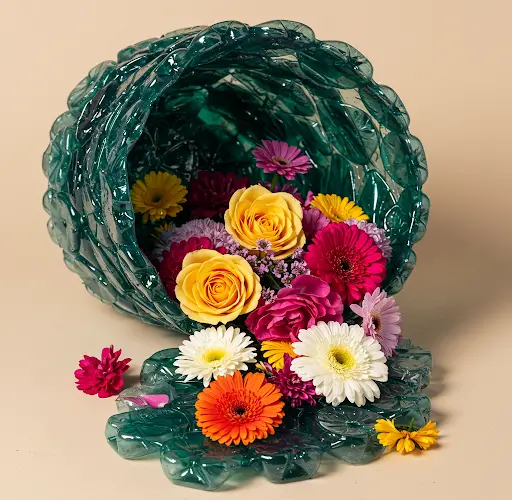
How to Recycle Plastic Bottles into Unique Spilled Flower Pots
Plastic waste is a growing environmental concern, but with a little creativity, you can turn discarded plastic bottles into beautiful and functional garden décor. One of the most unique and eye-catching ideas is creating a spilled flower pot—a design where flowers appear to be spilling out of the container in an artistic and natural way. This DIY project is perfect for upcycling plastic bottles while adding charm to your garden, balcony, or indoor space. Here’s a step-by-step guide on how to transform plastic bottles into a stunning spilled flower pot.
Why Recycle Plastic Bottles into Spilled Flower Pots?
Recycling plastic bottles into flower pots is beneficial for several reasons:
- Environmental Impact – Reduces plastic waste and promotes sustainable gardening.
- Cost-Effective – Saves money on expensive garden decorations and planters.
- Creative and Customizable – Allows you to experiment with colors, designs, and plant choices.
- Space-Saving – Perfect for small gardens, balconies, and indoor spaces.
- Fun DIY Project – A great activity for kids and adults alike, encouraging creativity and environmental awareness.
Materials Needed
Before starting, gather the following materials:
- Large plastic bottles (2-liter soda bottles, detergent bottles, or water jugs)
- Sharp scissors or a craft knife
- Acrylic paint or spray paint
- Paintbrushes or sponges
- Sandpaper (for roughing up the plastic surface)
- Hot glue gun or strong adhesive (optional, for decorations)
- Potting soil
- Flowering plants or trailing plants (petunias, alyssum, creeping thyme, or marigolds work well)
- Pebbles or small stones (for drainage and decoration)
- Clear sealant or varnish (to protect painted designs)
Step-by-Step Guide
Step 1: Choose and Prepare the Plastic Bottle
- Select a plastic bottle that suits your desired pot size. A 2-liter soda bottle is ideal for small-to-medium arrangements, while larger jugs can create more dramatic effects.
- Rinse the bottle thoroughly and remove any labels or adhesive residue.
- Use sandpaper to roughen up the surface slightly, which helps the paint adhere better.
Step 2: Cut the Bottle into a Spilled Pot Shape
- Using a marker, outline the spout area where the flowers will “spill” out. This should be a wide, curved opening extending down one side of the bottle.
- Carefully cut along the outline with scissors or a craft knife. Leave the back and bottom of the bottle intact to hold the soil in place.
- Poke or drill small holes in the bottom for drainage to prevent waterlogging.
Step 3: Painting and Decorating
- Apply a base coat of acrylic or spray paint in your chosen color. Bright colors like blue, red, or yellow create a bold look, while earthy tones give a rustic feel.
- Allow the base coat to dry completely before adding designs or patterns.
- Use stencils, sponges, or freehand painting to add floral, abstract, or whimsical designs.
- Seal the paint with a clear varnish or sealant to protect it from moisture and fading.
Step 4: Adding Soil and Plants
- Place a layer of pebbles or small stones at the bottom of the bottle for drainage.
- Fill the bottle with nutrient-rich potting soil, leaving about an inch of space at the top.
- Carefully plant flowers near the cut opening so they naturally appear to be spilling out.
- Use trailing plants like creeping thyme or petunias to enhance the overflowing effect.
Step 5: Positioning and Final Touches
- Place your spilled flower pot on its side in the garden, on a balcony, or indoors near a window.
- Arrange additional small pebbles, mulch, or decorative stones around the “spilled” section to enhance the illusion of flowers cascading from the pot.
- Water the plants gently to help them settle in and start growing.
Best Plants for Spilled Flower Pots
To create a stunning overflowing effect, choose plants with vibrant colors and trailing growth habits:
- Petunias – Available in various colors, perfect for a dramatic spilling effect.
- Alyssum – Small, delicate flowers that form dense clusters.
- Creeping Thyme – A fragrant, trailing plant ideal for a ground-covering effect.
- Marigolds – Bright and cheerful, adding contrast to green foliage.
- Verbena – Sprawling growth and long-lasting flowers.
- Pansies – Hardy, colorful, and great for cooler seasons.
Creative Variations and Ideas
- Hanging Spilled Pot – Attach the bottle to a wall or fence for a vertical spilled flower effect.
- Stacked Spilled Pots – Use multiple bottles in a tiered arrangement for a cascading garden look.
- Themed Designs – Create a fairytale effect with tiny fairy figurines and decorative pebbles.
- Glow-in-the-Dark Paint – Use luminous paint to make your flower pot glow at night.
- Miniature Garden – Add small figurines, moss, and tiny accessories for a whimsical touch.
Maintenance Tips for Long-Lasting Beauty
- Water Regularly – Check the soil moisture frequently and water as needed.
- Fertilize Occasionally – Use an organic fertilizer every few weeks for healthy plant growth.
- Trim Overgrowth – Prune any excess growth to maintain the desired shape.
- Refresh Paint as Needed – Reapply paint or sealant if fading occurs.
- Replant Seasonally – Change flowers based on seasonal preferences for year-round beauty.
Conclusion
Recycling plastic bottles into unique spilled flower pots is an eco-friendly and creative way to add personality to your garden or home décor. This DIY project is easy, customizable, and contributes to reducing plastic waste. With the right plants and a little artistic flair, you can transform ordinary plastic bottles into stunning displays of cascading flowers. Whether you have a large garden, a small balcony, or an indoor space, these spilled flower pots are a beautiful and sustainable gardening solution. Start your upcycling journey today and let your creativity bloom!


