Turnips are an underrated, fast-growing root vegetable that you can successfully cultivate—even in small or shallow containers. These cool-weather crops offer both edible roots and tasty leafy greens, making them an excellent choice for home gardeners with limited space. Whether you have a balcony, patio, or sunny windowsill, turnips can thrive in shallow containers with minimal effort.
Here’s a step-by-step guide to growing turnips in shallow containers, from planting to harvest.
Why Grow Turnips in Containers?
Growing turnips in containers offers several benefits:
-
Space-saving: Perfect for apartment dwellers or urban gardeners.
-
Portability: Move your containers to follow the sun or shelter them during bad weather.
-
Pest control: Easier to manage pests and diseases in a controlled environment.
-
Quick harvest: Most turnip varieties mature in just 30–60 days.
Turnips are not only easy to grow, but they’re also nutritious and versatile in the kitchen—ideal for roasting, boiling, or adding to soups and salads.
Best Varieties for Containers
When growing in shallow containers, choosing the right variety is key. Look for turnips that are known for compact growth and smaller roots. Some excellent options include:
-
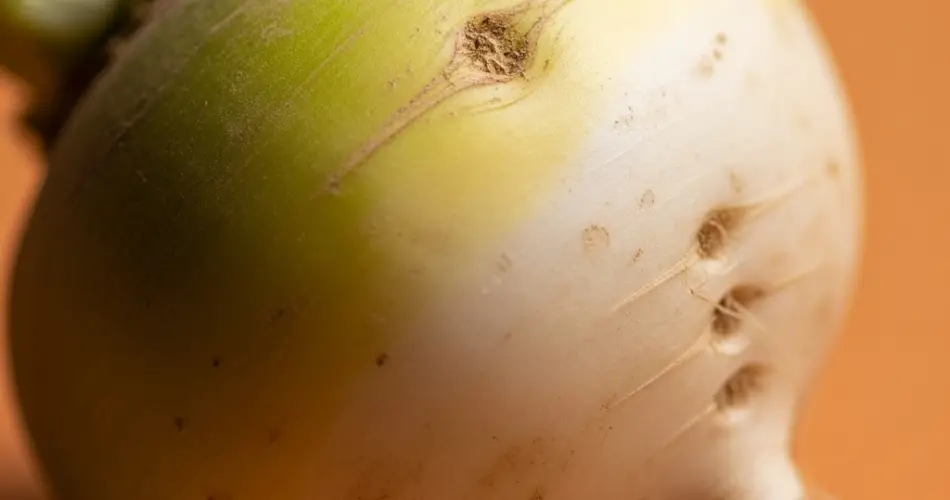
Tokyo Cross: A fast-growing, small white turnip ideal for tight spaces.
-
Hakurei: A Japanese variety known for its sweet, tender roots and edible greens.
-
Purple Top White Globe: A traditional variety that also adapts well to container life if given enough room.
Aim for turnips that mature quickly and don’t require deep soil to form properly.
Choosing the Right Container
Turnips don’t need much depth—just enough space for the roots to swell. Shallow containers that are at least 6–8 inches deep and 12 inches wide are sufficient.
Ensure your container has:
-
Good drainage holes to prevent soggy soil and root rot.
-
A wide surface area to allow for spacing between each plant.
-
Sturdy construction to hold moist soil and growing plants.
Plastic, clay, or wooden containers are all suitable options, as long as drainage is adequate.
Soil and Planting Mix
Use a loose, well-draining potting mix rich in organic matter. Avoid heavy or compacted soils, which can restrict root development. An ideal blend includes:
-
High-quality potting mix
-
Compost or aged manure
-
Perlite or sand for improved drainage
Avoid using garden soil directly, as it may be too dense and may carry pests or diseases.
Sowing Turnip Seeds
Turnip seeds can be sown directly into the container. There’s no need to start them indoors, as they germinate quickly and transplanting root vegetables is not ideal.
To sow:
-
Moisten the soil before planting.
-
Scatter seeds thinly or plant them 1/2 inch deep, about 2 inches apart.
-
Lightly cover with soil and gently pat down.
-
Water gently to settle the seeds.
Seeds will typically germinate within 5–10 days, depending on temperature. Turnips prefer cooler weather, ideally between 45–75°F (7–24°C).
Thinning and Spacing
Once the seedlings are about 2 inches tall, thin them to allow space for roots to develop. Thin to 3–4 inches apart for small varieties or 5–6 inches apart for larger ones.
Thinning is essential—crowded plants won’t form proper bulbs. The young thinned greens can be added to salads or stir-fries.
Sunlight and Watering
Turnips need full sun—at least 6 hours of direct sunlight daily. Place your containers in a sunny spot like a south-facing balcony, windowsill, or porch.
Keep the soil consistently moist but not soggy. Dry soil will lead to woody roots, while overwatering may cause rot. Use your finger to check the top inch of soil; water when it feels dry.
Fertilizing
Turnips are moderate feeders. If your soil is rich in compost, additional feeding may not be necessary. However, to encourage strong root and leaf growth, apply a balanced liquid fertilizer (like 10-10-10) every 2–3 weeks during the growing season.
Avoid high-nitrogen fertilizers, which can result in lush leaves but small roots.
Pests and Disease
Common pests for container-grown turnips include:
-
Aphids – spray with a mild soap solution.
-
Flea beetles – deter with row covers or neem oil.
-
Slugs/snails – remove by hand or use natural deterrents like crushed eggshells.
Ensure good airflow around containers to prevent fungal diseases. Rotate your crop locations between seasons to avoid soil-borne issues.
Harvesting Turnips
Turnips can be harvested at different stages depending on your preference:
-
For baby turnips, harvest when the roots are 1–2 inches in diameter.
-
For full-sized turnips, wait until they reach 3–4 inches wide.
-
Use garden scissors or gently pull the entire plant from the soil.
Turnip greens are also edible and can be harvested when tender and young—just don’t take too many at once or you’ll stunt the root development.
Storage and Use
Freshly harvested turnips can be stored in the refrigerator for up to 2 weeks. For longer storage, remove the greens and keep the roots in a cool, dark place.
Use turnips in stews, soups, stir-fries, or even roasted as a side dish. The greens are delicious sautéed with garlic and olive oil.
Final Thoughts
Growing turnips in shallow containers is a practical, rewarding way to enjoy homegrown vegetables without needing a large garden. With minimal space and simple care, you can produce crisp, tasty roots and flavorful greens from your own home.
Try this method for your next gardening project—you might be surprised by how productive a small container can be.