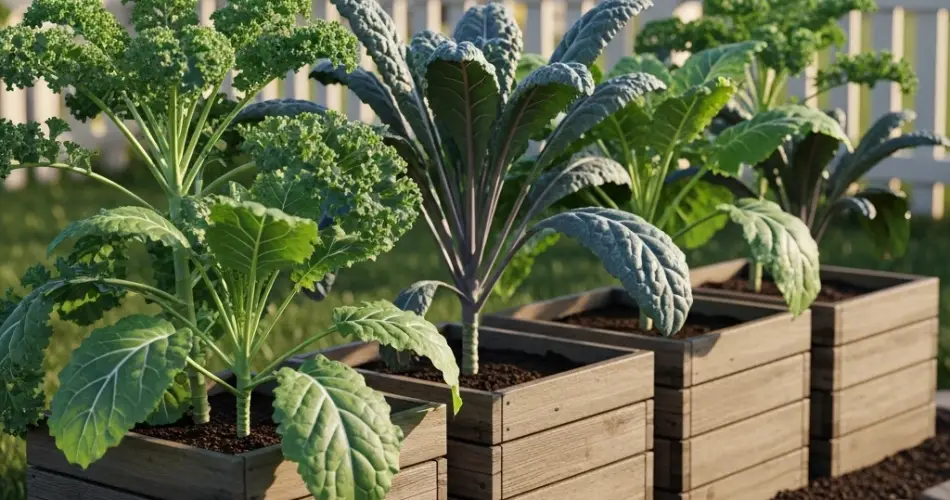
Kale has become one of the most popular superfoods, valued for its dense nutritional content and versatility in the kitchen. From smoothies and salads to sautés and soups, kale provides a constant supply of healthy greens. While it’s often grown in garden beds, kale adapts beautifully to container gardening. With wooden containers, you can cultivate this leafy vegetable even if you only have a balcony, porch, or small backyard.
This guide will walk you through everything you need to know to grow kale successfully in wooden containers, from choosing the right box to harvesting your first leaves.
Why Choose Kale for Container Gardening?
Kale is a hardy, cool-weather vegetable that thrives in limited space. Unlike some crops, kale does not require deep soil or sprawling plots to produce abundantly. By planting in wooden containers, you gain several benefits:
-
Space-saving: Perfect for urban homes, patios, or apartments.
-
Mobility: You can move the container to follow sunlight or protect it from harsh weather.
-
Aesthetic appeal: Wooden boxes add a rustic, natural charm to your garden setup.
-
Easy maintenance: With a contained growing area, weeds are minimal and care is simplified.
Step 1: Choosing the Right Wooden Container
Kale requires a container that is at least 12 inches deep and 12–18 inches wide. This allows enough space for roots to develop and for multiple plants to grow side by side.
When selecting your wooden container:
-
Use untreated wood to avoid chemicals leaching into the soil.
-
Drill drainage holes at the bottom to prevent waterlogging.
-
Line the inside with landscape fabric or a thin layer of stones to improve drainage and extend the life of the wood.
Cedar and redwood are great choices since they naturally resist rot, making them long-lasting options for outdoor use.
Step 2: Preparing the Soil
Kale thrives in nutrient-rich, well-drained soil. A good mix for wooden containers includes:
-
Potting soil for structure.
-
Compost to boost organic matter and nutrients.
-
Perlite or coarse sand for aeration.
Aim for soil with a pH between 6.0 and 7.5, as kale prefers slightly acidic to neutral conditions. Adding organic fertilizer or slow-release pellets before planting ensures steady growth.
Step 3: Choosing Kale Varieties
Kale comes in several varieties, and each adapts differently to container growing. Some popular choices include:
-
Curly kale: The most common type, with ruffled leaves and a robust flavor.
-
Lacinato kale (Dinosaur kale): Long, dark green leaves with a slightly sweeter taste.
-
Red Russian kale: Flat leaves with purple veins, tender and great for salads.
-
Baby kale: Grown for small, tender leaves harvested young.
For containers, Lacinato and curly kale are reliable options, while baby kale is excellent if you prefer quicker harvests.
Step 4: Planting Kale in Wooden Containers
You can grow kale from either seeds or seedlings.
-
From seeds: Sow seeds ½ inch deep and 3 inches apart. Thin seedlings later so each plant has about 8–12 inches of space.
-
From seedlings: Transplant nursery starts directly into the soil, spacing them evenly.
Once planted, water gently to help the soil settle. Kale seeds usually germinate within 5–10 days.
Step 5: Sunlight and Placement
Kale grows best in full sun to partial shade. Aim for at least 6 hours of sunlight daily. In warmer climates, partial shade during the afternoon helps prevent the leaves from becoming bitter.
If you’re growing kale indoors, place the wooden container near a sunny window or supplement with grow lights.
Step 6: Watering and Feeding
Consistent watering is key for tender leaves. The soil should stay moist but not soggy. Wooden containers dry out faster than ground soil, so check daily.
-
Water when the top inch feels dry.
-
Use mulch, like straw or shredded leaves, to help retain moisture.
Kale also benefits from regular feeding. Apply a nitrogen-rich fertilizer every 2–3 weeks to encourage lush, leafy growth. Liquid compost tea or diluted fish emulsion works well for container-grown plants.
Step 7: Caring for Your Kale
Kale is relatively low-maintenance, but a few tips will keep it thriving:
-
Remove yellowing or damaged leaves promptly.
-
Watch for pests like aphids and cabbage worms; spray with neem oil or use row covers if needed.
-
Rotate the container occasionally so all sides get even light.
Since kale tolerates cool temperatures, it can keep producing well into fall and even early winter in some regions.
Step 8: Harvesting Kale
The beauty of kale is its long harvesting window. You can start picking leaves when they are about 3–4 inches long. Use the cut-and-come-again method, snipping the outer leaves while allowing the center to keep growing.
For baby kale, harvest leaves earlier for a milder flavor. Mature kale develops more robust taste and is excellent for cooking. With proper care, a single kale plant can provide fresh leaves for several months.
Step 9: Extending the Harvest
To keep a steady supply of kale, plant seeds in succession every 3–4 weeks. This ensures you’ll always have young, productive plants on hand. In colder climates, bring wooden containers indoors or place them in a greenhouse to extend the growing season.
Final Thoughts
Growing kale in wooden containers is an excellent way to enjoy one of the most nutritious greens, even in small spaces. With the right soil, consistent care, and proper harvesting, your wooden box can provide a generous yield of fresh, flavorful leaves for months on end.
Whether you enjoy kale in salads, smoothies, or hearty cooked dishes, having your own supply ensures you’re eating the freshest greens possible—all grown right at home.


