Pumpkins are a favorite in gardens thanks to their large, vibrant fruits and versatility in the kitchen. If you’ve recently cooked with pumpkin and have seeds leftover, you might be wondering: can you grow pumpkins from those seeds? The answer is yes—under the right conditions, pumpkin seeds straight from your kitchen can be the start of a successful homegrown harvest.
Here’s a detailed, step-by-step guide to growing pumpkins from kitchen seeds, no specialized seed packets required.
Step 1: Select the Right Pumpkin
Not all pumpkins are created equal when it comes to seed-saving. For best results, choose seeds from a mature, organically grown pumpkin, preferably from a non-hybrid variety. Hybrid pumpkins (often labeled as F1 varieties) may produce weak or unpredictable offspring.
If possible, use seeds from heirloom or open-pollinated pumpkins. These have a better chance of producing healthy, fruitful plants that are true to the parent pumpkin.
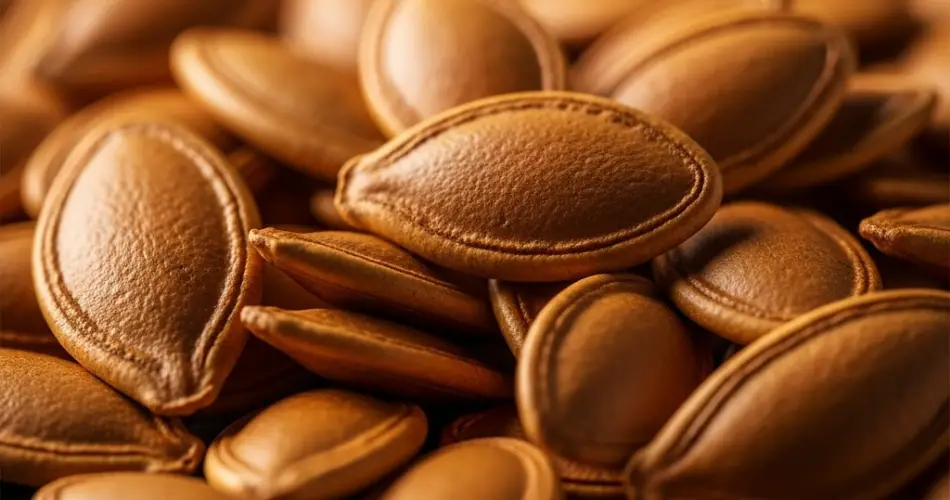
Step 2: Extract and Clean the Seeds
Cut open the pumpkin and scoop out the seeds. You’ll notice they’re surrounded by stringy pulp.
-
Rinse the seeds in a colander under cool water, removing as much pulp as possible.
-
Select the largest, plumpest seeds—these have the highest chance of germination.
-
Avoid flat, discolored, or damaged seeds.
Once cleaned, spread the seeds out on a paper towel or mesh screen to dry. Let them dry completely in a well-ventilated area for about a week. Properly dried seeds can be stored in a paper envelope or jar in a cool, dry place for future planting.
Step 3: Timing Your Planting
Pumpkins need warm soil and a long growing season (typically 90–120 days from seed to harvest). If you’re planting directly outdoors, wait until all danger of frost has passed and the soil has warmed to at least 70°F (21°C).
In cooler regions or for an early start, begin seeds indoors 3–4 weeks before your last expected frost date. Use biodegradable pots to avoid root disturbance when transplanting.
Step 4: Germinating the Seeds
Whether starting indoors or out, soak seeds in warm water for 6–8 hours before planting to help speed up germination.
-
Plant seeds 1 inch deep in fertile, well-draining soil.
-
If starting in pots, use a high-quality seed-starting mix.
-
Keep the soil moist but not waterlogged.
-
Germination typically occurs within 7–10 days.
Place the pots or garden bed in a sunny location. Pumpkins need at least 6–8 hours of sunlight daily to thrive.
Step 5: Transplanting and Spacing
If you started seeds indoors, transplant seedlings outdoors once they have two true leaves and temperatures are consistently warm.
-
Space vines 4–6 feet apart, or follow the variety’s specific spacing needs.
-
Use mounds or hills to improve drainage and root growth.
-
Add compost or aged manure to enrich the soil before planting.
Pumpkins are heavy feeders, so nutrient-rich soil is essential for good fruit development.
Step 6: Care and Maintenance
Pumpkins are relatively low-maintenance but need regular attention to thrive.
-
Water deeply once or twice a week, depending on rainfall. Avoid watering leaves to prevent fungal issues.
-
Mulch around the plants to retain moisture and suppress weeds.
-
Feed with compost tea or an organic fertilizer every 2–3 weeks.
-
Pinch off early blossoms to encourage the plant to develop a strong root system before fruiting.
-
If space is limited, train vines vertically on a sturdy trellis and support the fruit with slings.
Step 7: Pollination and Fruit Development
Pumpkins rely on bees and other pollinators for fruit development. Each plant produces male and female flowers, and pollination is required to form pumpkins.
If natural pollination is lacking, you can hand-pollinate using a soft brush to transfer pollen from male to female flowers. Female flowers can be identified by the small, bulbous ovary (future pumpkin) at the base.
Step 8: Harvesting
Pumpkins are ready to harvest when:
-
The rind is hard and cannot be easily punctured.
-
The color is deep and consistent with the variety.
-
The stem begins to dry and turn brown.
Cut pumpkins from the vine with a few inches of stem attached. Cure them in a dry, warm place for 1–2 weeks to toughen the skin and extend storage life.
Bonus Tip: Save Seeds for Next Year
Once you’ve harvested and enjoyed your pumpkins, you can repeat the cycle by saving seeds from the best fruits. Make sure the pumpkin was not cross-pollinated with other squash if you want consistent results.
Dry the seeds thoroughly and store them in a labeled envelope or jar until the next growing season.
Final Thoughts
Growing pumpkins from kitchen seeds is a satisfying way to turn food scraps into flourishing vines and fruitful harvests. With some patience and proper care, those seeds you might have thrown away can produce large, vibrant pumpkins for decorating, cooking, or saving seeds again. Whether you’re gardening in a large backyard or a small plot, growing pumpkins from kitchen leftovers is a great way to connect with nature and enjoy homegrown abundance.


