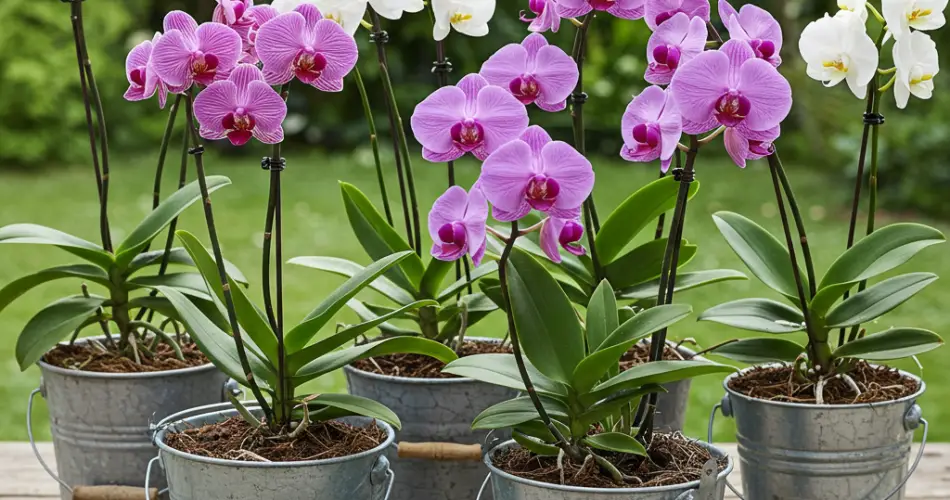
Orchids are exotic, elegant, and surprisingly adaptable plants that can brighten any space with their unique and long-lasting blooms. While many people think of orchids as delicate and difficult to grow, they’re actually quite manageable once you understand their basic needs. What’s more, you don’t need a fancy greenhouse or garden—orchids can thrive beautifully in buckets, making them perfect for apartment dwellers or those with limited space.
With the right setup and care, growing orchids in buckets can reward you with stunning flowers and lush foliage, right from the comfort of your home.
1. Choose the Right Type of Orchid
There are over 25,000 orchid species, but some are better suited for home container growing than others. For growing in buckets, stick with easy-care varieties such as:
-
Phalaenopsis (Moth Orchid) – The most popular for beginners, with long-lasting blooms and wide color variety.
-
Dendrobium – Tolerant of various conditions and great for indoor growing.
-
Cattleya – Known for large, fragrant flowers.
-
Oncidium – Often called “Dancing Ladies,” they produce a spray of small, vibrant flowers.
These orchids adapt well to home environments and are forgiving to new growers.
2. Prepare the Right Bucket
Orchids aren’t like typical houseplants. Their roots need aeration, drainage, and indirect light. Standard soil won’t do. So, when growing in buckets, a few adjustments are necessary:
-
Choose a plastic or ceramic bucket about 6–8 inches deep and wide.
-
Drill multiple drainage holes at the bottom and even along the sides to allow air circulation.
-
If you’re using a decorative bucket without holes, place a slotted orchid pot inside and remove it for watering.
Make sure the bucket sits on a tray or saucer to catch any excess water.
3. Use a Suitable Orchid Medium
Orchids don’t grow in regular soil. They’re epiphytes, meaning they naturally grow on trees and absorb moisture from the air. So instead of soil, use:
-
Pine bark
-
Coconut husk chips
-
Sphagnum moss
-
Perlite or charcoal (for improved drainage)
You can buy pre-mixed orchid potting media at garden centers. Ensure the mix is loose and airy to allow root breathing.
4. Provide the Right Lighting
Orchids prefer bright, indirect light. Avoid placing them in direct sunlight, especially through glass, as this can scorch the leaves.
-
East-facing windows are ideal.
-
For west or south-facing windows, use sheer curtains to diffuse the light.
-
If natural light is limited, a grow light can supplement for about 12–14 hours a day.
Watch the leaves: dark green may mean too little light, while yellowish-green or red-tinted leaves can signal too much.
5. Watering: Less Is More
Orchids prefer to dry slightly between waterings. A common rule is to water once a week, but this depends on humidity, potting medium, and indoor climate.
-
Stick your finger an inch into the medium—water only if it feels dry.
-
Water thoroughly, allowing the water to run through the pot and drain fully.
-
Never let the orchid sit in water, as this leads to root rot.
In dry climates, you can increase humidity by misting the leaves or placing a humidity tray beneath the pot.
6. Feeding and Fertilizing
Orchids are light feeders but still benefit from regular nutrition. Use a balanced, water-soluble orchid fertilizer (like 20-20-20) diluted to half-strength:
-
Feed every 2 weeks during active growth (spring and summer).
-
In winter, reduce feeding to once a month or stop altogether if the plant is dormant.
Over-fertilizing can cause salt buildup and damage roots, so flush the medium occasionally with plain water to clean it out.
7. Pruning and Maintenance
Once the orchid blooms fade:
-
For Phalaenopsis, you can trim the flower spike just above a node to encourage a secondary bloom.
-
For other types, cut the spike near the base after flowering.
Regularly remove dead or yellowing leaves and inspect roots for signs of rot or pests.
8. Repot When Needed
Orchids need repotting every 1–2 years, or when the medium breaks down and no longer drains well.
-
Choose a slightly larger bucket or clean the existing one.
-
Refresh the potting mix to prevent mold and allow fresh air around the roots.
Repotting is best done in spring, right after the blooming period ends.
9. Common Issues and How to Avoid Them
-
Yellow leaves: Usually from overwatering or poor drainage.
-
Wrinkled leaves: A sign of underwatering or root damage.
-
No blooms: Could be due to low light, overfeeding, or not enough temperature variation.
Stay observant and adjust care accordingly. Orchids are surprisingly responsive once you understand their signals.
Conclusion
Growing orchids in buckets is a rewarding and space-saving way to enjoy one of the world’s most elegant flowering plants. With the right care, even a small balcony or kitchen corner can become a lush oasis filled with exotic color. Whether you’re a new gardener or an indoor plant enthusiast, orchids offer beauty, resilience, and a satisfying growing experience.


