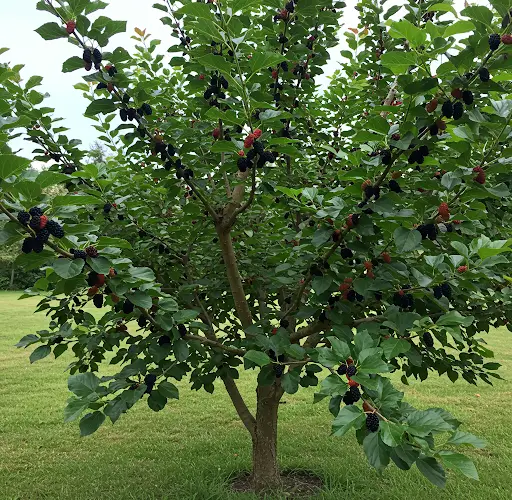
How to Grow a Mulberry Tree from a Cutting: A Simple Step-by-Step Guide
Mulberry trees are loved for their sweet, juicy fruits and their fast-growing nature. They’re easy to care for, thrive in a variety of climates, and can be grown successfully in home gardens with minimal effort. One of the most efficient and cost-effective ways to propagate mulberry trees is through stem cuttings.
Growing a mulberry tree from a cutting is not only simple—it’s also a fun and rewarding gardening project. With the right technique and care, your cuttings can establish strong roots and grow into healthy, fruit-bearing trees.
Here’s a complete guide on how to grow a mulberry tree from a cutting.
Why Grow Mulberry from Cuttings?
Propagating from cuttings ensures the new tree retains the same fruit quality and characteristics as the parent tree. This method is particularly useful if you already have access to a mature, productive mulberry tree and want to grow more without relying on seeds, which can take longer and vary in quality.
Cuttings also grow faster than seedlings and typically bear fruit sooner—sometimes within 1–2 years under ideal conditions.
Best Time to Take Cuttings
The best time to take mulberry cuttings is during the tree’s dormant period, which is usually in late winter or early spring before new growth begins. Hardwood cuttings taken during this time root more easily and are less prone to rot or disease.
However, in tropical and subtropical regions, mulberry can also be propagated using semi-hardwood cuttings during the rainy season when humidity is higher.
Materials You’ll Need
-
Healthy, mature mulberry branches (1–2 years old)
-
Pruning shears or a sharp knife
-
Rooting hormone (optional but helpful)
-
Pots or containers with good drainage
-
Quality potting mix or garden soil
-
Watering can or spray bottle
-
Clear plastic bag or humidity dome (optional)
Step-by-Step: Growing Mulberry from a Cutting
1. Choose the Right Branch
Select a healthy, disease-free branch that is about the thickness of a pencil and 6–12 inches long. Ideally, the branch should be woody (not green or soft) and have 3–5 leaf nodes.
Avoid branches with signs of pest damage or fungus. The cutting should be firm, not brittle or dry.
2. Prepare the Cutting
Use sterilized pruning shears or a knife to make a clean cut just below a node (the point where a leaf was or is attached). Trim the cutting to a manageable size—typically around 8 inches long.
Remove any leaves or buds from the bottom half of the cutting. If leaves are present at the top, trim them to reduce water loss and focus energy on root development.
Dip the cut end in rooting hormone if available. While mulberry cuttings can root without it, the hormone speeds up the process and increases success rates.
3. Prepare the Planting Medium
Fill a pot or container with a well-draining mix. A combination of garden soil, compost, and sand or cocopeat works well. The container should have drainage holes at the bottom to prevent waterlogging.
Moisten the soil slightly before planting the cutting.
4. Plant the Cutting
Insert the cutting into the soil about 3–4 inches deep, ensuring that at least two nodes are buried. Press the soil gently around the base to hold the cutting in place.
If you’re planting multiple cuttings, space them a few inches apart to avoid crowding.
5. Maintain Proper Moisture and Humidity
Keep the soil consistently moist, but not soggy. Water gently to avoid dislodging the cutting.
To maintain humidity—especially in dry or hot climates—you can cover the cutting with a clear plastic bag or use a humidity dome. Make sure the cover doesn’t touch the cutting directly. Open it daily for a few minutes to allow air circulation and prevent mold.
Place the pot in a warm, bright location with indirect sunlight.
Rooting and Transplanting
Mulberry cuttings typically begin to root within 3 to 6 weeks, depending on temperature and moisture levels. You’ll know roots are forming when new leaves begin to emerge.
To check for root development, gently tug on the cutting after a few weeks. Resistance indicates root growth.
Once the cutting has a strong root system and new growth is visible, you can transplant it into a larger pot or directly into the garden. Choose a sunny location with well-draining soil.
Caring for Young Mulberry Trees
-
Watering: Water regularly, especially during the first few months. As the tree establishes, reduce watering frequency.
-
Mulching: Apply organic mulch around the base to retain moisture and suppress weeds.
-
Feeding: Use a balanced organic fertilizer every 6–8 weeks during the growing season.
-
Pruning: Prune to shape the tree and encourage branching. Remove any dead or crossing branches.
Mulberry trees are generally low-maintenance and resistant to most pests and diseases. Once established, they can grow rapidly and begin producing fruit in as little as 1–2 years.
Final Thoughts
Growing a mulberry tree from a cutting is a simple, eco-friendly, and cost-effective way to expand your home garden. Whether you’re looking to enjoy fresh berries, shade, or beautiful foliage, the mulberry tree is a valuable addition to any landscape.
With just a bit of patience and care, a small cutting can grow into a fruitful tree that brings joy—and delicious mulberries—for years to come.