Kale has gained popularity as a nutritional powerhouse, offering high levels of vitamins, minerals, and antioxidants. This leafy green is not only delicious in salads, smoothies, and sautés but is also remarkably easy to grow at home. While many gardeners assume kale requires a large plot, it adapts surprisingly well to container gardening. Hanging baskets, in particular, provide a practical and attractive way to grow kale, especially for those with limited space.
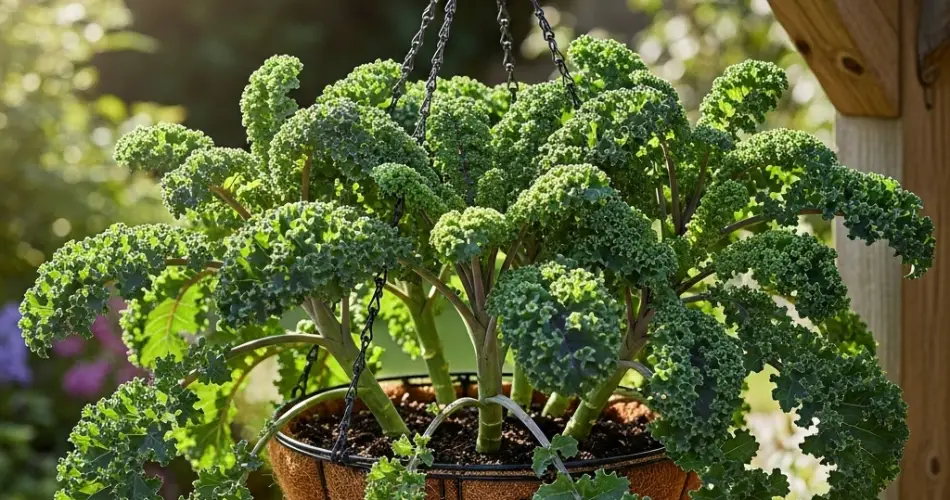
Growing kale in hanging baskets brings fresh, nutritious leaves right to your doorstep. This method saves ground space, enhances garden aesthetics, and keeps plants out of reach of certain pests. With the right care, hanging baskets can produce a steady supply of vibrant, healthy kale.
Why Choose Hanging Baskets for Kale
Hanging baskets offer several benefits for kale cultivation:
-
Space efficiency: Perfect for apartments, patios, balconies, or small outdoor areas.
-
Pest prevention: Elevating kale keeps it away from slugs, snails, and many ground-dwelling insects.
-
Improved drainage: Hanging baskets prevent water from pooling around the roots, reducing the risk of rot.
-
Decorative appeal: Cascading kale leaves add color and texture to vertical gardening spaces.
These benefits make hanging baskets an ideal solution for gardeners seeking both functionality and style in limited areas.
Selecting the Right Basket
Choosing an appropriate basket is critical for successful kale growth.
-
Size: Select a basket at least 12 inches deep and 12–14 inches wide to provide adequate root space.
-
Material: Wire baskets with a coconut coir liner or plastic hanging baskets work well. Ensure the material is sturdy enough to hold soil and water weight.
-
Drainage: Proper drainage holes are essential to prevent soggy soil, which can stunt growth or damage roots.
-
Support: Use a strong hook and chain for hanging, as soil and water can make the basket heavy.
A properly selected basket will create a stable and comfortable environment for kale to thrive.
Preparing the Basket
Before planting, it’s important to prepare the basket to retain soil while allowing adequate drainage.
-
Lining: Use a coco liner, burlap, or landscape fabric to keep soil in place and prevent it from washing out during watering.
-
Drainage layer: A thin layer of gravel or small stones at the bottom can improve drainage further.
-
Soil mix: Use a lightweight, fertile potting mix enriched with compost. Adding perlite or vermiculite improves aeration and prevents compaction.
Well-prepared soil ensures that your kale receives adequate nutrients, moisture, and root space for optimal growth.
Planting Kale in Hanging Baskets
Kale can be grown from seeds or seedlings, though seedlings offer a faster start for beginners.
-
Seeds: Sow directly into the basket, placing seeds about ½ inch deep and 2–3 inches apart.
-
Seedlings: Carefully transplant seedlings, maintaining the crown at soil level.
For a continuous harvest, plant a few seeds or seedlings every 2–3 weeks. This staggered approach ensures fresh leaves throughout the season.
Sunlight and Temperature
Kale prefers cool to moderate temperatures, typically thriving between 55–75°F (13–24°C).
-
Light: Provide at least 4–6 hours of sunlight per day. Morning sun and afternoon shade are ideal, particularly in hot climates.
-
Placement: In warmer weather, hang baskets in shaded areas to prevent leaf scorching or bolting (premature flowering).
If growing indoors, place baskets near a sunny window or use supplemental grow lights to maintain steady growth.
Watering and Care
Consistent moisture is key for kale, as uneven watering can cause bitter leaves or slow growth.
-
Check soil regularly: Water when the top inch of soil feels dry.
-
Even moisture: Deep watering ensures roots receive adequate hydration.
-
Mulching: A light layer of straw or shredded leaves helps retain moisture and regulate soil temperature.
Proper care promotes tender, vibrant leaves and reduces stress on the plant.
Fertilizing Kale
Since hanging baskets dry out faster and nutrients leach from soil, regular feeding is important.
-
Balanced liquid fertilizer: Apply every 2–3 weeks.
-
Organic options: Diluted compost tea or fish emulsion provides natural nutrition.
Regular feeding encourages steady leaf growth and improves flavor and texture.
Harvesting Kale
Kale is fast-growing and can be harvested in 4–6 weeks after planting.
-
Pick outer leaves first: Harvest mature leaves 6–8 inches long, leaving the central growth for continuous production.
-
Frequent harvesting: Encourages the plant to produce new leaves, extending the harvest season.
-
Full harvest: For mature plants, cut the entire plant at the base when leaves are fully developed.
Regular harvesting ensures a consistent supply of fresh, nutritious greens.
Common Issues
-
Bolting: Hot weather can trigger flowering and bitterness. Move baskets to cooler spots if necessary.
-
Yellowing leaves: Often caused by overwatering or nutrient deficiencies; adjust care accordingly.
-
Pests: Aphids may appear, but can be controlled with natural sprays like soapy water or neem oil.
With attention to watering, sunlight, and feeding, kale thrives in hanging baskets with minimal issues.
Final Thoughts
Hanging baskets provide a creative and practical solution for growing kale, bringing fresh, nutrient-rich greens into your home without requiring extensive garden space. Properly prepared baskets, consistent care, and regular harvesting make it easy to enjoy tender kale leaves year-round.
This method combines beauty, functionality, and convenience, making it ideal for small-space gardeners who want to maximize vertical space while maintaining access to fresh, homegrown superfoods.


