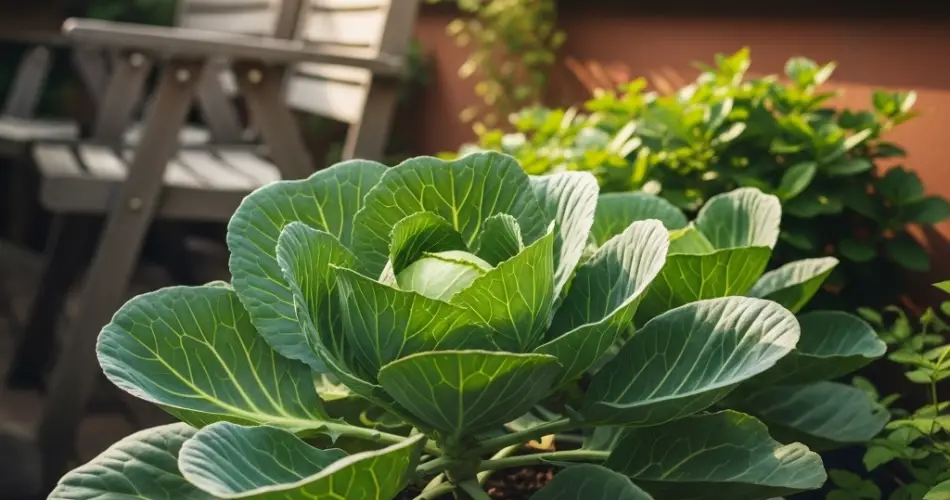
Cabbage is a nutrient-rich vegetable that’s surprisingly easy to grow, even if you don’t have a garden. With a bit of planning, you can grow firm, crunchy heads of cabbage right in pots on your patio, balcony, or terrace. Container gardening not only saves space—it also gives you control over the soil, water, and pests, making cabbage cultivation easier and more accessible than ever.
This guide walks you through everything you need to know to grow cabbage in containers—from choosing the right pot to harvesting your own fresh, leafy heads.
Why Grow Cabbage in Pots?
Growing cabbage in containers has several benefits. Pots can be placed in the sunniest spots, raised off the ground for better air circulation, and moved if needed to avoid harsh weather. Containers also reduce the risk of soil-borne diseases and allow for precise watering and fertilization.
Advantages of container-grown cabbage:
-
Great for patios, balconies, and small spaces
-
Fewer issues with soil pests and weeds
-
Better drainage and soil control
-
Easier access for maintenance and harvesting
-
Can be started earlier in the season and extended later
Best Cabbage Varieties for Containers
While most types of cabbage can be grown in pots, some varieties are better suited to compact spaces due to their smaller size and quicker growth.
Top varieties to try:
-
Golden Acre – Early maturing, compact heads
-
Red Express – Vibrant red cabbage, ideal for small spaces
-
Pointed or cone-shaped cabbages like ‘Caraflex’ – Smaller and space-saving
-
Savoy types – Decorative and tender, with textured leaves
-
Miniature varieties like ‘Pixie’ or ‘Mini Cabbage’ – Perfect for limited space
Choose a variety based on your taste preferences and container size.
Choosing the Right Container
Cabbage develops a wide root system and needs ample space to form a tight head. The size and depth of your pot will affect the overall health and size of the plant.
Container requirements:
-
Size: At least 12 inches deep and 12–18 inches wide
-
Volume: Minimum 5 gallons per plant
-
Material: Fabric grow bags, plastic pots, or clay containers with drainage holes
-
Drainage: Essential to prevent waterlogging and root rot
If you’re planting multiple cabbages, use large containers or trough-style planters and space the plants at least 12 inches apart.
Preparing the Soil
Cabbage prefers nutrient-rich, well-draining soil with a neutral pH.
Ideal soil mix:
-
High-quality potting mix
-
25–30% compost or well-rotted manure
-
Perlite or vermiculite for improved drainage
Before planting, mix in a balanced, slow-release organic fertilizer. Throughout the growing season, apply a nitrogen-rich liquid feed every two weeks to encourage leafy growth.
Planting Cabbage in Pots
-
Start seeds indoors 4–6 weeks before the last expected frost or purchase healthy seedlings.
-
Fill your container with prepared soil, leaving 1–2 inches below the rim.
-
Transplant seedlings into the pot when they have 4–5 true leaves. Bury them up to their lowest leaves to encourage strong roots.
-
Firm the soil gently around the base and water thoroughly.
-
Place the pot in a sunny location with at least 6 hours of direct sunlight daily.
Caring for Cabbage in Containers
Sunlight
Cabbage needs full sun to develop firm heads. Choose the brightest spot on your patio or balcony.
Watering
Keep the soil consistently moist but not soggy. Cabbage needs steady watering—uneven moisture can cause the heads to split. Water at the base of the plant to avoid wetting the leaves.
Feeding
Once the plant is established, feed with a nitrogen-rich liquid fertilizer every 10–14 days. When heads begin forming, switch to a balanced or potassium-rich feed.
Mulching
Add a layer of straw, shredded leaves, or dry grass to retain moisture and reduce weeds.
Pest and Disease Management
Cabbage is a favorite target for some garden pests. Container gardening can limit exposure, but vigilance is still required.
Common pests:
-
Cabbage worms and loopers – Remove by hand or use BT (Bacillus thuringiensis)
-
Aphids – Spray with a mix of water and a drop of dish soap
-
Slugs and snails – Use organic slug pellets or traps
-
Flea beetles – Protect young plants with row covers or neem oil
Rotate crops and clean containers between growing seasons to avoid disease build-up.
Harvesting Your Crunchy Cabbage
Cabbage heads are ready to harvest when they feel firm and reach the expected size for their variety—typically 60 to 90 days after transplanting.
Harvest tips:
-
Use a sharp knife to cut the head at the base, leaving the outer leaves and root system intact.
-
If the weather is still favorable, the plant may produce smaller secondary heads.
-
Store harvested cabbage in a cool, dry place or refrigerate to extend freshness.
Final Tips for Success
-
Start a new crop every few weeks for a continuous supply
-
Protect young plants from strong winds or heavy rains
-
Clean and sterilize pots at the end of each season
-
Consider growing cabbage alongside herbs like thyme or dill to deter pests naturally
Conclusion
With the right container, soil, and care, growing crunchy cabbage on your patio is both simple and rewarding. This cool-season crop is packed with flavor and nutrition, and it adds a fresh, leafy harvest to your small-space garden. Whether you’re growing green, red, or Savoy types, cabbage thrives in pots and brings homegrown goodness within arm’s reach—no backyard required.


