Growing your own herbs is a rewarding and sustainable way to enhance your meals with fresh flavor year-round. But if you’re dealing with unpredictable weather, limited space, or seasonal changes, a mini greenhouse can make a big difference. Compact and efficient, a mini greenhouse helps maintain warmth, humidity, and protection—creating an ideal environment for herb growth. Whether you’re a beginner or an experienced gardener, building your own mini greenhouse is easier than you might think.
Here’s a step-by-step guide to help you create a simple and effective mini greenhouse for herbs using basic materials.
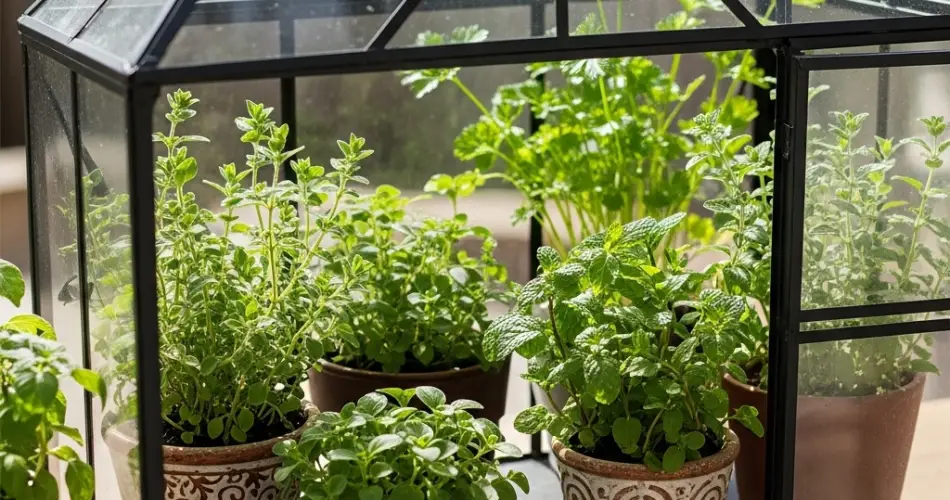
Benefits of a Mini Greenhouse for Herbs
Before diving into the building process, it’s helpful to understand why mini greenhouses are great for herb gardening:
-
Extended growing season – Protects herbs from frost and cold winds, allowing you to grow year-round.
-
Controlled environment – Regulates temperature and humidity for optimal plant health.
-
Pest protection – Shields tender herbs from insects and animals.
-
Compact design – Ideal for balconies, patios, and small gardens.
A mini greenhouse is especially useful for delicate or heat-loving herbs like basil, cilantro, parsley, and dill, which can struggle in cooler or windy conditions.
Step 1: Choose the Right Location
Start by selecting a suitable spot for your mini greenhouse. It should receive at least 6 hours of sunlight per day—preferably a south-facing area. Make sure the location is flat, sheltered from strong wind, and near a water source for easy access.
If you’re using the greenhouse indoors or on a balcony, ensure it fits well in the space and gets ample light, or consider supplementing with grow lights.
Step 2: Gather Your Materials
You don’t need a big budget or fancy equipment to build a functional mini greenhouse. Here are some common materials you can use:
Basic Supplies:
-
Clear plastic storage bin with a lid (for a tabletop version)
-
OR PVC pipes and plastic sheeting (for a larger outdoor version)
-
Zip ties, duct tape, or clips
-
Scissors or a utility knife
-
Wooden planks or old shelving (optional for base)
-
Thermometer (optional, to monitor interior temperature)
Recycled Material Options:
-
Old windows or picture frames (for a DIY cold frame)
-
Plastic bottles or containers (for cloches over individual plants)
-
Clear shower curtain liners (in place of plastic sheeting)
The size and materials will depend on where you’re placing the greenhouse and how many herbs you plan to grow.
Step 3: Build the Frame
There are multiple styles of mini greenhouses, but here are two easy options:
Option A: Plastic Bin Greenhouse (For Small Spaces)
-
Take a clear plastic storage bin and turn it upside down over potted herbs.
-
Leave the lid off for air circulation during the day, and use it at night for insulation.
-
Drill a few small holes in the sides to allow for ventilation if needed.
-
Place in a sunny spot, such as a windowsill, balcony, or garden bench.
Option B: PVC and Plastic Sheeting Greenhouse (For Outdoors)
-
Cut PVC pipes and assemble into a rectangular or dome-shaped frame.
-
Use elbows and T-joints to connect the pipes securely.
-
Cover the frame with clear plastic sheeting or a shower curtain liner.
-
Use zip ties, duct tape, or clips to hold the plastic in place.
-
Create a flap or roll-up section for easy access and airflow.
Add wooden planks or shelving underneath to hold pots securely if placing on uneven ground.
Step 4: Prepare the Inside
Once your frame and covering are in place, it’s time to prepare the interior:
-
Place herb pots or containers inside the greenhouse. Make sure each pot has good drainage.
-
Arrange herbs by height, putting taller plants in the back and shorter ones in front.
-
Leave space between pots to promote airflow and reduce mold or mildew risk.
Recommended herbs for greenhouse growing include:
-
Basil
-
Mint
-
Parsley
-
Cilantro
-
Thyme
-
Dill
-
Chives
-
Oregano
Step 5: Maintain Your Mini Greenhouse
Keeping the greenhouse running smoothly requires a few basic maintenance steps:
-
Ventilation: On warm days, open the structure to allow airflow and prevent overheating. Close it in the evening or during storms.
-
Watering: Herbs in greenhouses may dry out faster, so monitor soil moisture and water as needed.
-
Temperature: Use a thermometer if possible. Most herbs prefer daytime temps of 65–75°F (18–24°C).
-
Cleaning: Wipe down plastic sheeting occasionally to allow maximum light and prevent fungal buildup.
During summer, monitor closely for overheating. In winter, insulate the base with straw or bubble wrap for added warmth.
Optional Additions
To improve your mini greenhouse setup, consider these extras:
-
Grow lights: For low-light indoor areas
-
Humidity trays: To increase moisture levels
-
Small fan: For airflow if the greenhouse is large or enclosed
-
Automatic watering system: Helpful for busy gardeners
Final Thoughts
Building a mini greenhouse for herbs is a simple, affordable, and satisfying project. It lets you take control of your growing environment, extend your harvests, and enjoy fresh, aromatic herbs no matter the season. With a little creativity and some recycled or budget-friendly materials, you can construct a greenhouse that’s both practical and charming—a perfect addition to any home garden.


