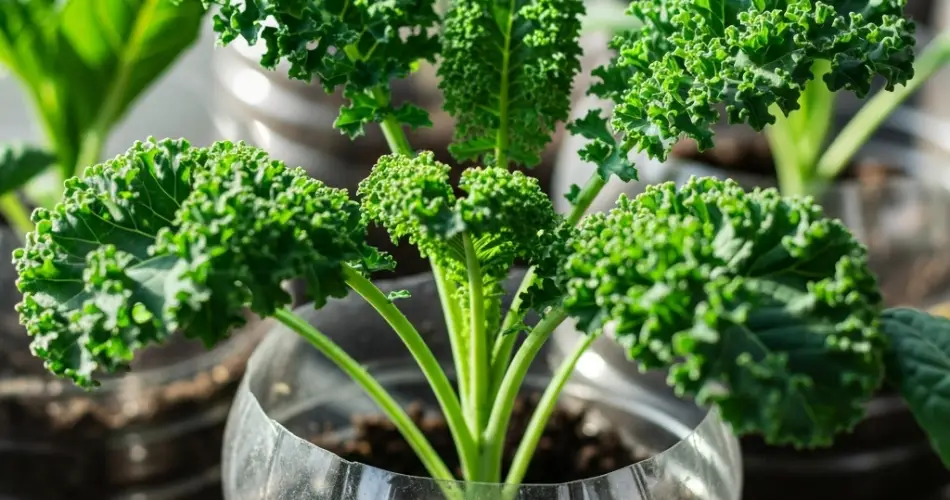
Kale is a nutrient-dense leafy green that’s easy to grow at home—even if you don’t have a backyard or garden. With a bit of creativity, you can cultivate kale in recycled plastic bottles and hang them vertically to save space. This method is perfect for balconies, patios, or even sunny indoor areas, and it allows you to enjoy a constant supply of fresh, homegrown greens without the need for traditional containers or garden beds.
A hanging bottle garden is not only practical but also eco-friendly. By repurposing plastic bottles, you reduce waste while growing your own healthy food. Here’s a complete guide to creating a hanging bottle kale garden in small spaces.
Why Grow Kale in Hanging Bottles?
Kale has shallow roots and doesn’t require much soil depth, making it suitable for bottle gardening. Hanging the bottles vertically takes advantage of unused space—such as walls, fences, or railings—making this method ideal for apartments and compact living areas.
This setup also improves air circulation, reduces soil-borne pests, and adds greenery to urban spaces. Plus, kale is a hardy vegetable that grows well in cool temperatures and can be harvested continuously.
Materials You’ll Need
-
Empty 2-liter plastic bottles (one for each kale plant)
-
Sharp knife or cutter
-
Nail or heated screwdriver (for drainage and hanging holes)
-
Good-quality potting mix or compost-rich soil
-
Kale seeds (dwarf or curly kale varieties work best for containers)
-
String, wire, or rope for hanging
-
Watering can or spray bottle
Optional: Pebbles or charcoal for drainage
Step 1: Prepare the Bottles
Start by washing each plastic bottle thoroughly and removing labels. Cut a large rectangular opening along the side of the bottle—this is where the kale will grow. Leave enough plastic around the edges for stability.
Next, poke 4–5 small holes at the bottom of the bottle for drainage. Then, make two small holes on either side near the top of the bottle (above the planting window) to insert string or wire for hanging.
Step 2: Add Drainage Material (Optional)
If you’re concerned about excess moisture or poor drainage, place a thin layer of pebbles or activated charcoal at the bottom of each bottle. This helps prevent root rot and keeps the soil fresh longer.
Step 3: Fill with Soil
Fill each bottle with potting mix up to about 1 inch below the planting opening. Use a light, well-draining mix that contains compost or organic matter. Kale prefers slightly acidic to neutral soil with good nutrient content.
Avoid compacting the soil—keep it loose so roots can grow easily.
Step 4: Sow Kale Seeds
Sprinkle 3–4 kale seeds in the center of each bottle’s planting window. Cover them lightly with a thin layer of soil, then mist with water. Keep the soil moist but not soggy.
Once seedlings emerge (in 7–10 days), choose the strongest one and remove the rest to avoid overcrowding.
Step 5: Hang Your Bottle Garden
Attach string or wire to the holes at the top of each bottle and hang them on a sturdy hook, rod, railing, or wall mount. Be sure each bottle gets enough light—kale needs about 5–6 hours of sunlight daily. East- or west-facing areas are ideal.
You can hang bottles in a vertical row or side-by-side, depending on your available space and light direction.
Step 6: Water and Maintain
Water your hanging kale garden regularly. In warm weather, check the soil daily, as hanging containers dry out faster than ground-level pots. Use a spray bottle or watering can to water gently and evenly.
Avoid overwatering—make sure water is draining properly through the bottom holes.
If needed, feed your kale plants with a diluted liquid organic fertilizer every two weeks to encourage strong leaf growth.
Step 7: Harvesting Kale
Kale is typically ready to harvest about 50–70 days after planting, though you can begin picking tender baby leaves earlier.
Use the “cut-and-come-again” method: harvest the outer leaves first, allowing the inner leaves to continue growing. This lets you enjoy a steady supply of fresh kale for salads, smoothies, and cooked dishes.
Harvest regularly to encourage new growth and prevent the plant from becoming too mature or bitter.
Tips for Success
-
Choose compact kale varieties like ‘Dwarf Blue Curled’ or ‘Red Russian’ for better results in bottles.
-
During hot weather, move the bottles to a shaded area during peak sun hours to prevent wilting.
-
Regularly remove yellowing or damaged leaves to keep the plant healthy.
-
Plant new bottles every few weeks for a continuous harvest.
-
Refresh the soil every growing cycle to replenish nutrients.
Conclusion
A hanging bottle kale garden is a smart and sustainable solution for growing greens in small spaces. It makes use of vertical areas, minimizes waste through plastic bottle reuse, and provides you with fresh, nutritious kale all year round. Whether you live in a high-rise apartment or just want to maximize your balcony space, this project is a simple and rewarding way to bring homegrown vegetables into your daily life.


