Did you know that you can grow your own popcorn plants right at home using popcorn kernels bought from the supermarket? Many people believe popcorn is only for snacking, but those little kernels are actually viable seeds that can be planted and nurtured to grow corn plants that produce fresh popcorn ears. Whether you have a backyard garden or just a balcony with pots, growing popcorn can be a fun and rewarding project with surprisingly great results.
This article will guide you through the process of planting supermarket popcorn kernels in pots, the care your plants need, and what to expect from your homegrown popcorn crop.
Why Grow Popcorn at Home?
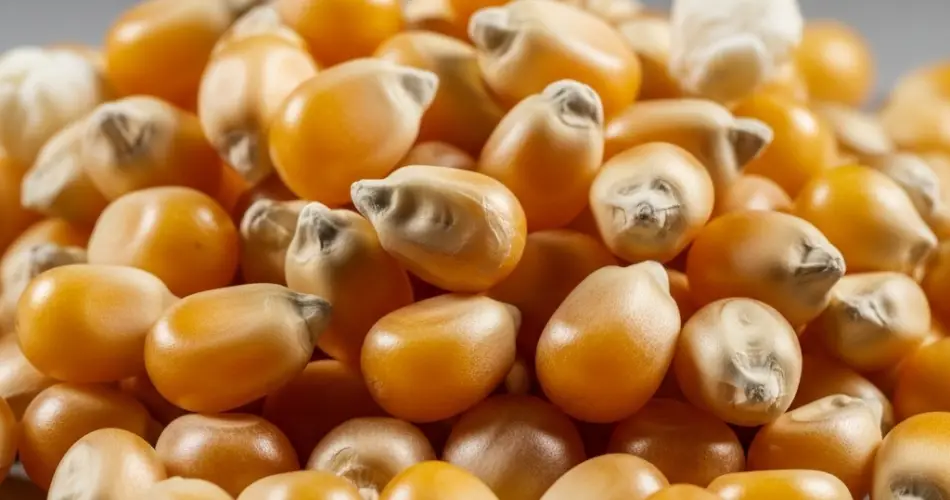
Popcorn is a type of flint corn that has a hard outer shell with a soft starchy center. When heated, the moisture inside the kernel turns to steam, causing the kernel to explode and turn inside out, producing the popcorn we all love.
Growing your own popcorn has several benefits:
-
Freshness: Homegrown popcorn is fresh and free from preservatives or additives.
-
Sustainability: Growing your own reduces packaging waste and carbon footprint.
-
Educational: It’s a great gardening project for kids and adults to learn about plant life cycles.
-
Satisfaction: Watching popcorn kernels grow into tall corn plants is exciting and rewarding.
Selecting Popcorn Kernels for Planting
Before planting, it’s important to select the right popcorn kernels. Although most supermarket popcorn is processed and sometimes treated with oils or flavorings, many plain, unpopped kernels can still germinate.
For best results:
-
Choose plain, dry, and untreated popcorn kernels.
-
Avoid kernels that have been flavored, coated, or are already partially popped.
-
Organic popcorn kernels are ideal but not always necessary.
Planting Popcorn Kernels in Pots
Growing popcorn in pots is simple and suitable for both beginners and experienced gardeners. Follow these steps for a successful planting:
1. Choose the Right Pot
Use a deep container or pot at least 12 inches (30 cm) in diameter and depth to allow roots to develop fully. Ensure the pot has drainage holes to prevent waterlogging.
2. Prepare the Soil
Use well-draining potting soil rich in organic matter. Adding compost or aged manure will provide essential nutrients to the growing plants.
3. Plant the Kernels
-
Soak the popcorn kernels overnight in water to soften the seed coat and promote germination.
-
Plant the kernels about 1 to 2 inches (2.5 to 5 cm) deep in the soil.
-
Space kernels about 4 inches (10 cm) apart if planting multiple kernels in one pot.
4. Watering
Keep the soil consistently moist but not waterlogged. Water gently to avoid disturbing the seeds.
Care and Maintenance
Once your popcorn seeds sprout, care for them properly to ensure healthy growth:
-
Sunlight: Corn plants need full sun — at least 6 to 8 hours daily. Place your pots in a sunny spot.
-
Watering: Corn requires regular watering, especially during dry spells. Keep the soil moist but avoid soggy conditions.
-
Fertilizing: Apply a balanced fertilizer every 3–4 weeks or side-dress with compost to encourage strong stalks and ears.
-
Support: When plants grow tall, they may need support stakes to prevent falling over, especially in windy areas.
Growth Stages of Popcorn Plants
You will notice several key stages during your popcorn plant’s life cycle:
-
Germination: Within 7 to 10 days, kernels sprout tiny shoots.
-
Seedling Stage: Young plants develop their first leaves and grow rapidly.
-
Vegetative Stage: The stalk elongates, and side leaves grow.
-
Tasseling: The plant produces tassels (male flowers) at the top, which release pollen.
-
Silking: Silks (female flowers) emerge from the ears, ready to catch pollen.
-
Ear Development: Ears of corn begin to form and grow larger over the next several weeks.
-
Maturation: The kernels on the ears harden and dry out, ready for harvest.
Harvesting Your Popcorn
Harvest time typically occurs about 90 to 120 days after planting, depending on the variety and growing conditions.
-
Look for ears with dry, hard kernels and brown husks.
-
Pull back a bit of the husk to check the kernels — they should be firm and not soft.
-
To dry the ears further, hang them in a warm, well-ventilated area for several weeks.
-
Once fully dried, remove the kernels from the cob by hand or by rubbing the ear between your hands.
Popping Your Homegrown Popcorn
The fun part comes after harvest—popping your homegrown popcorn!
-
Use a stovetop pan or popcorn maker.
-
Heat a small amount of oil in the pan.
-
Add a few kernels to test the temperature.
-
Once they pop, add enough kernels to cover the bottom in a single layer.
-
Cover and shake the pan gently over medium heat until popping slows.
Enjoy your fresh, homegrown popcorn as a tasty snack — perfect for movie nights or sharing with friends and family.
Tips for Success
-
Popcorn plants grow best in warm temperatures and should be started after the last frost date.
-
Avoid overwatering to prevent root rot.
-
Rotate crops each season if planting outdoors to maintain soil health.
-
Save some of your harvested kernels to plant again next season.
Final Thoughts
Growing popcorn from supermarket kernels is an enjoyable and surprisingly easy gardening project. With a bit of care and patience, you can produce your own ears of popcorn right at home—even in pots on a balcony or patio.
Not only will you have a fun and educational experience, but you’ll also get to enjoy the unique satisfaction of popping and eating popcorn that you grew yourself. Give it a try—you might be surprised at how well it grows!
