Growing mint at home is a rewarding and refreshing experience. This aromatic herb not only adds a burst of flavor to drinks and dishes but also offers numerous health benefits. With just a few materials and some care, you can cultivate lush mint in crates on your balcony—even if you’re short on space. Here’s a simple step-by-step guide to growing cool mint in balcony crates.
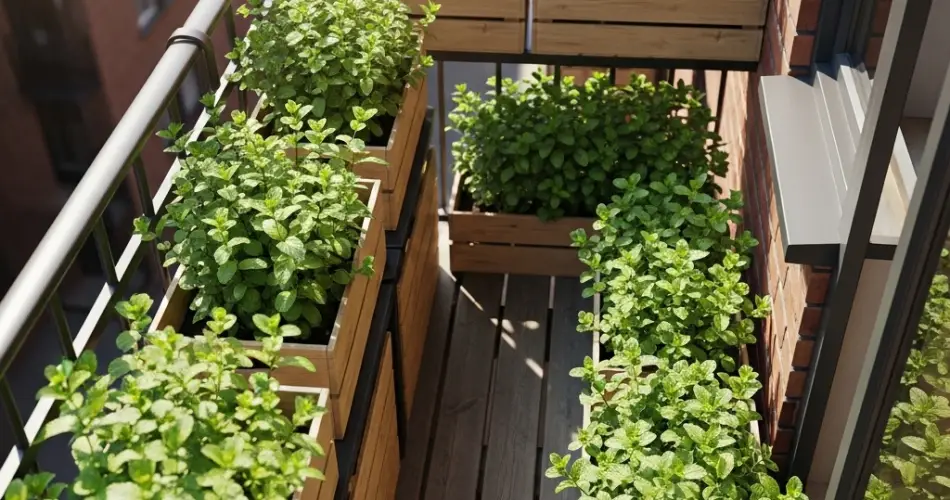
Why Grow Mint in Crates?
Crates are perfect for small spaces like balconies. They provide adequate space for root spread, good drainage, and easy mobility. Mint, known for its vigorous growth, can quickly take over garden beds if not contained. Growing it in crates helps keep it in check while still allowing it to thrive.
Materials You’ll Need
-
A wooden or plastic crate (around 12–18 inches deep)
-
A plastic liner or landscape fabric (to prevent soil from escaping)
-
Potting mix with good drainage
-
Organic compost or well-rotted manure
-
Mint cuttings or seedlings (such as spearmint, peppermint, or chocolate mint)
-
Watering can or spray bottle
Step 1: Prepare the Crate
Start by cleaning the crate thoroughly. If using wood, make sure there are no pests or mold. Line the interior with plastic or landscape fabric, poking a few holes at the bottom for drainage. This prevents soil from washing away while keeping the roots aerated.
Place the crate in a sunny spot on your balcony that gets partial to full sunlight for at least 4–6 hours a day. Mint can tolerate some shade, but it flourishes best with good light exposure.
Step 2: Create the Ideal Soil Mix
Mint prefers loose, well-drained soil that retains moisture without becoming soggy. Mix equal parts of potting soil and organic compost. If your potting mix feels heavy, you can add some perlite or sand to improve aeration.
Fill the crate with this mix, leaving about an inch of space from the top to make watering easier.
Step 3: Planting the Mint
You can start mint from cuttings, seedlings, or nursery plants. To plant from cuttings, snip a healthy stem from an established mint plant and place it in water until roots develop. Once you see a few centimeters of roots, it’s ready to go in the soil.
Dig shallow holes about 6–8 inches apart, and plant each seedling or cutting gently. Press the soil around the base to keep the plant stable.
Water thoroughly right after planting to help the roots settle in.
Step 4: Care and Maintenance
Watering: Mint loves moist soil. Water when the top inch feels dry, especially during hot or windy days. Avoid overwatering to prevent root rot.
Feeding: Feed your mint every two to three weeks with diluted organic fertilizer or compost tea. Over-fertilizing can reduce the essential oil content, making the mint less flavorful.
Trimming: Regularly pinch back the tips of the plant to encourage bushier growth. Remove any flowers as soon as they appear to keep the plant focused on leaf production rather than seed formation.
Pest Control: Mint is generally resistant to pests, but aphids or spider mites might show up. Spray with a mild soap solution or neem oil if necessary.
Step 5: Harvesting
You can start harvesting mint once the plant is about 6 inches tall. Snip off leaves or stems as needed, but avoid removing more than one-third of the plant at a time to prevent stress.
The best time to harvest is early morning, when the essential oils are at their peak. Rinse and use the leaves fresh, or dry them for later use.
Extra Tips
-
Rotate the crate occasionally if one side receives more light to encourage even growth.
-
Mint spreads quickly. Every few months, check if roots are getting too dense and divide the plant if needed.
-
In tropical or warm climates, mint can be grown year-round. In colder regions, bring the crate indoors during winter.
Conclusion
Growing mint in balcony crates is a smart, space-saving solution for urban dwellers. With minimal effort, you’ll enjoy a continuous supply of fresh, fragrant mint for tea, salads, sauces, and more. This herb is beginner-friendly and adds both greenery and utility to any home setting. Whether you’re a seasoned gardener or just starting out, this method will make mint growing easy and enjoyable.


