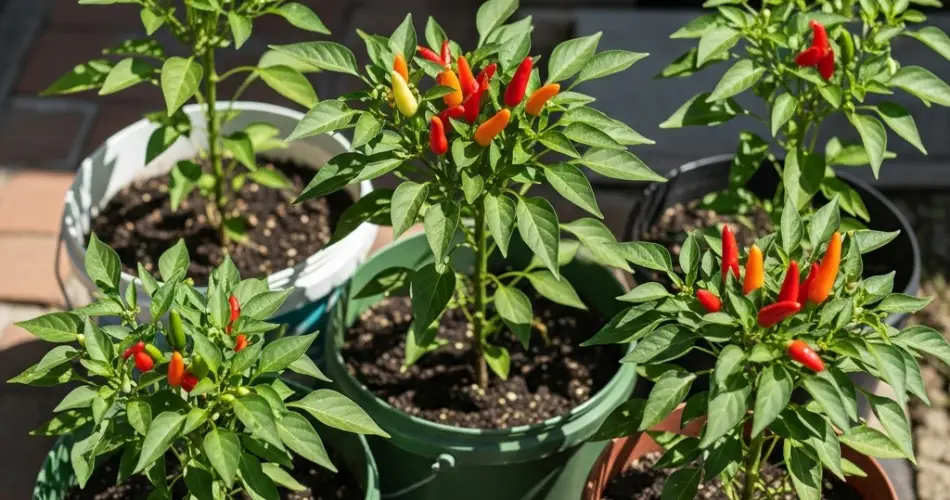
No backyard? No problem! If you’re craving the thrill of growing your own hot chilies, a few buckets and some sunshine are all you need. Bucket gardening is an ideal way to cultivate chili peppers in small spaces like balconies, patios, rooftops, or even sunny windowsills. Chilies are naturally compact, making them perfect for container growing—and you’ll be amazed at how many fiery peppers a single plant can produce.
This guide will show you step by step how to grow hot chilies in buckets, from picking the right variety to enjoying a spicy harvest.
Why Buckets Are Great for Chili Growing
Buckets are an inexpensive, accessible solution for container gardening. With the right size, drainage, and placement, they create an ideal environment for growing healthy chili plants.
Advantages of growing chilies in buckets:
-
Ideal for urban gardeners or renters with no soil access
-
Easy to move around for better sunlight or protection
-
Control over soil quality and watering
-
Reduces issues with ground pests and weeds
-
Suitable for both beginners and experienced gardeners
Even recycled food-grade buckets work well—as long as they are clean and have proper drainage holes.
Best Chili Varieties for Bucket Growing
Almost any chili variety can be grown in a bucket, but compact and productive types tend to do best in small spaces. Choose based on your preferred spice level and cooking style.
Recommended hot chili varieties:
-
Cayenne – Medium-hot and great for drying
-
Bird’s Eye – Small, fiery, and very productive
-
Thai Chili – Intense heat, ideal for stir-fries and sauces
-
Habanero – Very hot, with a fruity flavor
-
Serrano – Hotter than jalapeños, great for salsas
-
Tabasco – Famous for sauces, bushy growth habit
For a milder option, jalapeños or banana peppers also perform well in buckets.
Choosing and Preparing Your Bucket
A standard 5-gallon (19-liter) bucket is perfect for one chili plant. Make sure it has several holes drilled in the bottom for drainage. Elevating the bucket slightly using bricks or a plant stand can help improve airflow and drainage.
Tips for prepping your bucket:
-
Use a food-safe plastic bucket (avoid buckets that previously held chemicals)
-
Drill 4–6 holes in the bottom for water to drain
-
Place gravel or broken clay pieces at the bottom to aid drainage (optional)
-
Paint or wrap white fabric around dark buckets to prevent overheating in full sun
Ideal Soil Mix for Bucket Chilies
Chilies need rich, well-draining soil to thrive in containers. The right soil mix helps retain moisture while keeping roots aerated.
Simple chili bucket soil recipe:
-
60% high-quality potting mix
-
30% compost or aged manure
-
10% perlite or coarse sand for drainage
Mix in a slow-release organic fertilizer at planting time. For continued growth, feed with a potassium-rich liquid fertilizer every 2–3 weeks once flowering begins.
Planting and Positioning
Start seeds indoors or buy healthy seedlings. Transplant them into buckets once they’re at least 4–6 inches tall and outdoor temperatures remain above 60°F (15°C).
Planting steps:
-
Fill the bucket with soil mix, leaving 1–2 inches at the top
-
Plant one seedling per bucket, burying it up to its lowest set of leaves
-
Water deeply to settle the soil
-
Place the bucket in a sunny location, receiving 6–8 hours of light daily
If growing on a balcony or rooftop, secure buckets from wind and extreme exposure.
Chili Plant Care and Maintenance
Watering
Water when the top inch of soil feels dry. In warm weather, this may be daily. Avoid soggy conditions—chilies dislike wet feet.
Fertilizing
Apply a liquid fertilizer rich in potassium (like tomato feed) every two weeks during fruiting. Avoid high-nitrogen fertilizers, which produce too many leaves and not enough peppers.
Support
Use a bamboo stick or small cage to support the plant as it grows, especially when it starts producing heavy fruit.
Pruning
Pinching off the growing tips when the plant is 8–10 inches tall can help it become bushier and yield more fruit.
Managing Pests in a Small Space
Even in buckets, chili plants can attract pests. Keep a close eye for common issues and act early.
Watch for:
-
Aphids – Spray with soapy water or neem oil
-
Whiteflies – Use yellow sticky traps
-
Spider mites – Mist leaves regularly and maintain humidity
-
Cutworms – Use collars around stems or handpick in the evening
Healthy, well-fed plants are naturally more resistant to pests and diseases.
Harvesting Your Hot Chilies
Chilies are usually ready to harvest about 70–90 days after transplanting. The exact timing depends on the variety.
Harvest tips:
-
Pick when the fruits have reached their full color and firmness
-
Use clean scissors or garden shears to avoid damaging the plant
-
Harvesting regularly encourages more fruit production
You can use chilies fresh, dried, fermented into hot sauce, or frozen for later use.
Final Growing Tips
-
Rotate buckets weekly for even sunlight exposure
-
Mulch the soil surface to retain moisture and suppress weeds
-
Bring buckets indoors or under cover during storms or cold snaps
-
Refresh soil and sanitize buckets before replanting each season
Conclusion
You don’t need a plot of land to grow fiery, flavorful chilies. With a simple bucket, some potting mix, and a sunny spot, you can enjoy a productive chili harvest no matter where you live. Container gardening with buckets is not just space-saving—it’s fun, low-maintenance, and full of spicy rewards.


