You don’t need a large garden or farm to grow your own fresh, spicy chilies. With just a few containers and a sunny space, you can produce a productive chili crop right on your patio, balcony, or terrace. Whether you enjoy mild varieties or fiery-hot peppers, container chili farming is a space-saving, rewarding way to add flavor and color to your meals—and your home garden.
This guide walks you through everything you need to know to grow healthy chili plants in containers, from choosing the right variety to harvesting a bountiful crop.
Why Grow Chilies in Containers?
Growing chili peppers in containers has several advantages. It gives you full control over soil quality, moisture, and positioning. Containers also help reduce the risk of pests and diseases and are easier to manage than in-ground gardens.
Benefits of container chili farming:
-
Great for small spaces like balconies, patios, or rooftops
-
Easy to move plants for optimal sunlight or protection from harsh weather
-
Control over soil nutrients and drainage
-
Less weeding and reduced exposure to soil-borne pests
-
Ideal for beginners and experienced gardeners alike
Choosing the Right Chili Variety
There are hundreds of chili varieties available, ranging from sweet and mild to extremely hot. Some grow better in containers than others, especially compact or bushy types.
Top chili varieties for container growing:
-
Cayenne – Thin, red, and moderately spicy; great for drying
-
Jalapeño – Mild to medium heat; ideal for sauces and stuffing
-
Thai Hot – Small, fiery, and highly productive
-
Habanero – Very hot and aromatic; needs warmth and sunlight
-
Bird’s Eye – Popular in Asian cuisine; compact and prolific
-
Banana Pepper – Mild and sweet; perfect for pickling
Choose a variety based on your cooking needs and heat preference.
Selecting the Right Container
Chili plants have moderately deep roots and require well-drained soil and sufficient space to thrive.
Container requirements:
-
Size: At least 10–12 inches deep and 12 inches wide per plant
-
Volume: 3–5 gallons per chili plant
-
Material: Plastic pots, grow bags, clay pots, or recycled containers with good drainage
-
Drainage: Ensure several holes at the base to prevent waterlogging
You can also plant multiple chilies in large trough planters, spacing them about 12–15 inches apart.
Soil Preparation
Chili plants need fertile, well-draining soil that holds enough moisture without becoming soggy.
Recommended soil mix:
-
60–70% high-quality potting mix
-
20% compost or aged manure for nutrients
-
10–15% sand or perlite for aeration and drainage
Before planting, mix in a balanced slow-release fertilizer. During the growing season, supplement with a potassium-rich liquid fertilizer every 2–3 weeks to boost flowering and fruiting.
Planting Chili Seeds or Seedlings
-
Start seeds indoors 6–8 weeks before the last expected frost, or buy healthy seedlings from a nursery.
-
Transplant seedlings when they are 4–6 inches tall and the weather is consistently warm.
-
Fill containers with prepared soil and plant one seedling per pot.
-
Water thoroughly after planting and keep the soil consistently moist, but not soggy.
Place containers in a location with at least 6–8 hours of direct sunlight daily. Chilies love warmth and light.
Care and Maintenance
Watering
Chilies need regular watering but dislike waterlogged roots. Water when the top inch of soil feels dry. In hot climates, you may need to water daily.
Feeding
Fertilize every two weeks with a low-nitrogen, high-potassium liquid fertilizer once flowers start forming. Avoid overfeeding with nitrogen, as it encourages leafy growth at the expense of fruit production.
Support
Some chili plants may need light support as they grow heavy with fruit. Use bamboo stakes or small tomato cages to keep branches upright.
Pruning
Pinch off the growing tips when the plant is about 8–10 inches tall to encourage bushier growth and more branching. Remove yellow or damaged leaves to improve airflow and reduce disease risk.
Common Pests and How to Handle Them
Container-grown chilies are less prone to pests, but some may still appear.
Watch for:
-
Aphids – Spray with soapy water or neem oil
-
Spider mites – Mist regularly and improve humidity
-
Whiteflies – Use yellow sticky traps or insecticidal soap
-
Cutworms or caterpillars – Pick off by hand or use organic pest control methods
Inspect plants regularly and act early to prevent infestations from spreading.
Flowering and Fruit Production
Chili plants begin flowering about 6–8 weeks after transplanting. Bees, wind, or gentle hand-pollination will help the flowers set fruit.
Once chilies start forming, continue regular feeding and watering. As the fruit matures, the plant may become top-heavy—use plant ties or cages to keep stems from bending or snapping.
Harvesting Your Chilies
Chilies are usually ready to harvest about 70–90 days after transplanting, depending on the variety.
Harvest tips:
-
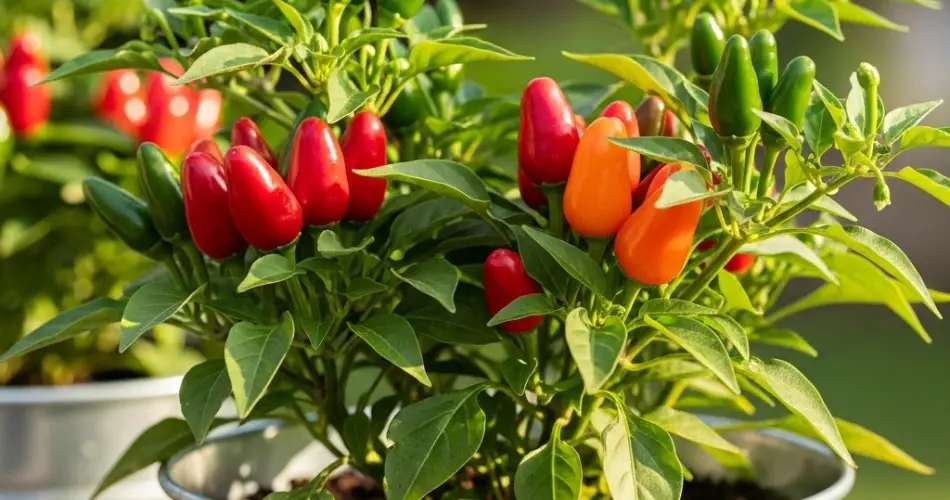
Pick when fruits are firm and reach full color (green, red, yellow, orange, or purple depending on type)
-
Use scissors or garden shears to cut fruit cleanly from the plant
-
Regular harvesting encourages continued blooming and more fruit production
You can eat chilies fresh, dry them for storage, or use them in sauces and pickles.
Final Tips for Success
-
Rotate containers occasionally for even sun exposure
-
Bring pots indoors or under shelter if temperatures drop suddenly
-
Mulch the soil surface to retain moisture and reduce evaporation
-
Clean and sanitize containers between growing seasons to prevent disease buildup
Conclusion
Chili farming in containers is one of the easiest and most satisfying ways to grow your own spices at home. With just a little care and the right conditions, you can enjoy a steady supply of fresh chilies throughout the season—even in the smallest of spaces. Whether you love a mild zing or fiery heat, container-grown chilies are a flavorful addition to your urban garden.


