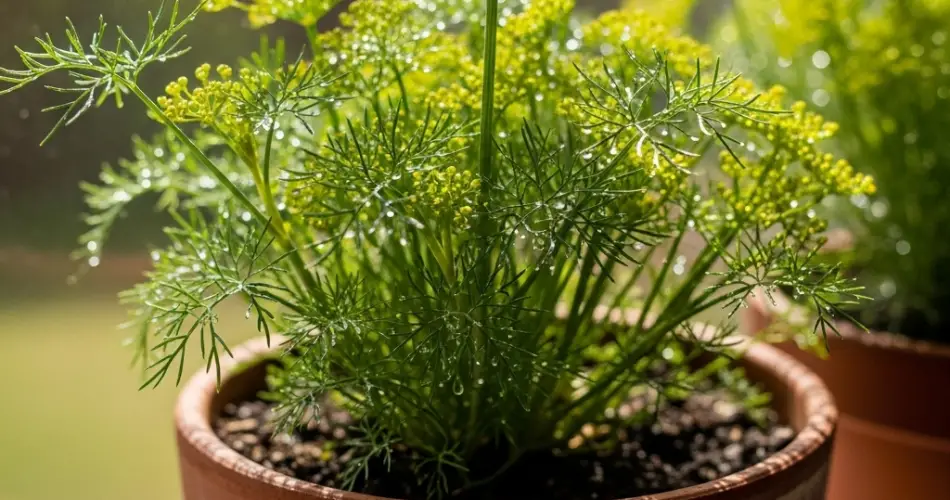
Dill is one of those herbs that brings an unmistakable flavor to the kitchen. With its feathery leaves, delicate fragrance, and versatility in both pickling and cooking, it is a must-have for any herb garden. Fortunately, you don’t need a large yard or sprawling vegetable patch to enjoy fresh dill. This hardy annual thrives just as well in containers, making it an excellent choice for apartment balconies, patios, or windowsills. Growing dill in pots allows you to enjoy its fresh flavor all season long, while also providing easy access for harvesting whenever your recipes call for it.
Why Grow Dill in Pots?
Growing dill in pots is a practical option for gardeners with limited space. It gives you the ability to control soil quality, position the plant in the sunniest spots, and protect it from harsh weather or pests. Because dill has a relatively short lifespan—it bolts quickly in warm weather—keeping it in pots makes it easier to sow new seeds at intervals for a continuous harvest.
Containers also prevent dill from spreading too much. In a garden bed, dill can reseed aggressively, sometimes taking over spaces intended for other plants. With pots, you have full control of its growth while still reaping its culinary benefits.
Choosing the Right Pot
The key to healthy dill is providing enough space for its deep roots. Dill develops a long taproot, so shallow pots are not suitable.
-
Size: Choose a container that is at least 12 inches deep to accommodate root growth. Wider pots also allow you to sow several seeds together for a bushier look.
-
Material: Terracotta or clay pots are a good option because they dry out more quickly, reducing the risk of soggy soil. Plastic or ceramic containers can also work if drainage is adequate.
-
Drainage: Good drainage is essential. Make sure the container has holes at the bottom to prevent waterlogging, which can quickly lead to root problems.
Soil Requirements
Dill prefers light, well-draining soil that mimics its natural growing conditions. Heavy, moisture-retentive soil is not suitable, as it can cause the roots to rot.
-
Use a high-quality potting mix as the base.
-
Mix in some coarse sand or perlite to improve aeration and drainage.
-
Dill grows best in slightly acidic to neutral soil (pH 6.0–7.5).
Avoid fertilizing too heavily, as this can result in lush foliage but weaker flavor. A modest boost with an organic, balanced fertilizer every few weeks is enough to support growth.
Sunlight and Placement
Dill is a sun-loving herb. For strong, aromatic leaves, it needs at least six hours of direct sunlight each day. Place your pot in a south- or west-facing location where it receives plenty of light. If you are growing indoors, position the container near a sunny window or supplement with a grow light.
Because dill grows tall and slender, providing some protection from strong winds is also helpful. On a balcony or patio, placing pots near a railing or wall can prevent plants from toppling over.
Planting Dill in Pots
Dill grows best when started from seed rather than transplants, as its taproot does not like to be disturbed.
-
Sow seeds directly into the container, scattering them evenly across the soil surface.
-
Cover lightly with a thin layer of soil (about ¼ inch).
-
Water gently to moisten the soil without washing away the seeds.
-
Thin seedlings once they are a few inches tall, leaving about 6 inches of space between plants.
For a steady supply, sow seeds every three to four weeks during the growing season. This succession planting ensures you always have fresh leaves for cooking and mature heads for pickling.
Watering and Care
While dill is somewhat drought-tolerant once established, it still performs best with consistent moisture.
-
Water deeply when the top inch of soil feels dry.
-
Avoid overwatering, as soggy soil can cause root damage.
-
Mulch lightly with straw or dry leaves to help retain moisture in hot weather.
Dill generally does not require heavy feeding. Too much fertilizer may cause the plants to grow excessively tall and fall over. Instead, focus on maintaining good sunlight, proper watering, and healthy soil.
Harvesting Dill
Harvesting dill is simple and rewarding.
-
Leaves: Begin snipping fresh leaves once the plant reaches about 8 inches tall. Use scissors to cut the fronds, leaving enough behind for continued growth.
-
Seeds: Allow some flower heads to mature and turn brown. Collect the seed heads and hang them upside down in a paper bag until the seeds fall out. These seeds can be used in pickling, cooking, or even replanted for the next crop.
To encourage prolonged leaf production, pinch off flower buds when they first appear. However, if your goal is to harvest seeds, let the plant flower and set seed naturally.
Culinary Uses of Dill
Dill is most famously associated with pickles, where its seeds and leaves provide that signature tangy flavor. However, its uses extend far beyond pickling. Fresh dill leaves are delicious in potato salads, fish dishes, soups, dips, and yogurt-based sauces. Dill pairs beautifully with cucumbers, carrots, and eggs, adding a bright and refreshing taste.
By keeping a pot of dill close to your kitchen, you’ll always have this flavorful herb within easy reach.
Conclusion
Dill is one of the most rewarding herbs to grow in containers. With its aromatic foliage, tall airy stems, and versatile culinary uses, it brings both beauty and practicality to small gardens. By choosing the right pot, providing plenty of sunlight, and planting seeds in succession, you can enjoy fresh dill leaves for cooking and abundant seeds for pickling throughout the season. Compact, easy to grow, and endlessly useful, dill in pots is a smart choice for gardeners who love flavor and want to make the most of their space.


