Garlic is an essential ingredient in countless cuisines, prized for its rich aroma, pungent flavor, and numerous health benefits. While traditionally grown in garden beds, garlic also thrives in pots, making it a great crop for urban dwellers and gardeners with limited space. Growing garlic in containers is surprisingly simple, and with the right care, you can harvest bulbs full of flavor right outside your door.
Here’s a comprehensive, step-by-step guide to help you grow garlic successfully in pots, no backyard required.
Why Grow Garlic in Pots?
Growing garlic in pots has many advantages. It allows you to control soil conditions, reduce the risk of disease, and easily move the container to the best spot for sun exposure. Potted garlic is less prone to weed competition, and the compact nature of container gardening makes harvesting and maintenance more convenient.
This method is ideal for balconies, patios, or small spaces near your kitchen, allowing you to enjoy fresh garlic at your fingertips.
Best Garlic Types for Containers
There are two main types of garlic: softneck and hardneck.
-
Softneck Garlic: More common in supermarkets. It stores longer and usually produces more cloves per bulb. Varieties like ‘California Early’ and ‘Inchelium Red’ are great for mild climates.
-
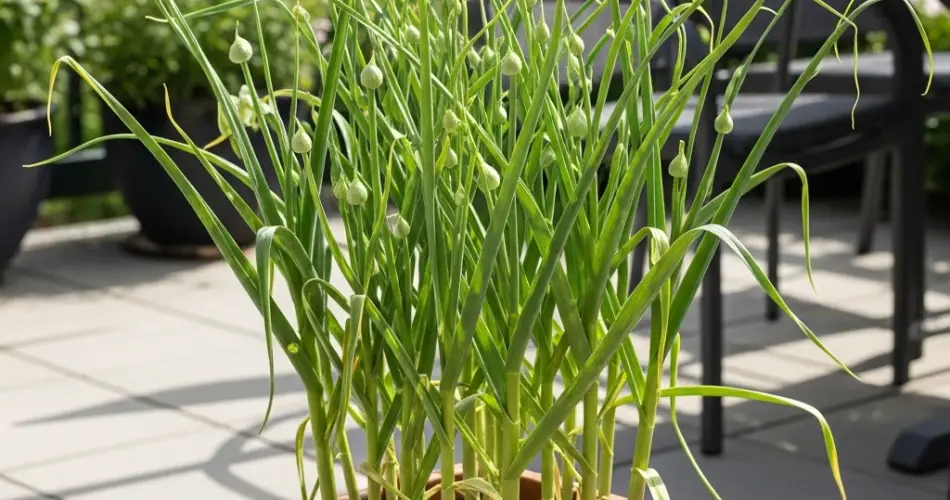
Hardneck Garlic: Produces fewer, larger cloves and a flowering stalk called a scape. It prefers colder climates and includes varieties such as ‘Purple Glazer’ and ‘German Red’.
Choose a type based on your local climate. In cooler regions, hardneck garlic tends to perform better, while softneck is ideal for warmer areas.
Selecting the Right Pot
Garlic doesn’t require deep soil, but it does need space for roots and bulbs to develop. Choose a pot that is:
-
At least 8–10 inches deep
-
Has good drainage holes
-
Wide enough to allow spacing of 4–6 inches between cloves
You can grow multiple garlic plants in one wide container or use individual pots for each clove.
Terracotta, plastic, or ceramic containers all work well as long as drainage is adequate. Avoid letting water sit at the bottom of the pot to prevent rot.
Soil and Drainage
Garlic prefers loose, well-draining soil rich in organic matter. A high-quality potting mix combined with compost or aged manure provides ideal conditions.
Before planting, amend the soil with a balanced, slow-release fertilizer or bone meal. Garlic thrives in slightly acidic to neutral soil (pH 6.0–7.0).
Planting Garlic in Pots
-
Choose Healthy Cloves: Use organic garlic bulbs meant for planting, not grocery store cloves which may be treated to prevent sprouting. Break apart the bulb into individual cloves, leaving the papery skin intact.
-
Plant Time: Garlic is typically planted in fall (October to November), giving it time to establish roots before winter dormancy. In warmer climates, you can plant as late as early spring.
-
Planting Depth and Spacing:
-
Plant each clove pointed-end up, 2 inches deep into the soil.
-
Space them 4–6 inches apart in all directions.
-
-
Watering: Water thoroughly after planting. Keep the soil consistently moist, but not soggy.
-
Mulch: A light layer of mulch helps retain moisture and protects the bulbs from temperature swings.
Sunlight Requirements
Garlic requires full sun—ideally 6–8 hours of direct light each day. Place your container in a sunny spot, such as a south-facing balcony, patio, or window area. If you’re growing indoors, make sure to rotate the pot regularly or use grow lights to supplement natural light.
Garlic Care and Maintenance
-
Watering: Keep the soil moist but not wet. Overwatering can lead to rot, especially in containers. Water less frequently in cooler weather.
-
Feeding: Fertilize every 3–4 weeks with a liquid fertilizer high in nitrogen during the growing phase. Switch to a low-nitrogen fertilizer once bulb formation begins in spring.
-
Remove Weeds: While pots are less prone to weeds, occasionally check and remove any to ensure garlic gets all the nutrients.
Harvesting Garlic
Garlic is typically ready for harvest 7–9 months after planting. Signs that your garlic is ready include:
-
Leaves begin to yellow and fall over
-
At least half of the foliage has died back
To harvest:
-
Gently loosen the soil with your hands or a trowel and lift the bulbs out.
-
Avoid pulling by the stem to prevent damage.
After harvesting, allow garlic to cure in a dry, shaded, and well-ventilated area for 2–3 weeks. Once cured, trim the roots and stalks and store in a cool, dark place.
Bonus: Growing Garlic Greens
You can also grow garlic cloves just for their flavorful greens. Plant a few extra cloves closely together in a shallow pot. They’ll sprout into shoots in about two weeks and can be snipped like chives for salads, eggs, or stir-fries.
Final Tips
-
Rotate your containers each year to avoid soil-borne diseases.
-
Use containers with saucers or place them on stands to improve airflow and drainage.
-
Protect your pots in winter by wrapping them in burlap or moving them to a sheltered location if temperatures drop below freezing.
Growing garlic in pots is a satisfying and space-efficient way to enjoy this culinary staple. Whether you’re cultivating full bulbs or just harvesting green shoots, garlic is a low-maintenance plant that rewards you with bold flavor and visual appeal. With just a bit of attention and a sunny spot, you can grow your own fresh garlic right at home.


