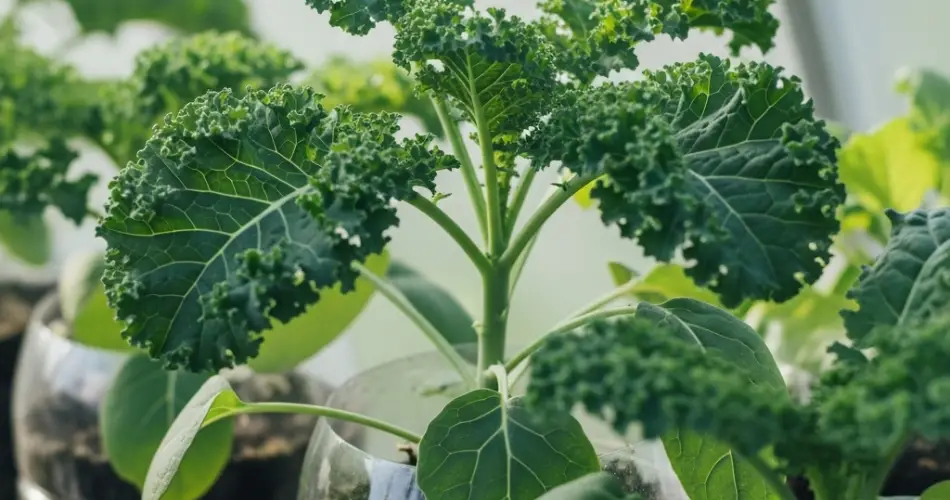
Kale is a powerhouse leafy green, loaded with vitamins, minerals, and antioxidants. It’s known for its hardiness, cold tolerance, and ability to thrive in containers—making it an ideal crop for home gardening. And the good news? You don’t need a yard or garden bed to grow it. With a few recycled plastic bottles and some basic supplies, you can cultivate fresh kale at home, even in the smallest spaces. This guide will walk you through how to grow and harvest kale from bottles—from planting to your dinner plate.
Why Grow Kale in Bottles?
Growing kale in plastic bottles offers several advantages. First, it’s a sustainable way to reuse materials that might otherwise end up in landfills. Second, it saves space and is perfect for balconies, windowsills, and small patios. Lastly, kale is a relatively low-maintenance crop that grows well in containers, making it suitable for both beginner and experienced gardeners.
Kale varieties like ‘Dwarf Blue Curled’, ‘Lacinato’ (Dinosaur Kale), and ‘Red Russian’ are particularly good choices for container planting due to their compact growth and high yield.
What You’ll Need
To get started, gather these basic materials:
-
1.5L or 2L plastic bottles (cleaned and label-free)
-
Scissors or a craft knife
-
Quality potting soil or compost-rich growing mix
-
Kale seeds
-
Watering can or spray bottle
-
String or wire (for vertical hanging)
-
A small trowel (optional)
Choose bottles that are sturdy and clear or lightly tinted, so you can monitor moisture levels. Be sure to wash and rinse them thoroughly before use.
Preparing the Bottles
You can prepare the bottles in either a horizontal or vertical format, depending on your available space.
Horizontal Bottles:
-
Lay the bottle flat and cut out a rectangular window along one side, leaving the rest intact.
-
Poke 3–5 small drainage holes on the bottom.
-
Fill the bottle with potting soil, leaving about 1 inch of space from the top.
Vertical Bottles:
-
Cut off the top third of the bottle.
-
Drill or punch holes in the bottom for drainage.
-
Puncture small holes near the top edge to thread string or wire for hanging.
-
Fill the lower section with soil and gently tamp it down.
Whether hung or placed on a ledge, make sure the container has enough drainage to avoid waterlogging, which can lead to root rot.
Planting Kale Seeds
Sow kale seeds about ¼ to ½ inch deep in the soil. If using horizontal bottles, space seeds about 3–4 inches apart. In vertical bottles, limit planting to one or two seeds per container due to space constraints.
After sowing, water the soil lightly but thoroughly. Keep the bottle in a spot that receives at least 5–6 hours of sunlight daily. Kale thrives in cool to mild temperatures, so avoid planting in the peak of summer unless shade is available.
Seedlings typically emerge within 5–10 days. Once they reach 2 inches in height, thin them out if needed to avoid overcrowding.
Caring for Your Kale Plants
Water regularly to keep the soil moist but not soggy. Bottle planters tend to dry out more quickly than ground beds, especially in warm weather, so check soil moisture daily. Morning watering is best to prevent fungal diseases.
Feed the plants every two weeks with a balanced liquid fertilizer or compost tea. If you notice pale leaves or slow growth, it may be a sign of nutrient deficiency—boost feeding as necessary.
As the plants grow taller, you may need to provide support. A small stick inserted into the soil can help keep them upright in windy conditions.
Dealing with Pests
While kale is hardy, it can still be affected by common pests like aphids, cabbage worms, and whiteflies. Elevating bottles helps avoid some ground pests, but inspect the leaves regularly.
Remove pests by hand or use a mild neem oil spray as a natural deterrent. Regular airflow and spacing between bottles will also reduce the risk of mildew or fungal infections.
Harvesting Kale
You can begin harvesting kale about 6–8 weeks after planting, once the leaves are around the size of your hand. Use clean scissors or garden shears to cut the outer leaves from the base, leaving the inner leaves to continue growing.
This “cut-and-come-again” method allows for continuous harvests over several weeks or even months. If cared for properly, kale can produce for an extended period—especially in cooler weather.
When the plant starts to bolt (send up a flower stalk), it’s nearing the end of its life cycle. At this point, it’s best to harvest the remaining leaves and compost the rest of the plant.
Replanting for Continued Supply
After harvesting, you can reuse the same bottle for a new crop. Remove the old root system, refresh the soil with compost or fertilizer, and replant. Rotating crops like spinach, arugula, or lettuce can help keep the soil healthy and your harvest varied.
Growing kale in bottles is a smart, space-efficient way to bring fresh, nutritious greens into your home. It’s a great option for urban gardeners, apartment dwellers, or anyone looking to make the most of small areas. With minimal supplies and a bit of care, you can go from bottle to bowl and enjoy homegrown kale straight from your own vertical garden.


