To help you have more options for caring for orchids at home using organic fertilizer, I am sharing an effective method that promotes the development of new shoots, encourages flowers to bloom profusely, and extends their longevity. In this guide, I will show you how to create a simple yet powerful fertilizer using common household ingredients. By following these steps, your orchids will flourish with healthy roots, lush leaves, and vibrant flowers.
Step 1: Preparing the Rice Water
One of the key ingredients in this fertilizer is rice water, which is rich in essential nutrients that promote orchid growth. To make this, I reuse the water left after washing rice before cooking. You can use 200 grams of rice, just like I do, or increase the amount if you have more orchids to care for.
After washing the rice, collect the cloudy water and transfer it into a container with a tight lid. Place the container in a cool and shaded area for 24 hours. This process allows natural fermentation, which enhances the nutritional value of the rice water, making it an excellent natural fertilizer for orchids.
Step 2: Preparing the Ginger Solution
Ginger is known for its ability to stimulate plant growth, strengthen roots, and encourage the production of new leaves and flowers. To prepare the ginger solution, take about 10 grams of fresh ginger and mince it finely. Then, soak the minced ginger in 1 liter of freshly boiled water.
Allow the ginger to steep in the boiled water for 24 hours. This step helps extract the beneficial compounds from the ginger, which will aid in plant growth and protection against diseases. Keep the container in a cool place while the solution infuses.
Step 3: Filtering and Using the Fertilizer
After 24 hours, it’s time to filter the solutions. Only use the clear liquid from both the fermented rice water and the ginger-infused water. Avoid using the cloudy residue, as it may contain unwanted sediment that could clog the roots or leaves.
Now that the fertilizer is ready, we can apply it to the orchids using multiple methods.
Method 1: Cleaning the Leaves
One of the best ways to keep your orchids healthy is by maintaining clean leaves. Take a soft cloth or cotton pad and soak it in the prepared fertilizer solution. Gently wipe the top and bottom surfaces of the leaves with this liquid. This process ensures that the stomata remain clear, allowing the orchid to photosynthesize efficiently.
Regular application of this method prevents dust and bacteria from accumulating on the leaves, ensuring they stay green and vibrant. Cleaning the leaves once a month using this fertilizer will significantly improve the orchid’s ability to absorb nutrients and maintain overall health.
Method 2: Spraying the Fertilizer
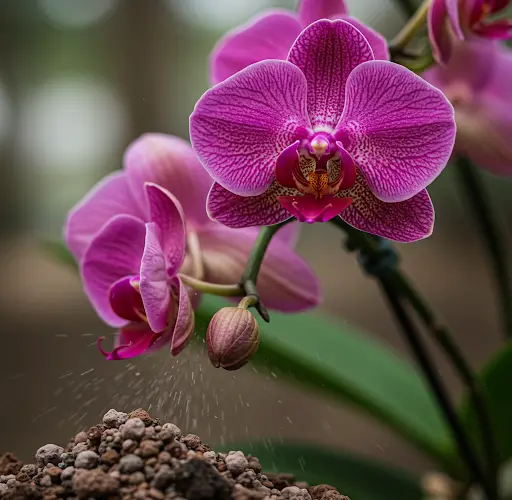
Another effective way to nourish orchids is by spraying the fertilizer directly onto the entire plant. Pour the fertilizer mixture into a spray bottle and mist the plant thoroughly, covering both the leaves and aerial roots. The minerals and amino acids found in ginger and fermented rice water will help strengthen the orchid’s immunity, promote shoot development, and support faster root growth.
Spraying the fertilizer solution once a month is sufficient to provide a consistent supply of nutrients, ensuring that the orchids remain strong and resistant to pests and diseases.
Method 3: Watering the Orchid Roots
The final and most effective way to apply this fertilizer is by watering the roots directly. Slowly pour the fertilizer solution onto the orchid’s potting medium, ensuring that the roots absorb the nutrients properly. This method enhances root growth, encourages new shoot formation, and improves the plant’s ability to uptake essential minerals.
Applying this fertilizer once every two weeks will promote steady growth and ensure that the orchid receives all the nutrients it needs for optimal development.
Observing the Results
One Month Later:
After one month of using this organic fertilizer, you will notice that new roots have started to sprout. These fresh roots help the orchid absorb nutrients more effectively, leading to healthier growth.
Two Months Later:
After two months, the roots will have developed further, becoming strong and robust. The orchid will start showing signs of new shoot growth, and the leaves will appear healthier and greener.
Four Months Later:
By the fourth month, you will notice the formation of multiple buds and new branches. The plant will be preparing for an impressive blooming phase.
Six Months Later:
At this stage, your orchid will reward you with an abundance of beautiful flowers. The blooms will appear more vibrant, and the flowers will stay fresh on the branches for a longer time before wilting. This is a clear indication that your orchid is thriving with the help of this natural fertilizer.
Final Tips for Best Results
- Apply the fertilizer consistently every two weeks for maximum benefits.
- Place the orchid in a location with indirect sunlight to support photosynthesis.
- Ensure proper air circulation to prevent mold and fungal infections.
- Avoid overwatering; orchids require a well-balanced moisture level.
By following these methods and maintaining a consistent care routine, your orchids will grow stronger, bloom more frequently, and stay healthy for years to come. This simple, natural fertilizer made from fermented rice water and ginger is an excellent way to nourish your plants without the need for chemical fertilizers.
I hope this guide provides you with valuable insights into caring for your orchids using organic fertilizer. If you find this information helpful, don’t forget to share it with fellow gardening enthusiasts! Let’s nurture our plants with love and patience, and they will reward us with stunning blooms and lush greenery.


