Oregano is one of the most beloved herbs in home cooking, known for its bold aroma and earthy flavor that enriches everything from sauces and soups to pizzas and roasted vegetables. While buying oregano plants or seeds is always an option, cloning oregano from cuttings offers a faster and more sustainable way to grow your own supply. Even better, you can do it with something as simple as a recycled plastic bottle.
This eco-friendly approach allows you to create a steady stock of oregano plants without spending much money. By reusing bottles that would otherwise go to waste, you also practice sustainable gardening, making it a win-win for both your kitchen and the environment.
Why Clone Oregano Instead of Growing from Seed?
Cloning oregano—propagating new plants from cuttings—has several advantages:
-
Faster results: Seeds can take weeks to sprout and establish, while cuttings root in as little as 10–14 days.
-
Consistency: Cuttings produce plants identical to the parent, ensuring the same flavor and growth characteristics.
-
Eco-friendly: By using bottles and cuttings, you avoid plastic seed trays and reduce waste.
-
Cost savings: Once you have one healthy oregano plant, you can create many more without purchasing new ones.
Materials You’ll Need
Before getting started, gather these basic items:
-
A healthy oregano plant for cuttings
-
A sharp knife or scissors
-
A clean plastic bottle (1–2 liters)
-
Water or potting soil (depending on your chosen method)
-
Optional: clear tape or rubber bands
Step 1: Prepare the Bottle
Take your plastic bottle and wash it thoroughly to remove any residue. Cut the bottle in half across the middle. The bottom half will serve as your container, and the top half can be inverted as a humidity dome if you’re using soil.
-
For water propagation: The base of the bottle will simply hold water.
-
For soil propagation: Fill the base with a lightweight potting mix, ideally one mixed with perlite for good drainage.
Step 2: Take Healthy Oregano Cuttings
Select strong stems from your oregano plant. Using scissors or a knife, cut sections about 4–6 inches long. Make the cut just below a leaf node—the point where leaves meet the stem. Remove the lower leaves, leaving a few at the top. The bare nodes will become rooting points once placed in water or soil.
Step 3: Insert the Cuttings
-
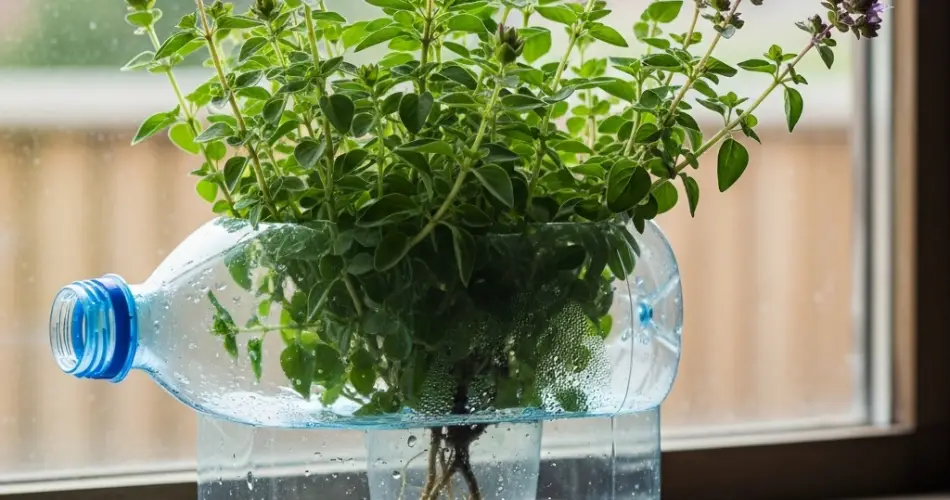
Water method: Fill the bottom half of your bottle with clean water and place the cuttings inside. Ensure the leaf nodes are submerged, but the top leaves remain above the water.
-
Soil method: Insert the cuttings into the moist potting mix, firming the soil around the base. Place the upper part of the bottle over it to act as a greenhouse dome. Leave the cap off or make small holes for ventilation.
Step 4: Choose the Right Location
Position the bottle where it will get plenty of indirect sunlight. A windowsill or a bright kitchen counter works perfectly. Avoid harsh, direct sun during midday hours, as this can overheat the bottle and stress the cuttings.
-
If using water, replace the liquid every 2–3 days to keep it fresh.
-
If using soil, mist lightly when the surface begins to dry out.
Step 5: Watch for Root Growth
One of the advantages of using clear bottles is that you can easily monitor progress. In water, white roots usually appear within two weeks. In soil, you’ll know the cuttings are rooting when you see new leaf growth or feel resistance when tugging gently on the stem.
Once the roots reach about 2 inches in length, your oregano is ready for transplanting.
Step 6: Transplant Your Oregano
Move the rooted cuttings into larger pots or directly into your garden. Choose containers with drainage holes and fill them with well-draining soil. Plant the oregano cuttings gently, water thoroughly, and place them in a spot with at least six hours of sunlight daily.
Step 7: Care and Harvesting
To keep your oregano healthy and productive:
-
Water moderately: Let the soil dry slightly between waterings. Too much water can lead to root rot.
-
Prune regularly: Snip stems just above a node to encourage bushy growth.
-
Harvest often: Regular trimming ensures a constant supply of fresh leaves and stimulates new growth.
-
Fertilize lightly: A diluted organic fertilizer once a month will boost vigor without overwhelming the plant.
Final Thoughts
Cloning oregano with a plastic bottle setup is a simple, budget-friendly, and eco-conscious way to expand your herb collection. By turning kitchen scraps and discarded bottles into useful tools, you reduce waste while cultivating a renewable source of flavor for your meals.
This method is quick, efficient, and adaptable to any home environment—whether you live in a house with a garden or an apartment with just a sunny windowsill. With a little care and patience, you’ll soon enjoy a thriving oregano harvest grown entirely from your own sustainable efforts.


