Do You Like to Eat Asparagus? Use This Method to Grow Lots of Asparagus!
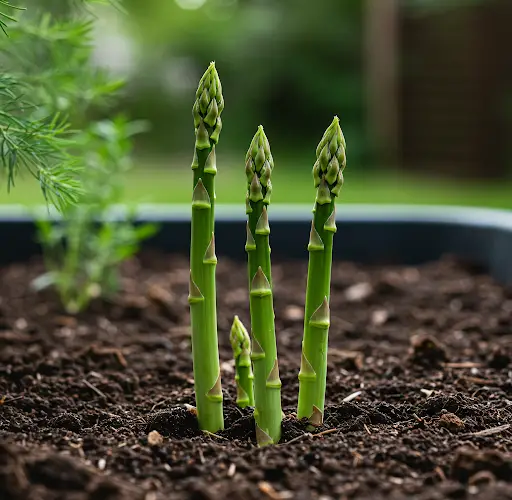
Asparagus is a delicious, nutritious, and perennial vegetable that can produce spears for many years once established. If you love eating asparagus, why not grow your own supply at home? With the right method, you can cultivate a bountiful harvest of fresh, tender asparagus spears year after year.
In this guide, you’ll learn the best techniques to grow asparagus, from selecting the right variety to planting, caring for, and harvesting your homegrown crop.
Why Grow Your Own Asparagus?
Asparagus is a great choice for home gardening because:
- It’s perennial, meaning it grows back every year.
- Homegrown asparagus is sweeter and fresher than store-bought.
- It contains fiber, vitamins A, C, E, and K, plus essential minerals like iron and folate.
- Once established, it produces for 10-20 years with minimal effort.
- You can save money by growing your own rather than buying expensive supermarket asparagus.
Step-by-Step Guide to Growing Asparagus for Maximum Yield
Materials Needed:
- Asparagus crowns or seeds (choose a high-yield variety)
- Rich, well-draining soil
- Compost or organic fertilizer
- Mulch (straw, dry leaves, or grass clippings)
- Watering can or hose
- Raised bed or garden plot
- Organic pest control (neem oil, diatomaceous earth, or insect netting)
Step 1: Choosing the Right Variety
There are two main types of asparagus:
- Green Asparagus: The most common type, grows easily in most climates.
- Purple Asparagus: Sweeter than green asparagus, with higher anthocyanin levels.
For high yields, consider planting hybrid varieties like Jersey Giant, Jersey Knight, or Mary Washington.
Step 2: Selecting the Best Location
- Asparagus thrives in full sunlight (at least 6-8 hours per day).
- It prefers well-draining, sandy loam soil to prevent root rot.
- Choose a permanent spot, as asparagus grows back every year.
- Raised beds are great for better drainage and easier maintenance.
Step 3: Preparing the Soil
- Loosen the soil to a depth of 12-18 inches for strong root development.
- Mix in compost, aged manure, or organic fertilizer to enrich the soil.
- Adjust the soil pH to 6.5-7.0 using lime or sulfur if needed.
- Remove weeds and large stones to give asparagus roots room to spread.
Step 4: Planting Asparagus
Growing from Crowns (Recommended for Faster Growth):
- Dig trenches 6-8 inches deep and 12-18 inches apart.
- Place crowns with roots facing downward, spacing them 12 inches apart.
- Cover with 2 inches of soil and gradually fill the trench as plants grow.
- Water thoroughly to help roots establish.
Growing from Seeds (Takes Longer but Cost-Effective):
- Soak seeds for 24 hours before planting to speed up germination.
- Start seeds indoors 8-12 weeks before the last frost.
- Transplant seedlings once they reach 8-12 inches tall.
- Space seedlings 12-18 inches apart in rows.
Step 5: Watering and Mulching
- Keep the soil consistently moist but not waterlogged.
- Water deeply 1-2 times per week, depending on weather conditions.
- Apply 2-3 inches of mulch to retain moisture and prevent weeds.
- Avoid overwatering, as asparagus roots are prone to rot in soggy soil.
Step 6: Fertilizing for Maximum Growth
- In early spring, apply a balanced organic fertilizer (10-10-10 NPK).
- Use compost tea or fish emulsion every 4-6 weeks for extra nutrients.
- After harvest, add bone meal or rock phosphate to replenish phosphorus.
- Avoid excessive nitrogen, which promotes leafy growth over spears.
Step 7: Managing Pests and Diseases
| Problem | Cause | Solution |
|---|---|---|
| Yellowing spears | Poor drainage or overwatering | Improve drainage and water less |
| Asparagus beetles | Insects eating spears | Hand-pick beetles or spray neem oil |
| Rust or fungal spots | Excess moisture | Ensure good airflow and avoid overhead watering |
| Slow growth | Lack of nutrients | Add compost or balanced fertilizer |
Step 8: Harvesting Asparagus for Continuous Production
- Do not harvest in the first year to allow plants to establish.
- In the second year, harvest spears for 2-3 weeks only.
- From the third year onwards, harvest for 6-8 weeks.
- Cut spears at 6-8 inches tall using a sharp knife.
- Stop harvesting when spears become thin (pencil-sized), allowing ferns to grow.
Step 9: Extending the Growing Season
- Succession Planting: If possible, plant new crowns every 3-4 years for staggered harvesting.
- Protect plants from extreme cold using mulch or row covers.
- Divide mature crowns every 5-7 years to maintain productivity.
- Rotate asparagus beds if possible to prevent soil depletion.
Bonus Tips for a Bountiful Asparagus Harvest
- Cut ferns back in late fall after they turn yellow to prevent disease.
- Apply mulch before winter to protect roots from frost damage.
- Hand-pull weeds instead of using herbicides, which can harm roots.
- Mix asparagus with companion plants like tomatoes and basil for natural pest control.
- Save seeds from mature plants to propagate more asparagus in the future.
Final Thoughts
Growing asparagus at home is a rewarding experience that provides fresh, flavorful spears year after year. With the right care, you can enjoy a continuous harvest for decades!
Try this proven method today and start enjoying the benefits of homegrown asparagus!


