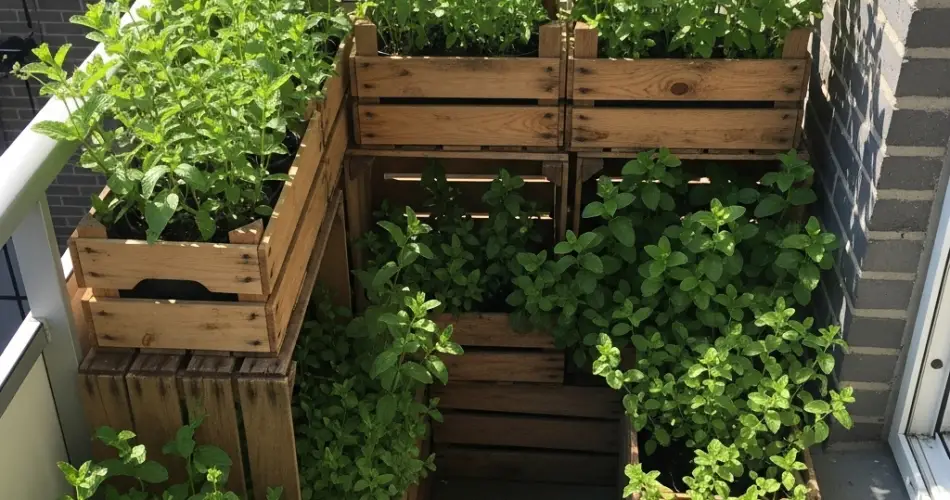
Mint is one of the most rewarding herbs to grow at home. Its vibrant green leaves, refreshing aroma, and versatile use in drinks, teas, desserts, and savory dishes make it a must-have for any kitchen garden. However, mint has a tendency to spread quickly and take over garden beds. That’s where growing mint in a wooden crate on your balcony becomes the perfect solution. It keeps the herb contained while providing a steady harvest of flavorful leaves in a manageable, stylish setup.
Crate gardening is gaining popularity among urban gardeners for its simplicity and practicality. A wooden crate provides excellent drainage, is easy to move around, and can be placed anywhere with good sunlight. Here’s how to create a productive mint garden using nothing more than a basic crate and a bit of balcony space.
Why Use a Crate for Growing Mint?
Mint is a hardy perennial that thrives with minimal effort, but its aggressive growth habits make it unsuitable for open beds unless carefully controlled. A crate offers several advantages:
-
Containment: Prevents mint from spreading uncontrollably.
-
Good drainage: Crates allow excess water to escape, helping prevent root rot.
-
Space efficiency: Ideal for small balconies and patios.
-
Portability: Move the crate to adjust for sun exposure or changing weather.
-
Customizable: Crates can be painted, labeled, or styled to suit your aesthetic.
Mint grown in a crate remains healthy, vigorous, and easy to maintain, all while staying where it belongs.
Materials Needed
To start your crate-grown mint garden, gather these materials:
-
A wooden crate (untreated wood is best for edibles)
-
Landscape fabric or burlap (to line the crate)
-
Scissors or utility knife
-
Potting soil with good drainage
-
Compost or organic matter
-
Mint cuttings or transplants
-
Small pebbles (optional for extra drainage)
-
Watering can or spray bottle
Choose a mint variety based on your needs—peppermint, spearmint, apple mint, or even chocolate mint.
Preparing the Crate
-
Line the inside of the crate with landscape fabric or burlap to hold the soil while allowing water to drain freely.
-
Add a drainage layer (optional): Place a thin layer of pebbles or gravel at the bottom for extra water flow.
-
Fill with soil: Use a well-draining potting mix blended with compost or organic matter to nourish the plant. Mint thrives in slightly moist, fertile soil.
-
Moisten the soil before planting to create an inviting environment for root establishment.
Planting Mint
Mint is easy to grow from cuttings, divisions, or nursery transplants.
-
From cuttings: Place 4–6 inch cuttings in water until they develop roots, then transplant into the crate.
-
From transplants: Dig a small hole and gently place the root ball in the soil, covering it up to the stem’s base.
Space the plants 6–8 inches apart if planting more than one variety, and plant near the center of the crate to allow even growth.
Place your crate where it gets partial to full sunlight—about 4 to 6 hours of sun daily. While mint tolerates shade, some sunlight helps enhance flavor and leaf production.
Caring for Crate-Grown Mint
Mint is low-maintenance, but it still benefits from regular attention:
-
Watering: Keep the soil consistently moist but not soggy. Water when the top inch feels dry.
-
Fertilizing: Add compost or use a diluted organic liquid fertilizer once a month during active growth.
-
Mulching: Use mulch to help retain moisture, especially during summer.
Rotate the crate occasionally if one side gets more sunlight, to encourage balanced growth.
Pruning and Harvesting
Regular pruning keeps mint healthy and prevents it from becoming woody or leggy.
-
Start harvesting when plants are 4–6 inches tall.
-
Pinch off the growing tips to encourage bushier growth.
-
Harvest leaves in the morning for the best flavor.
-
Remove flower buds as they appear to extend the plant’s productive life.
You can dry excess mint for tea, freeze it in ice cubes for drinks, or use fresh leaves directly in recipes.
Common Issues and Solutions
-
Yellowing leaves: Often due to overwatering or poor drainage—adjust your watering schedule.
-
Leggy growth: Typically caused by insufficient sunlight. Move the crate to a brighter spot.
-
Pests like aphids: Use a light spray of soapy water or neem oil to manage infestations.
Mint is naturally pest-resistant and usually thrives with minimal intervention when placed in the right environment.
Refreshing the Crate Garden
Mint can live for years, but it’s helpful to refresh the soil annually and divide the root ball every 1–2 years to prevent overcrowding and keep the plant vigorous.
To divide mint:
-
Gently remove the plant from the crate.
-
Use a knife or hands to separate the root ball into smaller sections.
-
Replant one section and compost or replant the others elsewhere.
Final Thoughts
Growing mint in a wooden crate is an excellent way to enjoy this aromatic herb without letting it take over your garden. Whether you’re sipping fresh mint tea, muddling herbs for a cocktail, or adding flavor to a dish, your crate-grown mint will be within easy reach. With just a small balcony and a little care, you can cultivate a thriving mint garden that’s both beautiful and practical, season after season.


