Garlic is a versatile and flavorful crop that can be grown in even the smallest of spaces. Whether you live in an apartment, a townhouse with a small patio, or simply want the convenience of fresh garlic close to your kitchen, container gardening is a great solution. Growing garlic in containers is easy, requires minimal maintenance, and yields kitchen-ready results right at your fingertips.
Here’s a detailed guide on how to grow garlic successfully in containers, from planting to harvest.
Why Grow Garlic in Containers?
Garlic adapts well to container gardening, making it perfect for people with limited space. Growing garlic in pots also allows for better control over soil quality, moisture, and sunlight exposure. It reduces weed growth, minimizes pest risk, and makes harvesting more accessible.
For those who cook regularly, having garlic just a few steps away is a convenient way to add freshness and nutrition to meals.
Best Garlic Types for Containers
Garlic comes in two main types: hardneck and softneck.
-
Softneck garlic is more common in warmer climates and typically produces more cloves per bulb. It also stores longer, making it a favorite for home gardeners.
-
Hardneck garlic is best for colder regions. While it has fewer cloves, it produces flavorful bulbs and scapes—edible flowering stalks that are a gourmet treat.
Both types grow well in containers. Choose a variety that suits your climate and culinary preferences.
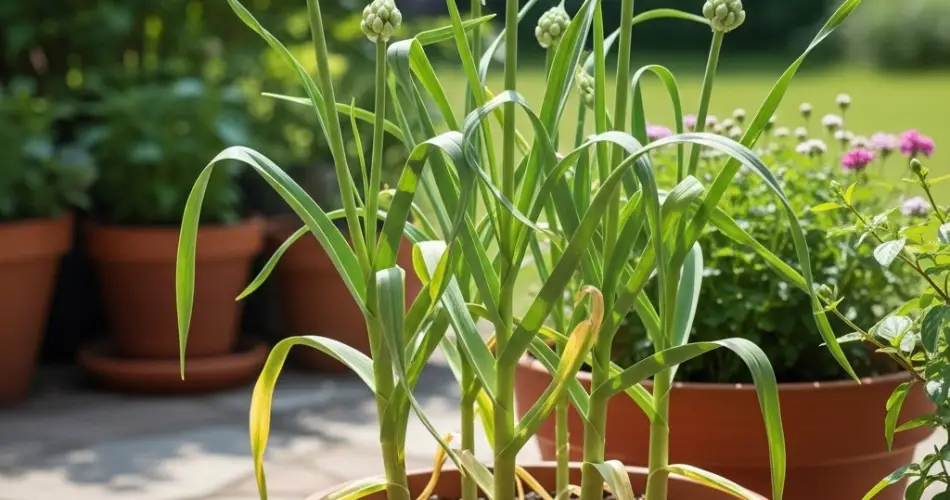
Choosing the Right Container
A successful garlic harvest begins with the right container. Select a pot that is:
-
At least 8–10 inches deep
-
Wide enough to space cloves 4–6 inches apart
-
Equipped with good drainage holes
You can plant several cloves in one large container or use individual pots for each clove. Plastic, terracotta, or ceramic containers all work well, but ensure proper drainage to prevent root rot.
Preparing the Soil
Garlic thrives in well-draining, nutrient-rich soil. A mix of potting soil and compost or aged manure provides a good balance of fertility and aeration. You can also add a bit of sand or perlite to improve drainage.
Before planting, mix in a slow-release balanced fertilizer or organic amendments such as bone meal or worm castings. Aim for a soil pH between 6.0 and 7.0.
How to Plant Garlic in Pots
-
Choose Healthy Cloves: Purchase garlic bulbs intended for planting from a nursery or seed supplier. Avoid supermarket garlic, which may be treated to prevent sprouting. Gently separate the bulb into individual cloves without removing the papery skin.
-
Planting Time: In most regions, garlic is planted in the fall (September to November), allowing it to establish roots before winter dormancy. In mild climates, you can also plant in late winter or early spring.
-
Planting Depth and Spacing:
-
Place each clove with the pointed end facing up, about 2 inches deep.
-
Space cloves 4–6 inches apart.
-
Cover with soil and water thoroughly.
-
-
Mulch: Add a light layer of mulch such as straw or dried leaves to retain moisture and insulate the soil.
Sunlight and Watering
Garlic needs at least 6–8 hours of sunlight daily. Place your container in a bright, sunny location like a balcony, terrace, or sunny windowsill.
Keep the soil consistently moist, especially during dry periods. However, avoid waterlogging, which can cause bulbs to rot. Reduce watering as the garlic nears maturity and the leaves begin to yellow.
Fertilizing and Care
-
Apply a nitrogen-rich liquid fertilizer every few weeks during the early growth stages to encourage leafy growth.
-
Once bulbs start forming (in late spring), switch to a low-nitrogen fertilizer to help bulb development.
-
Keep containers free of weeds and check occasionally for pests like aphids or fungus gnats.
Harvesting Garlic
Garlic is usually ready to harvest about 7–9 months after planting. Key signs that your garlic is ready:
-
Leaves begin to yellow and dry from the bottom up.
-
At least half the plant’s foliage has withered.
To harvest:
-
Loosen the soil gently with your hands or a small tool.
-
Pull out the bulbs carefully—avoid tugging the stems directly.
After harvesting, cure garlic by hanging or laying it in a dry, shaded, and well-ventilated area for 2–3 weeks. This process helps preserve the garlic for storage. Once cured, trim the roots and stalks and store the bulbs in a cool, dry place.
Bonus: Garlic Greens for Quick Harvests
If you’re eager for quicker results, try growing garlic just for the greens. Plant cloves closely in a shallow container, water regularly, and harvest the shoots when they reach 6–8 inches tall. These garlic greens have a mild flavor and can be used like scallions or chives.
Final Tips
-
Rotate your container placement occasionally to ensure even sun exposure.
-
Don’t reuse the same soil for garlic every year to prevent disease buildup.
-
Label different garlic varieties if you’re growing more than one type.
Growing garlic in containers is a rewarding and efficient way to enjoy this culinary staple year-round. With a bit of preparation, care, and the right conditions, you can produce flavorful, homegrown garlic even in the smallest spaces—making your kitchen harvest truly satisfying.


