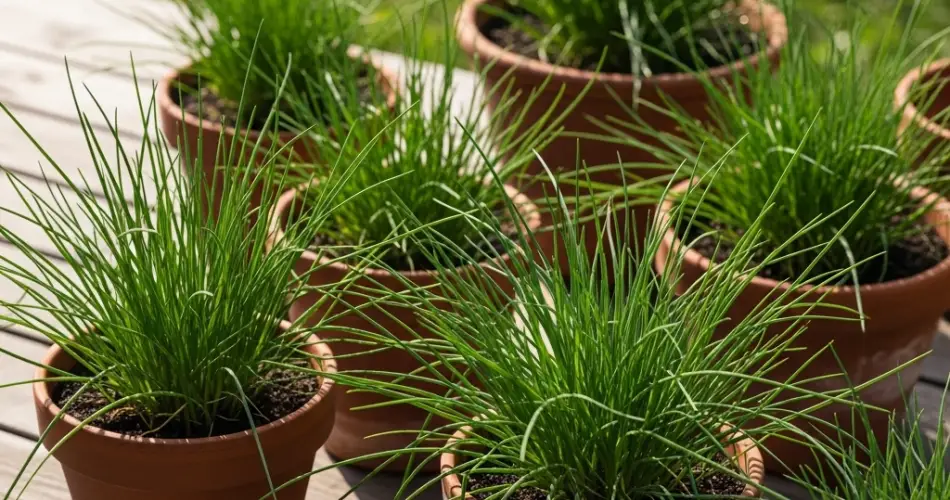
Chives are one of the easiest and most rewarding herbs to grow indoors. With their mild onion flavor, bright green leaves, and beautiful purple flowers, they’re a favorite among home cooks and gardeners alike. Growing chives in pots is ideal for beginners because the plant is low-maintenance, takes up little space, and thrives on a sunny windowsill.
Whether you want to enhance your cooking with fresh herbs or start your own indoor herb garden, chives are an excellent choice. Here’s everything you need to know to successfully grow chives in pots, even with minimal gardening experience.
Why Grow Chives Indoors?
Chives (Allium schoenoprasum) belong to the same family as onions, garlic, and leeks. They’re prized for their mild onion-like flavor, making them perfect for garnishing soups, eggs, potatoes, and salads. Here are a few reasons to grow them indoors:
-
Convenient harvesting: Snip off what you need without stepping outside.
-
Year-round availability: With proper care, you can grow chives indoors throughout the year.
-
Pest resistance: Chives naturally repel certain pests, making them easy to maintain.
-
Decorative appeal: Their slender leaves and attractive flowers add charm to any kitchen or indoor space.
Choosing the Right Pot and Soil
Start with a pot that has drainage holes to prevent root rot. A 6 to 8-inch wide pot is usually sufficient for one chive plant. Terracotta or ceramic pots work well, but plastic containers are fine as long as they offer good drainage.
Use a well-draining potting mix. A blend designed for vegetables or herbs is ideal. Avoid heavy garden soil, which can compact and retain too much water in containers.
How to Start Chives
There are two main ways to start growing chives: from seeds or by dividing an established plant.
1. From Seeds
-
Fill your pot with moist potting soil.
-
Scatter the seeds on top and lightly press them into the soil.
-
Cover with a thin layer (about ¼ inch) of soil.
-
Mist the surface to keep it evenly moist.
-
Seeds usually germinate within 10–14 days if kept at 65–75°F (18–24°C).
Once the seedlings reach about 2 inches tall, thin them out so the remaining plants are spaced about 2 inches apart.
2. From Established Plants
If you already have a chive plant growing outdoors, you can divide it:
-
Carefully dig up the clump.
-
Separate it into smaller sections with roots attached.
-
Replant a division into your indoor pot, firm the soil around it, and water well.
This method gives you a quicker harvest and a more established plant from the start.
Light Requirements
Chives need at least 6 hours of direct sunlight per day. A sunny south- or west-facing window is ideal. If natural light is limited, use a grow light to ensure strong, healthy growth.
Rotate the pot occasionally so the plant grows evenly and doesn’t lean toward the light source.
Watering and Feeding
Chives like consistently moist—but not soggy—soil. Stick your finger into the top inch of soil: if it feels dry, it’s time to water. Drain any excess water from the saucer to prevent root rot.
Feed chives with a balanced liquid fertilizer (like 10-10-10) once a month during the growing season. Too much fertilizer can lead to weak, floppy growth, so keep it light.
Harvesting Chives
You can start harvesting once the plant is at least 6 inches tall. Use scissors to snip the leaves about 1–2 inches above the soil level. Always cut from the outer edges first, allowing the inner leaves to continue growing.
Regular harvesting encourages the plant to produce more leaves. Avoid removing more than one-third of the plant at a time, especially when it’s still young.
Managing Flowering
Chives produce beautiful purple flowers in late spring or early summer. While they’re edible and add visual interest, flowering can cause the leaves to become tougher.
If your goal is continuous leaf harvest, pinch off flower buds as soon as they appear. Alternatively, let the plant bloom for a while, then trim back to promote fresh growth.
Pests and Problems
Chives are generally pest-free indoors, but occasional issues may arise:
-
Fungus gnats: These can appear if the soil is too wet. Let the top layer of soil dry between waterings.
-
Aphids: Wash them off with a gentle spray of water or use insecticidal soap.
-
Yellowing leaves: Often a sign of overwatering or insufficient light.
Keeping the plant in a well-lit, ventilated area and not overwatering will prevent most problems.
Final Tips
-
Trim your chives regularly to encourage fresh, dense growth.
-
If your plant becomes crowded or leggy, divide and repot it.
-
In winter, growth may slow, but the plant will bounce back in spring with proper care.
Conclusion
Chives are the perfect starter herb for anyone venturing into indoor gardening. They require minimal care, offer consistent harvests, and brighten both your kitchen and your cooking. With just a sunny window and a little attention, you can enjoy fresh chives all year long right from your windowsill.