Green beans are one of the easiest and most rewarding vegetables to grow at home. They’re fast-growing, nutritious, and perfect for small-space gardening. If you’re short on land but rich in creativity, vertical gardening with plastic bottles is a clever solution that allows you to grow a productive green bean crop on a balcony, wall, or fence. This method not only saves space but also reuses plastic bottles in an eco-friendly way.
Here’s a step-by-step guide to growing green beans in recycled plastic bottles for a vertical harvest that’s both practical and sustainable.
Materials Needed
-
1.5 to 2-liter plastic bottles (clean and dry)
-
Sharp cutter or knife
-
Nail and candle (for poking holes)
-
Cotton rope or twine (optional)
-
Wire, nails, or zip ties (for mounting)
-
Good-quality potting soil
-
Green bean seeds (pole or climbing variety recommended)
-
Compost or organic fertilizer
-
Watering can or spray bottle
Step 1: Prepare the Bottles
Start by selecting plastic bottles of the same size for consistency and stability when mounted. Remove the labels and clean them thoroughly. Using a sharp blade, cut a rectangular opening on one side of each bottle — large enough to plant and tend the beans easily. Leave enough of the plastic around the edges to hold the soil securely.
Use a heated nail to poke small drainage holes in the bottom and lower sides of each bottle. This prevents waterlogging and ensures healthy root development.
If you plan to hang the bottles, poke additional holes on each side near the top and insert twine to create hanging loops. For wall-mounted setups, make holes on the back and attach wires or zip ties.
Step 2: Choose the Right Variety
Pole beans are best for vertical growing since they naturally climb and produce more pods over a longer period than bush types. Choose disease-resistant, fast-growing varieties suited to your climate.
Step 3: Prepare the Soil Mix
Green beans grow best in loose, well-draining soil rich in organic matter. A simple mix of potting soil, compost, and a small amount of sand or coco peat works well. Avoid heavy garden soil, which can compact in bottles.
Before planting, moisten the soil lightly. Fill each bottle with soil up to two inches from the top.
Step 4: Planting
Sow 2–3 green bean seeds per bottle opening. Push them about 2 cm deep into the soil and gently cover. If you’re using a climbing variety, be sure to place the bottles near a support like a wire mesh, vertical trellis, or wall where the vines can cling and grow upward.
Water gently after sowing. Keep the soil moist but not soaked during germination, which usually takes 5 to 7 days.
Step 5: Positioning and Support
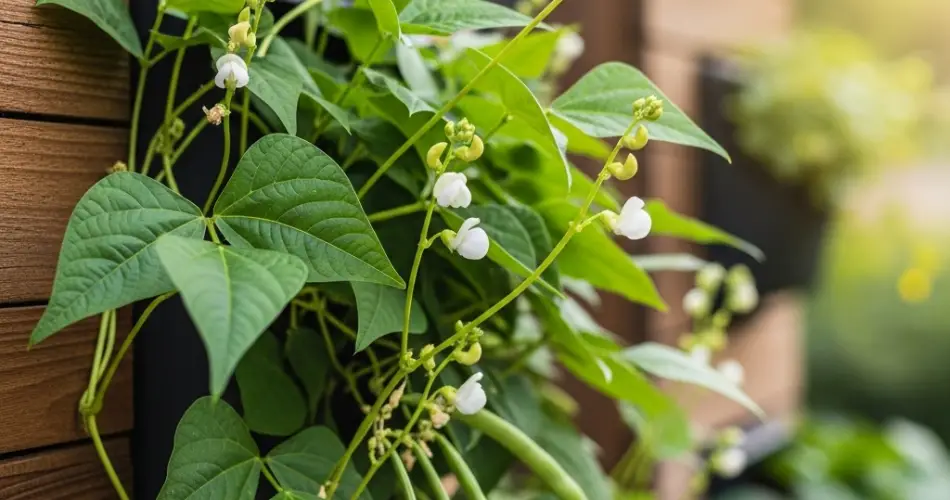
Hang or mount the bottles on a sunny wall or fence where they receive at least 6 hours of sunlight daily. Beans love warmth and light, and proper sun exposure will help boost flowering and pod production.
As the seedlings grow, guide the vines onto nearby supports or trellises. You can use string, mesh, or even vertical sticks to help the vines climb.
Step 6: Watering and Maintenance
Water the plants regularly, especially during dry days. Because bottles are small and exposed to air, the soil dries out faster than in ground planting. Early morning or late afternoon watering is ideal.
Every 10–14 days, feed the plants with a diluted organic liquid fertilizer, like compost tea or fermented plant juice. Beans fix their own nitrogen, so they don’t need heavy fertilization, but a light feed supports healthy growth and flowering.
Remove any yellowing leaves or pests you find. Regularly check that the vines are properly climbing and not tangled or falling.
Step 7: Harvesting
Green beans are ready to harvest about 45–60 days after planting, depending on the variety. Pick the pods when they are young, tender, and before the seeds inside begin to swell. Regular harvesting encourages more flower and pod production.
Use scissors or pinch the pods off gently by hand to avoid damaging the vines.
Benefits of Bottle-Grown Beans
-
Space-saving: Perfect for balconies, walls, and fences.
-
Eco-friendly: Gives a second life to used plastic bottles.
-
Easy access: Harvesting is simple since the plants grow at arm level.
-
Portable: Bottles can be moved or rearranged for sunlight needs.
Final Tips
-
Don’t overcrowd your setup. Leave space between bottles for air circulation.
-
Rotate bottle positions if some plants receive less sun.
-
Keep an eye out for aphids or spider mites; neem oil spray is a natural remedy.
-
Reuse your setup for another season by replenishing the soil and planting again.
Growing green beans in bottles is a fun, economical, and sustainable way to enjoy homegrown vegetables even in the smallest of spaces. With a little care and creativity, you can enjoy crisp, fresh beans straight from your vertical wall garden.


