Dill is one of the most rewarding herbs to grow in pots. Its delicate, feathery leaves not only add charm to a balcony or windowsill garden but also bring a burst of flavor to countless dishes. Whether you’re preparing pickles, seasoning fish, or enhancing salads, dill offers freshness that’s hard to beat. However, to enjoy dill for as long as possible, proper harvesting techniques are essential. Harvesting incorrectly or too aggressively can shorten the life of your plant, while thoughtful care will keep it producing leaves and seeds throughout the season.
This guide explores the best practices for harvesting dill from potted plants so you can maximize both yield and flavor.
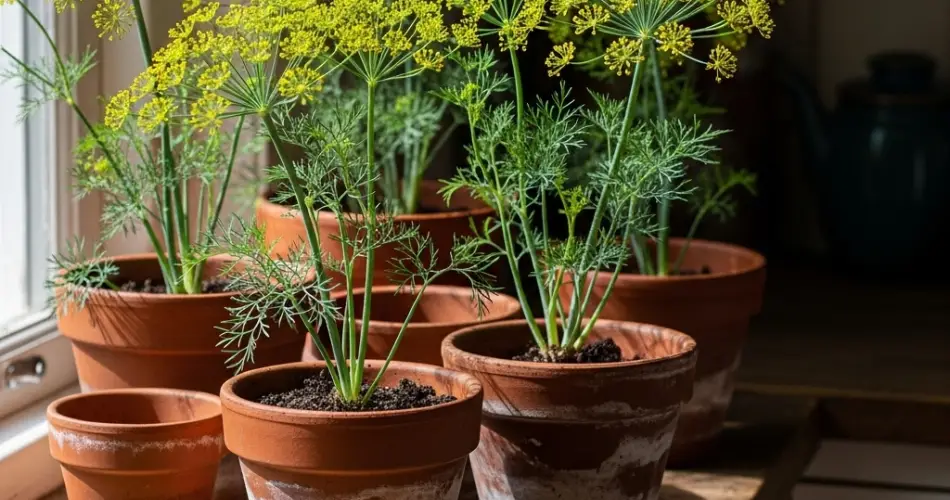
Understanding Dill Growth
Before learning how to harvest dill, it helps to understand its growth habits. Dill is an annual herb that grows tall and slender, with a central stem that eventually produces flower umbels. Once the plant flowers and sets seed—a process called “bolting”—leaf production slows down.
This means timing is everything. Harvesting leaves early and often helps delay bolting, encouraging the plant to continue producing its flavorful foliage. On the other hand, allowing some flower heads to mature ensures you’ll have seeds for culinary use and for future planting.
When to Harvest Dill
-
For leaves: Begin harvesting when the plant is about 6–8 inches tall. At this stage, the leaves are tender and flavorful. The best time to harvest dill leaves is in the morning after the dew has dried but before the heat of the day intensifies the oils.
-
For flowers: Harvest flower heads just as the blooms begin to open. These can be used fresh or dried for pickling recipes.
-
For seeds: Wait until the seed heads turn brown and dry on the plant. At this point, the seeds can be collected, dried, and stored.
By staggering your harvest—taking leaves regularly, saving some plants for flowers, and allowing others to set seed—you’ll get the most out of your potted dill.
How to Harvest Leaves
-
Use clean scissors or garden shears: Always cut with clean tools to avoid introducing disease.
-
Snip outer leaves first: Start by cutting the outer fronds, leaving the central growth intact. This allows the plant to keep producing new leaves.
-
Cut close to the stem base: Trim leaves near the base of the stem, but avoid cutting more than one-third of the plant at a time. Removing too much at once stresses the plant.
-
Harvest regularly: Frequent harvesting encourages bushier growth and delays flowering. Aim to cut leaves weekly once the plant is mature enough.
Fresh dill leaves don’t store well, so it’s best to harvest as needed. If you have more than you can use, drying or freezing is a good option.
How to Harvest Dill Flowers and Seeds
If your goal is to collect seeds, allow some dill plants in your container to flower naturally.
-
Flowers: Cut the flower umbels when they are partly open for use in pickling. They can be used immediately or dried for later.
-
Seeds: Once the flower heads turn brown, snip the entire seed head and place it upside down in a paper bag. Allow the seeds to fall out naturally as they dry. Store seeds in a cool, dark place in an airtight container.
Harvesting seeds not only provides a culinary spice but also gives you planting material for next season.
Maximizing Harvest in Pots
Since potted dill has limited root space, giving the plant proper care is key to maximizing harvest.
-
Sunlight: Ensure your pot is in a location that receives at least six hours of direct sunlight daily.
-
Soil: Use well-draining potting soil with added sand or perlite to mimic dill’s natural growing conditions.
-
Watering: Keep the soil evenly moist but not soggy. Overwatering in pots can quickly lead to root problems.
-
Succession planting: Because dill bolts quickly, sow new seeds in your pots every three to four weeks. This ensures you’ll have fresh leaves throughout the season, even as older plants begin to flower and seed.
Storing Your Dill Harvest
Fresh dill leaves have a short shelf life. Here are a few ways to make the most of your harvest:
-
Refrigeration: Wrap stems in a damp paper towel and place them in a plastic bag in the fridge. They’ll last about a week.
-
Freezing: Chop dill leaves and freeze them in ice cube trays with a little water or oil. This preserves flavor for soups and sauces.
-
Drying: Air-dry or use a dehydrator to preserve leaves, though drying tends to reduce flavor intensity compared to freezing.
-
Seeds: Store in airtight jars once fully dry. They can be used in baking, pickling, or seasoning.
Conclusion
Harvesting dill from potted plants is more than just snipping leaves—it’s about understanding the plant’s lifecycle and working with it to maximize flavor and longevity. Start harvesting leaves once the plant is tall enough, trim regularly to delay flowering, and allow some plants to produce seeds for future use. With proper care, even a single container of dill can provide months of fresh herbs for your kitchen and a stash of seeds for both cooking and replanting.
By following these best practices, you can enjoy a continuous supply of dill and make the most of this fragrant and versatile herb right from your own container garden.


