Bay leaf plants, also known as Laurus nobilis, are prized not only for their aromatic leaves used in cooking but also for their evergreen charm that brings year-round greenery to any garden. While traditionally planted in the ground, bay leaf plants adapt beautifully to container gardening. One of the most creative and functional ways to grow them is in wooden crate planters. This method is perfect for backyards of all sizes and provides a sustainable, stylish, and practical approach to cultivating your own fresh bay leaves.
Why Choose Crates for Bay Leaf Plants?
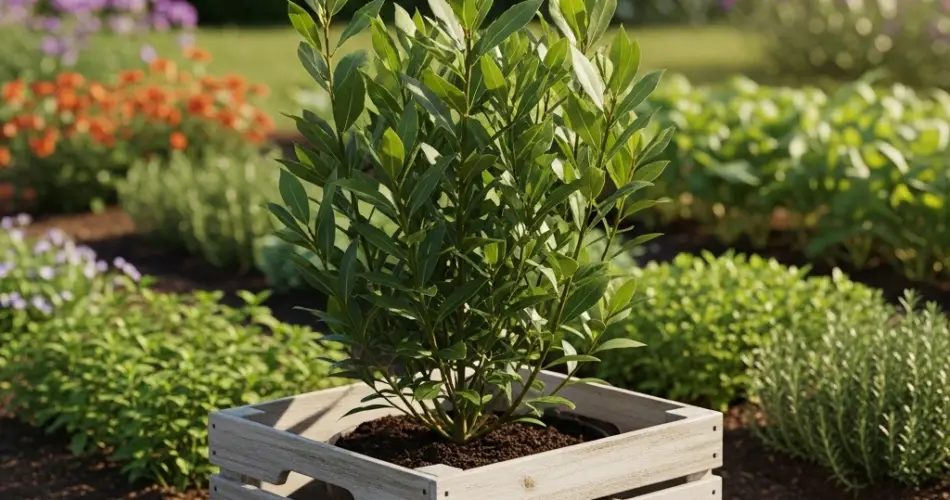
Wooden crates offer a rustic, natural look that complements backyard spaces. They are spacious enough for shrubs like bay laurel yet compact enough to move around if needed. Unlike conventional pots, crates allow for deeper root development, which benefits a slow-growing perennial like bay laurel.
Another advantage is versatility—crates can be placed along fences, used as raised beds, or even arranged in tiers for a vertical herb garden. By repurposing old crates, you also reduce waste while giving new life to materials that might otherwise be discarded.
Preparing the Crate
The success of growing bay leaf plants in crates depends on preparing the container correctly. Start with a sturdy wooden crate that is at least 16–20 inches deep. Bay laurel needs enough room for root growth to ensure it stays healthy over the years.
Drill several drainage holes at the bottom of the crate to prevent waterlogging, as bay plants do not tolerate consistently wet soil. To keep the soil from washing away while maintaining good drainage, line the inside with landscape fabric or burlap. If your crate is untreated, consider applying a natural, non-toxic sealant to help it withstand outdoor conditions. Finally, elevate the crate slightly off the ground with blocks or pot feet to allow airflow underneath and prevent rotting.
Soil Mix for Healthy Growth
Bay laurel thrives in soil that drains well but retains enough moisture for steady growth. An ideal mix for crate planters consists of:
-
50% quality potting soil for structure and aeration
-
30% compost to enrich the soil with organic nutrients
-
20% coarse sand or perlite to improve drainage
This blend creates a balanced medium that supports bay laurel’s root system while preventing excess moisture buildup. Adding a slow-release organic fertilizer at planting time provides a nutrient boost for young plants.
Planting Bay Laurel in Crates
You can grow bay leaf plants from seeds, cuttings, or young plants purchased from a nursery. While seeds are an option, they germinate slowly, making small starter plants the more practical choice for crate gardening.
Plant your bay in the center of the crate, ensuring the root crown sits just above soil level. Backfill with your prepared soil, gently firming it around the plant. Water well after planting to help the roots settle.
Position the crate in a spot where the plant receives at least 6–8 hours of direct sunlight daily. Bay laurel enjoys full sun but can adapt to partial shade, especially in very hot climates.
Watering and Feeding
Consistency is key when watering bay laurel. Check the soil regularly, and water when the top inch feels dry. Crates can dry out faster than garden beds, particularly in warm weather, so keep a closer eye on moisture levels. However, avoid overwatering, as soggy roots can harm the plant.
Fertilize every 6–8 weeks during the growing season using organic options like compost tea or a balanced liquid fertilizer. This supports lush leaf production and helps keep the plant vibrant.
Pruning and General Care
Bay leaf plants can grow quite large over time, but regular pruning helps maintain a manageable size, especially in crate planters. Prune lightly in spring to shape the plant and encourage bushier growth. Remove any dead or yellowing leaves to keep the plant healthy.
Pests are uncommon but can include scale insects or aphids. If they appear, wipe the leaves with a damp cloth or apply a mild soap spray. Mulching the top of the soil with straw or bark chips helps regulate moisture and temperature.
Harvesting Bay Leaves
Once your plant is well established, you can begin harvesting leaves year-round. Mature leaves, which are darker green, have the best flavor. To preserve their aroma, dry them before storing. Simply pick the leaves, rinse them, and allow them to air-dry in a cool, dry place.
Harvest lightly at first, giving the plant time to grow. Once established, your crate-grown bay can provide a generous supply of aromatic leaves for your cooking.
Benefits of Crate-Grown Bay Laurel
-
Portability – Crates can be moved to follow sunlight or be sheltered from harsh weather.
-
Soil Control – You decide the soil mix, ensuring proper nutrients and drainage.
-
Space-Saving – Perfect for small backyards or patio herb gardens.
-
Sustainability – Repurposing old crates is eco-friendly and adds rustic charm.
Final Thoughts
Growing evergreen bay leaf plants in backyard crate planters is an excellent way to combine practicality, sustainability, and beauty. With a well-prepared crate, proper soil mix, and consistent care, your bay laurel will flourish, providing fragrant leaves for cooking and lush greenery for your backyard.
Whether you’re an experienced gardener or just starting out, crate gardening with bay leaf plants offers a rewarding experience. It’s a sustainable, space-efficient, and visually appealing method that turns simple crates into thriving herb planters. Over time, your evergreen bay will become both a culinary treasure and a decorative highlight in your garden.


