DIY Automatic Plant Watering System Using Plastic Bottles
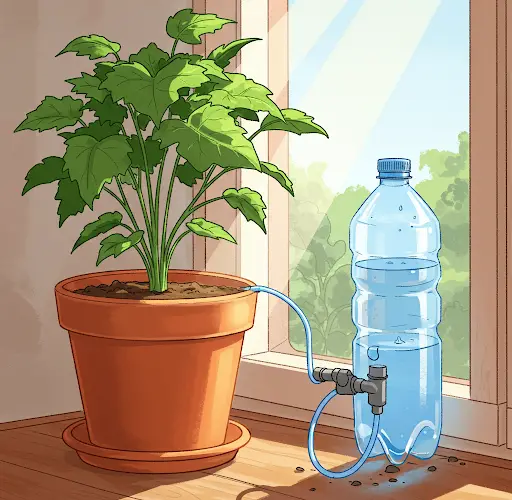
Keeping plants hydrated can be a challenge, especially during hot seasons, vacations, or for busy plant owners. While commercial automatic watering systems are available, they can be costly or require electricity. A simple, eco-friendly, and nearly free alternative is to use plastic bottles to create your own automatic watering system.
This method works well for both indoor and outdoor plants, and it helps reduce plastic waste by repurposing bottles that would otherwise be thrown away. Here’s everything you need to know to create an effective plant watering system using plastic bottles.
Why Use Plastic Bottles for Watering Plants?
Plastic bottles are readily available, lightweight, and easy to modify. They can act as slow-drip irrigation systems, gradually releasing water into the soil, which keeps it moist without overwatering. This technique is great for small gardens, potted plants, balcony plants, and even raised beds.
Some key benefits:
-
Low cost: Reuses waste bottles you already have.
-
Eco-friendly: Reduces plastic waste.
-
Time-saving: Waters your plants even when you’re away.
-
Customizable: Adjust to suit the needs of different plant sizes and soil types.
Materials You’ll Need
-
Used plastic bottles (500 ml to 2-liter size, depending on plant size)
-
A small nail or needle
-
A lighter or candle (optional, for heating the nail)
-
A knife or scissors
-
String or a piece of cloth (optional for wick method)
-
Soil or mulch
Method 1: Upside-Down Bottle Drip System
This is the most common method and works well for garden beds, large pots, and outdoor plants.
Steps:
-
Choose the Right Bottle: Use a 1-liter or 2-liter bottle for large plants, and smaller bottles for small pots.
-
Puncture the Cap: Use a hot nail or needle to make 2–4 small holes in the cap. The size of the holes will determine how fast the water drips. Start small—you can always enlarge them if needed.
-
Fill with Water: Fill the bottle completely.
-
Insert Into Soil: Quickly turn the bottle upside down and bury the neck a few inches into the soil near the base of the plant. The soil will act as a filter, and the water will slowly seep out.
-
Monitor and Refill: Refill every few days, depending on the plant’s needs and climate.
Tip: You can add small pieces of cloth inside the cap to further slow the drip rate if it seems too fast.
Method 2: Sideways Bottle Buried with Holes
This method provides more even water distribution and is great for long containers or rows of plants.
Steps:
-
Take a Bottle: Any size will work depending on how much water you want to store.
-
Make Holes on the Side: Use a hot needle or nail to poke 4–6 small holes along one side of the bottle.
-
Position in Soil: Lay the bottle horizontally in the soil with the holes facing downward. Cover it lightly with soil, leaving the bottle neck visible for refilling.
-
Fill with Water: Remove the cap, fill the bottle, and replace the cap to prevent evaporation.
This method works best when the soil is already moist, as it helps evenly distribute water to the plant roots over time.
Method 3: Wick System Using Cloth
For small indoor plants, the wick system is simple and clean.
Steps:
-
Cut a Strip of Cotton Fabric: An old T-shirt, string mop strand, or shoelace works well.
-
Fill a Bottle or Jar with Water: Place it next to the plant.
-
Insert Wick: Push one end of the wick into the water container, and bury the other end a few inches into the soil of your plant pot.
-
Let Gravity Work: The water will slowly travel through the wick and into the soil, keeping it moist over several days.
This method is silent, drip-free, and perfect for indoor setups where you don’t want a mess.
Tips for Best Results
-
Test Your Setup First: Always test for drip speed before leaving plants unattended.
-
Keep Bottles Clean: Algae can grow in outdoor bottles—rinse them regularly.
-
Use Mulch: Adding mulch around your plants helps retain soil moisture and reduces how often you need to refill bottles.
-
Use Rainwater: If you collect rainwater, it’s a great way to fill these bottles and reduce water bills.
When to Use This Method
-
During travel or vacations when you can’t water daily.
-
For balcony or garden plants in hot weather.
-
When you want to conserve water and prevent overwatering.
-
As an emergency backup during dry spells.
Conclusion
Creating an automatic watering system with plastic bottles is a simple yet powerful solution for plant care. It requires no electricity, timers, or expensive gear—just a little creativity and some recycled materials. Whether you’re a beginner gardener or a seasoned plant lover, this method will save you time and help your plants thrive with minimal effort.
Try it out, tweak it for your setup, and enjoy greener, healthier plants with less daily hassle!