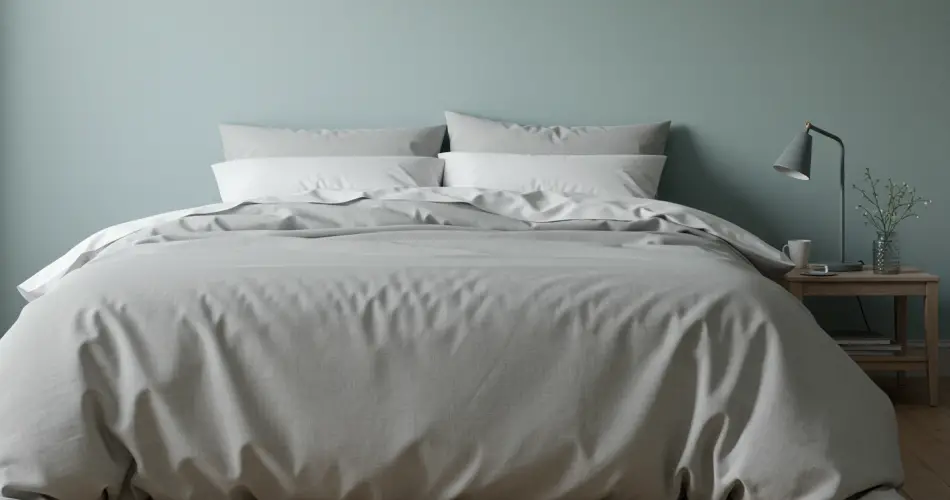
A duvet is one of the most essential elements for a cozy, comfortable bed, but over time even the best quality duvets lose their fresh appearance. Daily use, repeated washing, and natural wear can leave them looking faded, stained, or simply less appealing. The good news is that you don’t need to buy a brand-new duvet every time it starts looking old. With a little creativity and basic sewing skills, you can sew a duvet cover that gives your bedding a brand-new look while protecting your duvet from future damage.
Sewing your own duvet cover may sound complicated, but it is actually a simple project that requires minimal equipment, some fabric of your choice, and a sewing machine. With just a few steps, you can transform your duvet into a stylish, functional, and long-lasting piece.
Why Make Your Own Duvet Cover?
Duvet covers are essentially protective fabric cases, similar to a pillowcase but larger, into which the duvet is inserted. They can be removed, washed, and replaced as needed, making them an easy way to keep bedding clean and hygienic.
Making your own duvet cover has several advantages:
-
Cost-effective: Instead of buying a new duvet, you refresh the one you already own.
-
Customizable: Choose fabrics, patterns, and textures that match your bedroom décor.
-
Eco-friendly: Repurpose old fabrics you may already have at home.
-
Protective: Keeps your duvet clean and reduces wear and tear.
Whether you want to cover the duvet directly by sewing fabric onto it or create a removable sack-style cover, the process is straightforward.
Step 1: Wash and Prepare Your Duvet
Before you begin sewing, it’s important to wash your duvet thoroughly. This ensures that when you place it inside the cover, it will be fresh, clean, and ready to use. A clean duvet also makes the final result more satisfying and hygienic.
Step 2: Measure Your Duvet
Accurate measurements are the key to a well-fitting duvet cover. Lay your duvet flat on a large surface and measure its length and width. Write down the dimensions carefully. These will be the base measurements for your fabric.
If you are making a sack-style cover, remember that the cover will need to be slightly larger than the duvet to allow room for inserting it. For this reason, add about 30 centimeters (roughly 12 inches) to your measurements to ensure comfort and easy handling.
Step 3: Choose Your Fabric
Selecting the right fabric is both a practical and creative decision. You can opt for plain colors, bold patterns, or soft textures, depending on your personal taste and bedroom style. Popular options include:
-
Cotton: Breathable, durable, and easy to wash.
-
Flannel: Soft and warm, ideal for winter months.
-
Linen: Light, elegant, and perfect for a natural look.
Make sure the fabric is wide enough to cover the duvet. For a simple top cover, less fabric is needed. For a full sack-style duvet cover, you’ll need roughly double the fabric.
Step 4: Cut and Mark the Fabric
Place your fabric on a flat surface. Using tailor’s chalk or a washable fabric marker, draw the outline of your duvet measurements, remembering to add the extra allowance. Then, carefully cut the fabric pieces. You’ll need two identical panels: one for the front and one for the back.
Step 5: Add Elastic for Stability
To help the duvet stay in place inside the cover, you can add elastic pieces to the corners. Cut four short pieces of elastic and pin them at the corners of one fabric panel. These will later be attached to the corners of your duvet to prevent shifting.
Step 6: Pin and Prepare for Sewing
Lay the two fabric panels on top of each other with the right sides (the patterned or decorative sides) facing inward. Secure them together with pins, making sure the elastic pieces remain in place at the corners. This step ensures the fabric won’t shift as you sew.
Step 7: Sew the Panels Together
Using a sewing machine, stitch along the edges of the fabric. Remember, you only need to sew three sides completely shut. Leave one side open, as this will serve as the entry point for the duvet.
Always sew with the fabric’s inner sides facing outward so that when you turn the cover right side out, the seams will be hidden. Once you’ve finished sewing, iron the seams to create neat, flat edges.
Step 8: Insert the Duvet
Turn the duvet cover right side out. To insert the duvet more easily, roll it tightly and place it inside the cover from the open end. Once it’s inside, unroll it and adjust the corners so it lies evenly.
Step 9: Secure the Opening with Buttons or Closures
To prevent the duvet from slipping out, add a closure system to the open end. Buttons are a simple and effective choice. You can use matching or contrasting buttons depending on your style. If you don’t have new buttons, repurpose old ones since they’ll be hidden inside the cover.
Sew the buttons along the open edge of the cover, and create buttonholes or loops (you can also use the elastic from earlier) to fasten them securely. This ensures your duvet stays in place and the cover remains neat.
Step 10: Enjoy Your “New” Duvet
Once secured, your duvet cover is ready to use. You’ve effectively given your duvet a fresh new look without buying a new one. The fabric you chose becomes the new face of your bedding, transforming your bedroom with style and comfort.
Final Thoughts
Sewing your own duvet cover is an easy, budget-friendly project that can be done in a single afternoon. All it takes is some fabric, a sewing machine, and a little patience. The result is a customized, stylish duvet cover that keeps your bedding fresh and extends the life of your duvet.
Instead of replacing old duvets or buying expensive covers, try making your own. Not only will you save money, but you’ll also create something unique that reflects your personal taste. With the right fabric, a few buttons, and some basic sewing, you can transform your duvet into something that looks completely new—warm, inviting, and truly yours.