You Will Regret It If You Don’t Know This Method of Growing Gourds in Bags Sooner – Very Big Fruit!
Gourds are one of the easiest and most rewarding vegetables to grow at home. Whether you want to grow bottle gourds, bitter gourds, or ridge gourds, using bags instead of traditional soil beds can significantly increase your harvest while saving space. This method allows you to cultivate large, healthy gourds in a controlled environment, reducing the risk of soil-borne diseases and pests.
If you haven’t tried growing gourds in bags before, you’re missing out on an incredibly simple and efficient gardening technique. Follow this step-by-step guide to learn the secret to growing big, high-yielding gourds right at home.
Why Grow Gourds in Bags?
Growing gourds in grow bags has several advantages:
- Space-Saving: Ideal for small gardens, balconies, and patios.
- Better Root Aeration: Promotes healthy root growth and prevents waterlogging.
- Portable: Easily move bags to adjust for sunlight and weather conditions.
- Pest and Disease Control: Reduces soil-borne pests and fungal infections.
- Higher Yield: Nutrients are more concentrated, leading to bigger, healthier gourds.
Step-by-Step Guide to Growing Gourds in Bags
Materials Needed:
- Large Grow Bags (at least 10-15 gallons)
- Gourd Seeds or Seedlings (choose the variety you prefer)
- Nutrient-Rich Potting Mix (compost, coco peat, and garden soil mix)
- Organic Fertilizers (compost, banana peel tea, fish emulsion)
- Mulch (straw, dry leaves, or black plastic)
- Trellis or Support Structure (bamboo sticks, wire mesh, or wooden frames)
- Watering Can or Drip Irrigation System
Step 1: Choosing the Right Gourd Variety
There are several types of gourds you can grow in bags, including:
- Bottle Gourd: Large, cylindrical fruit, great for cooking.
- Bitter Gourd: Nutrient-rich with a unique bitter taste.
- Ridge Gourd: Long, ridged fruit, perfect for soups and stir-fries.
- Snake Gourd: Slender, elongated fruit with a mild flavor.
Choose a variety based on your preference and growing conditions.
Step 2: Preparing the Grow Bags
- Select a Large Grow Bag: At least 18 inches deep and 15 inches wide to accommodate root growth.
- Ensure Drainage: Punch 5-7 small holes at the bottom to allow excess water to drain.
- Fill with Soil Mix: Use a well-draining mixture of 40% garden soil, 40% compost, and 20% coco peat or sand.
- Moisten the Soil: Lightly water the soil before planting.
Step 3: Planting Gourd Seeds or Seedlings
From Seeds:
- Soak seeds in warm water for 24 hours to speed up germination.
- Sow 2-3 seeds per bag, about ½ inch deep.
- Cover lightly with soil and mist with water.
- Place in a warm, sunny location with at least 6-8 hours of direct sunlight.
- Germination takes 7-14 days.
- Thin out weaker seedlings, leaving only one strong plant per bag.
From Seedlings:
- Transplant when seedlings have 3-4 true leaves.
- Dig a small hole in the bag and carefully plant the seedling.
- Water gently to help roots establish.
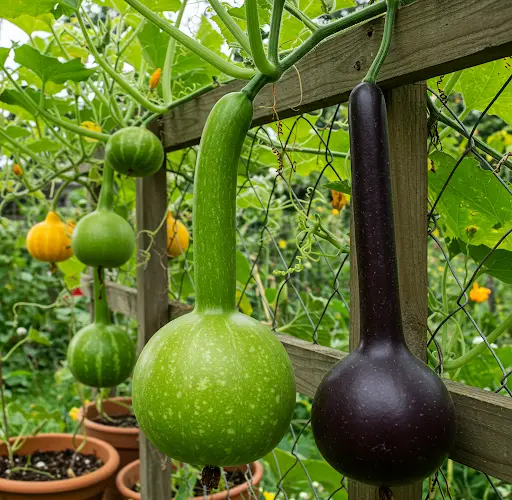
Step 4: Providing Support for Climbing Growth
Gourds are vining plants that require trellises or stakes to grow properly.
Best Support Options:
- Bamboo Stakes: Easy and natural support.
- Wire Mesh or Netting: Provides stability for climbing vines.
- Wooden or Metal Trellis: Ensures even fruit distribution.
Tie vines loosely to the support as they grow to encourage upward growth.
Step 5: Watering and Mulching
- Water deeply 2-3 times a week, depending on weather conditions.
- Avoid overwatering, as gourds dislike waterlogged roots.
- Apply mulch around the base to retain moisture and reduce weeds.
Tip: Water early in the morning to prevent fungal diseases.
Step 6: Fertilizing for Maximum Growth
Gourds are heavy feeders and require regular fertilization:
- After 2 Weeks: Apply liquid compost tea or diluted fish emulsion.
- During Flowering Stage: Use a low-nitrogen, high-potassium fertilizer (5-10-10) to encourage fruiting.
- Every 2-3 Weeks: Add banana peel tea for natural potassium and calcium.
- Boost Growth: Sprinkle wood ash or crushed eggshells for extra nutrients.
Step 7: Managing Pests and Diseases
| Common Issue | Cause | Solution |
|---|---|---|
| Aphids | Sap-sucking pests on leaves | Spray neem oil or soapy water |
| Powdery Mildew | High humidity and poor airflow | Ensure proper spacing and sunlight |
| Yellowing Leaves | Overwatering or nutrient deficiency | Reduce watering and apply organic fertilizer |
| Fruit Rot | Excess moisture or soil contact | Support fruits with netting or straw |
Using companion planting with marigolds, garlic, or basil can help deter pests naturally.
Step 8: Harvesting Large, Healthy Gourds
- Gourds mature in 60-90 days, depending on the variety.
- Harvest when fruits are firm, heavy, and reach their full size.
- Use sharp scissors or pruning shears to cut the fruit, leaving a short stem.
- Frequent harvesting encourages more fruit production!
Bonus Tips for Growing Even Bigger Gourds
- Pinch off excess shoots to direct energy into fruit growth.
- Provide full sun exposure for faster and healthier development.
- Rotate grow bags occasionally to ensure even sunlight distribution.
- Train vines upward to prevent overcrowding and disease.
- Pollinate manually by transferring pollen from male flowers to female flowers if natural pollinators are scarce.
Final Thoughts
Growing gourds in bags is a game-changing method that provides bigger, healthier, and more abundant fruit with minimal effort. This technique is perfect for home gardeners looking for space-saving, high-yield solutions. With proper soil, watering, and support, your gourd plants will thrive and reward you with a bountiful harvest.
Don’t wait—start growing gourds in bags today and enjoy the benefits of fresh, homegrown produce! You’ll wish you had known this method sooner!


