What I’ve Learned in 50 Years of Growing Potatoes – And How You Can Too
Growing potatoes may seem simple—just plant a few tubers in the ground and wait. But after 50 years of working the soil and harvesting hundreds of kilos of potatoes every season, it’s clear there’s much more to it than meets the eye. Successful potato cultivation requires knowledge, timing, and a few practical tricks passed down through generations or earned by experience.
If you’re aiming for a rich, healthy harvest of flavorful potatoes, whether in a garden bed, raised bed, or even containers, here are the time-tested lessons that continue to work year after year.
1. Start with the Right Seed Potatoes
Never use supermarket potatoes for planting. They may be treated with chemicals to prevent sprouting and often carry diseases that can linger in your soil. Always start with certified seed potatoes from a trusted supplier. These are disease-free, vigorous, and bred specifically for growing rather than eating.
If you want early potatoes, choose early-maturing varieties; for long storage, go with late-maturing types. You can even mix varieties to spread out your harvest.
2. Pre-Sprouting is Worth the Time
Before planting, allow your seed potatoes to “chit” or sprout. Place them in a bright, cool spot with the eyes facing up—an egg carton works great for this. In 2–3 weeks, you’ll see strong, short green shoots forming. This gives your potatoes a head start, especially in colder regions where the soil warms up slowly.
3. Prepare the Soil Well
Potatoes grow best in loose, well-drained soil rich in organic matter. A raised bed or deeply dug row with compost or aged manure added a few weeks before planting makes all the difference. Avoid fresh manure, as it can lead to scab on potatoes.
Make sure the soil is slightly acidic, with a pH around 5.5 to 6.5. If you’re not sure, a quick soil test kit will help you adjust the pH with sulfur or lime, if needed.
4. Plant Deep and Hill Often
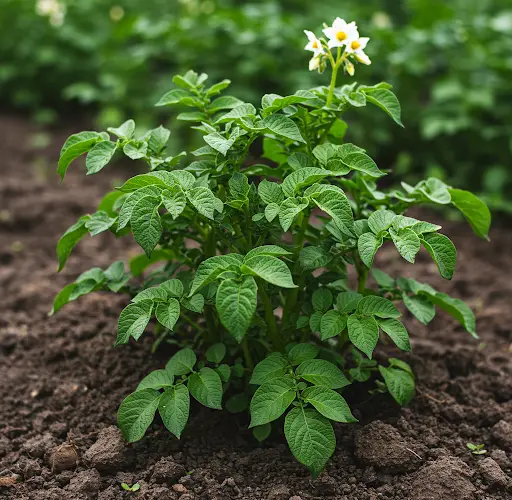
Plant your chitted potatoes about 10 cm (4 inches) deep, with 30–40 cm (12–16 inches) between them. As the plants grow, mound or “hill” soil up around the stems every couple of weeks. This encourages more tuber formation and protects developing potatoes from sunlight, which can turn them green and toxic.
Keep hilling until the plants are knee-high—this is one of the most important tasks for getting a heavy yield.
5. Feed and Water Properly
Potatoes are fairly hungry plants. While they don’t need constant fertilizing, a balanced organic fertilizer or compost tea at planting time and again during flowering will help boost yields. Avoid fertilizers high in nitrogen, which encourage leafy growth over tuber development.
Watering is key during the growing season. Keep the soil consistently moist but never soggy. The most critical time for watering is when the plants start flowering—this is when tubers begin to form. Inconsistent moisture at this stage can result in small or misshapen potatoes.
6. Control Pests and Diseases Naturally
Over five decades, one thing has become clear: prevention is easier than cure. Rotate crops each year—never plant potatoes in the same spot for at least three years. This reduces the risk of soil-borne diseases like blight and nematodes.
Keep an eye out for pests like Colorado potato beetles and aphids. Hand-picking, using neem oil, or introducing beneficial insects like ladybugs can help manage infestations naturally. If late blight is a problem in your area, use copper-based fungicidal sprays preventatively in damp weather.
7. Harvest at the Right Time
For new potatoes, harvest a couple of weeks after the plants flower. For mature potatoes, wait until the foliage dies back completely. Then, gently dig up the tubers, being careful not to puncture or bruise them.
Let your harvest air-dry in a shaded, well-ventilated place for a few hours to toughen the skin. For long-term storage, cure them for 1–2 weeks in a dark place at about 10–15°C (50–59°F), then store in cool, dark conditions with good airflow.
8. Save Your Best for Next Year
After harvest, choose your healthiest, largest potatoes with no signs of disease to save as seed for the next season. This traditional method of seed saving, combined with rotating planting spots, helps preserve strong genetics and ensures you have a crop ready to go when spring returns.
The Takeaway
After 50 years of potato growing, one truth stands out: consistency and care yield the best results. With proper soil preparation, thoughtful planting, and a bit of patience, growing potatoes can be one of the most rewarding experiences in your garden. Each year brings a new harvest—and with it, the satisfaction of seeing humble tubers turn into a pantry full of homegrown food.
Whether you’re a beginner or a seasoned grower, these tips can help you get the most out of your potato patch. Happy planting!