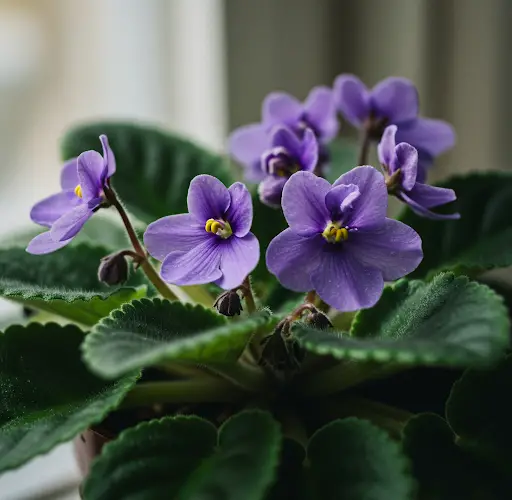
If your violets have not bloomed for a long time, today I will share four important tips to help your violets bloom profusely and produce new leaves. By following these key care tips, you can ensure that your violets flourish and remain healthy. Let’s dive into the first point right away.
1. Proper Placement and Light Conditions
One of the most critical factors for a thriving violet is its placement. You need to ensure that your violets receive the right amount of light. Violets love bright places but should not be exposed to direct sunlight. Direct sunlight can cause the leaves to lose their deep green color, turning them lighter and leading to burns. On the other hand, if violets are placed in a fully shaded area, their leaves will darken too much, which can hinder their growth.
The best spot for your violets is near a window that provides plenty of indirect sunlight. A great option is placing them behind a sheer curtain, where they can still receive bright light without exposure to harsh rays. This will allow them to develop healthy leaves and abundant blooms.
2. Proper Watering Techniques
Violets love moisture, and it is crucial not to let the soil dry out completely between waterings. However, overwatering can lead to root rot, infestations, and even the appearance of flies in the soil. To determine the right time for watering, touch the soil with your fingers. If it feels dry, it’s time to water your plant. If it still feels slightly damp, wait a little longer.
Watering violets too frequently can suffocate the roots and encourage fungal growth, whereas inconsistent watering can weaken the plant. A balanced approach is best—keeping the soil slightly moist but never soggy.
3. Propagating Violets Using the Greenhouse Method
If you want to multiply your violets, the easiest method is propagation from leaves. The best way to do this is to pluck a healthy leaf from the middle row, rather than selecting old or weak leaves. Once you have a good leaf, plant it directly into soil.
Violets root very quickly, but maintaining the right humidity level is key. You can also propagate violets using perlite, moss, or water. However, today I want to introduce you to the greenhouse method, which speeds up the rooting process significantly.
After planting the leaves, place them inside a plastic bag and seal it. This will create a humid environment, mimicking a greenhouse effect that encourages rapid root formation. Place the bag near a window where the violets can receive indirect light. Do not expose them to direct sunlight, as this could cause overheating inside the bag.
4. The Importance of Pruning, Soil, and Pot Selection
Pruning
Pruning plays a significant role in keeping your violets healthy and encouraging new blooms. If you want your violets to bloom abundantly and grow well, regular pruning is essential.
Every month, remove the yellowing and old leaves from the lowest part of the plant. This allows the violet to focus its energy on producing new leaves and flowers. Removing old leaves helps the plant allocate nutrients more efficiently, promoting healthier growth.
Choosing the Right Soil
Violets thrive in soft, well-draining soil. It is essential to choose a peat-based soil that is light and porous. If you cannot find peat soil, you can create a mix using garden soil with perlite or coconut peat. These mixtures allow for better drainage and prevent the soil from becoming too compact, which could suffocate the roots.
Selecting the Right Pot
When choosing a pot for your violets, opt for one that is not too deep and has plenty of drainage holes at the bottom. A shallow pot encourages quick root development, allowing the violet to grow more efficiently. The drainage holes help prevent excess water from accumulating at the roots, reducing the risk of rot.
Transplanting and Separating Baby Violets
Once your propagated violets have rooted and grown larger, it’s time to separate them into individual pots. Before starting the process, water the violets well to soften the soil, making it easier to separate them without damaging the roots.
You can use a small spoon to carefully remove the baby violets from the pot. Gently separate them, ensuring that each new plant has a healthy set of roots. If the baby violets are too small, it’s best to leave them together in the same pot to continue growing until they are strong enough for separation.
When planting the separated violets into new pots, make sure to create a small hole in the soil and place the violet carefully, ensuring the stem is not buried too deep. If the stem is buried too much, it can cause water to collect around the base, leading to root rot and stunted growth.
Final Thoughts
After successfully planting your baby violets, press the soil lightly to secure them in place. Make sure the stems remain slightly exposed above the soil surface. Water the plants gently from the top, ensuring that water does not collect at the base of the leaves. Over time, with proper care, your violets will develop strong roots and flourish with beautiful blooms.
By following these four essential tips—proper placement, correct watering, the greenhouse propagation method, and proper soil, pruning, and pot selection—you will see a significant improvement in your violets’ health and flowering ability. If you found these tips helpful, consider sharing them with other plant lovers!
Your violets will soon reward you with lush green leaves and abundant flowers, bringing beauty to your home. Keep caring for them consistently, and enjoy the vibrant blooms they produce!


