Peas are among the easiest vegetables to grow, and they reward you with tender, sweet pods that are delicious in both raw and cooked dishes. Even if you don’t have a traditional garden space, you can start pea seeds using recycled plastic bottles, then transfer them to larger containers, raised beds, or directly into the soil. This method is affordable, eco-friendly, and perfect for small-space gardeners who want to make the most of what they have.
This guide walks you through using bottles to sprout and grow peas from seed to healthy seedlings, giving you a head start on your harvest while reusing plastic that might otherwise end up in the trash.
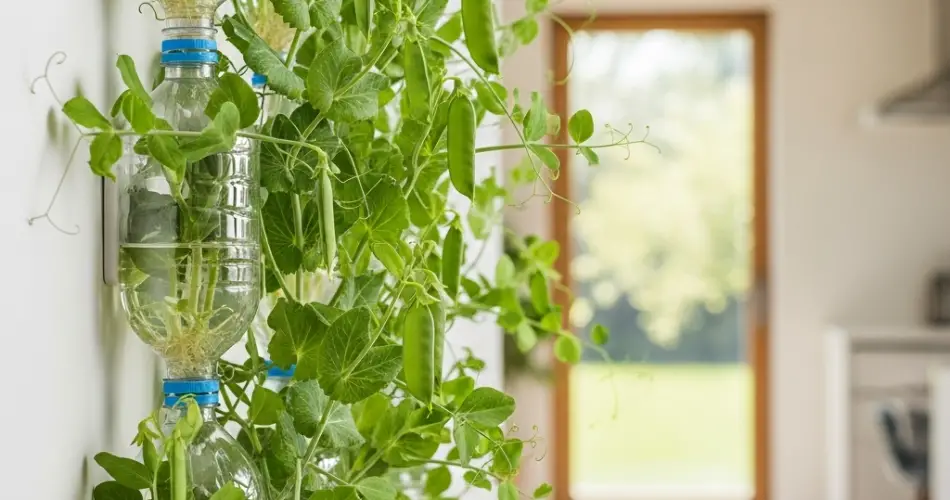
Why Use Bottles for Starting Peas?
Plastic bottles make excellent seed-starting containers for several reasons:
-
Moisture Control – The enclosed shape helps retain moisture, which is essential for germination.
-
Greenhouse Effect – Clear bottles allow sunlight in while maintaining warmth, encouraging faster sprouting.
-
Space Saving – They’re compact, making them ideal for balconies, windowsills, and small patios.
-
Recycling Benefit – You give single-use bottles a second life, reducing waste.
This method is especially useful in cooler seasons when starting peas indoors before transplanting ensures stronger, more resilient plants.
Choosing the Right Pea Variety
Before you start, decide what type of peas you want to grow:
-
Garden Peas (Shelling Peas) – Harvest for the seeds inside; pods are not eaten.
-
Snow Peas – Flat, tender pods harvested before seeds develop fully.
-
Snap Peas – Thick, crunchy pods that can be eaten whole.
All types grow well from bottle starts, but bush varieties are easier to manage in containers, while climbing varieties will need trellises later.
Materials You’ll Need
-
Clear or semi-transparent 1.5–2 liter plastic bottles
-
Sharp scissors or utility knife
-
Potting soil or seed-starting mix
-
Pea seeds
-
Water spray bottle
-
Small stick or chopstick for poking holes
Preparing the Bottle Planter
-
Cut the Bottle – Using scissors or a knife, cut the bottle in half or about two-thirds up from the base. The bottom part will hold the soil. The top part can act as a mini-greenhouse lid.
-
Drainage Holes – Poke several small holes in the bottom of the bottle for excess water to drain. Without this, the soil can become waterlogged, leading to root rot.
-
Fill with Soil – Add moist potting soil or seed-starting mix, leaving about 2–3 cm from the top edge.
Planting the Pea Seeds
-
Soak Seeds – Pea seeds germinate faster if soaked in water for 6–8 hours before planting.
-
Spacing – Make small holes about 2–3 cm deep and place one seed per hole. Space them about 4–5 cm apart within the bottle.
-
Cover and Water – Gently cover seeds with soil, then lightly mist with water to settle the soil.
-
Cover with Bottle Top – If using the top half of the bottle, place it over the bottom like a dome to trap warmth and moisture.
Caring for Bottle-Grown Peas
-
Light – Place bottles in a sunny spot where they get at least 6 hours of light daily. A south-facing windowsill is ideal.
-
Watering – Keep the soil consistently moist but not soggy. Mist rather than pour to avoid washing seeds out.
-
Ventilation – Remove the dome once seedlings sprout to prevent overheating and improve airflow.
-
Temperature – Peas prefer cooler conditions, around 13–18°C (55–65°F), making early spring and autumn ideal.
Transplanting to the Garden or Larger Pots
When seedlings reach about 10–15 cm tall and have several sets of leaves, they’re ready to move. Harden them off by placing the bottles outside for a few hours a day, gradually increasing their outdoor time over a week.
To transplant:
-
Water the soil in the bottle well so roots are less disturbed.
-
Gently squeeze and tap the sides of the bottle to loosen the soil block.
-
Plant into prepared garden soil or a larger container with good drainage.
-
Provide trellises or stakes if growing climbing pea varieties.
Harvesting Tips
-
Snow Peas – Harvest when pods are flat but fully grown.
-
Snap Peas – Pick when pods are plump but before peas become too hard.
-
Garden Peas – Wait until peas inside are round and sweet, then shell before eating.
Frequent picking encourages more pods, extending your harvest season.
Final Thoughts
Growing peas in recycled bottles is a clever, sustainable way to start your garden, especially in limited spaces. The method offers better control over early growth, reduces plastic waste, and ensures you can enjoy fresh, homegrown peas without needing a traditional garden bed. With just a few bottles, some soil, and seeds, you can turn your kitchen counter or balcony into a productive pea nursery.


