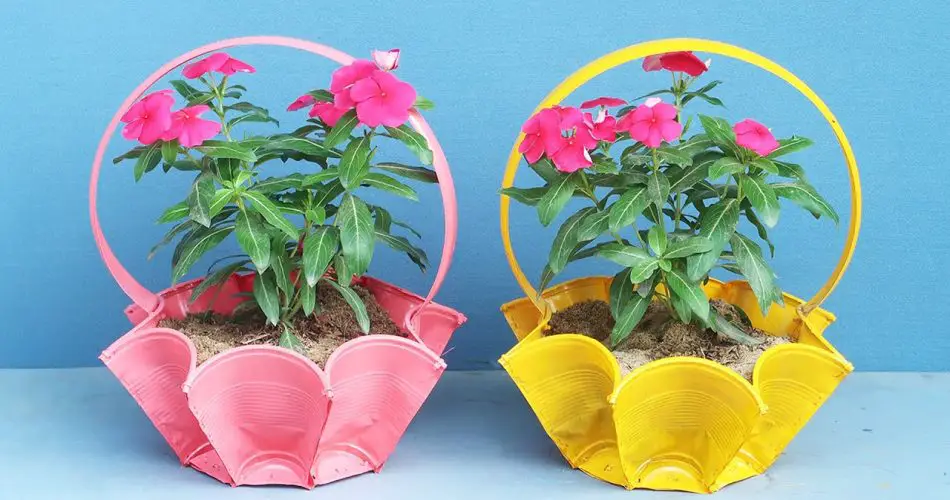
Looking for a fun and eco-friendly way to give your plants a stylish new home? Look no further! With just a few simple materials and a bit of creativity, you can transform discarded plastic cups into charming planters that will add a touch of personality to any space. Here’s how to make your own creative plant pots from plastic cups:
Materials Needed:
- Clean plastic cups (any size or color)
- Scissors or a craft knife
- Acrylic paint or permanent markers (optional)
- Potting soil
- Your choice of plants or succulents
Instructions:
- Clean and Prepare the Cups: Start by thoroughly cleaning and drying the plastic cups to ensure they are free of any dirt or residue. Remove any labels or stickers from the cups, as well.
- Customize (Optional): Get creative and personalize your plant pots by decorating them with acrylic paint or permanent markers. You can add colorful designs, patterns, or even write the names of the plants you’ll be growing in each cup.
- Make Drainage Holes (Optional): If you plan to use your plastic cups as planters for indoor plants, consider adding drainage holes to prevent waterlogging. Use scissors or a craft knife to carefully poke several small holes in the bottom of each cup.
- Fill with Soil: Once your cups are cleaned and decorated (if desired), fill each one with potting soil, leaving about an inch of space at the top for watering.
- Plant Your Plants: Carefully transplant your chosen plants or succulents into the cups, pressing down gently to secure them in the soil. Be sure to water your newly potted plants thoroughly after planting.
- Display and Enjoy: Arrange your creative plant pots in a sunny spot indoors or outdoors, and enjoy the beauty of your new planters! These upcycled plastic cup plant pots are not only functional but also add a unique and whimsical touch to any space.
Bonus Idea: Propagate Lucky Plants with Water
Another simple and creative way to grow plants is by propagating lucky plants (such as Pothos or Devil’s Ivy) in water. Here’s how:
- Take a healthy cutting from a mature lucky plant, making sure it has at least one node (where the leaves are attached to the stem).
- Place the cutting in a glass or jar filled with water, making sure the node is submerged.
- Change the water every few days to keep it fresh and prevent bacterial growth.
- After a few weeks, you should start to see roots forming on the cutting.
- Once the roots are a few inches long, you can transplant the cutting into soil to continue growing as a full-fledged plant.
Propagating lucky plants with water is a simple and rewarding way to grow new plants from cuttings, and it’s a great option for beginner gardeners or anyone looking to expand their plant collection without spending a lot of money.
With these easy-to-follow instructions, you can turn discarded plastic cups into creative plant pots and propagate lucky plants with water, all while adding greenery and charm to your home or garden. Happy gardening!
