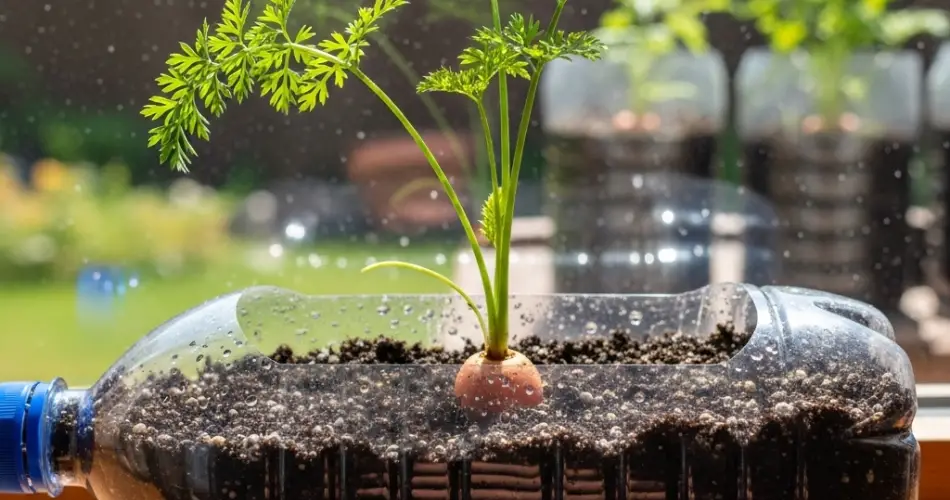
Carrots are one of the most popular root vegetables grown at home. Their crisp texture, sweet flavor, and versatility in the kitchen make them a favorite among gardeners and cooks alike. While they are usually planted directly into the soil outdoors, many gardeners face challenges such as uneven germination, poor soil preparation, or limited outdoor space. A clever solution to these challenges is starting carrot seeds in upcycled bottles.
This method not only helps reduce plastic waste but also creates a controlled environment for your seeds, leading to better germination rates and healthier seedlings. Whether you live in an apartment or have a garden but want a head start on your carrots, bottle seed starting is an eco-friendly and efficient approach worth trying.
Why Use Bottles for Carrot Seed Starting?
Carrot seeds are tiny and can be difficult to sow evenly. They require consistent moisture and light soil conditions to germinate properly. Starting them in upcycled bottles offers several advantages:
-
Eco-friendly: Reuses plastic bottles that would otherwise be discarded.
-
Moisture control: Bottles help maintain consistent humidity, which carrots need for sprouting.
-
Space-saving: Perfect for small balconies, windowsills, or kitchens.
-
Better germination: Controlled conditions mean stronger, healthier seedlings.
-
Transplant-friendly: Once seedlings are established, they can be easily moved to larger pots or garden beds.
Materials You’ll Need
To begin, gather these simple materials:
-
Clean plastic bottles (1–2 liters work best)
-
Carrot seeds (choose varieties suitable for containers, such as Nantes or Parisian)
-
Potting mix (light and well-draining)
-
Small pebbles or stones for drainage
-
A sharp knife or scissors
-
Spray bottle or watering can
Optional: A small amount of organic compost or fertilizer to enrich the soil.
Preparing the Bottle Planters
-
Cut the bottle: Take a clean plastic bottle and cut it horizontally about one-third from the top.
-
Create drainage: Use the bottom portion as your planter and poke 3–4 small holes in the base.
-
Add drainage layer: Place a thin layer of pebbles or small stones at the bottom.
-
Fill with soil: Add the potting mix until the bottle is almost full, leaving about an inch of space at the top.
The bottle now functions as a mini greenhouse that provides warmth and moisture—perfect conditions for carrot seeds.
Sowing Carrot Seeds
-
Sprinkle carrot seeds evenly on the soil surface. Since they are very small, take care not to overcrowd them.
-
Cover lightly with a thin layer of soil or vermiculite. Carrot seeds need light to germinate, so avoid burying them too deep.
-
Mist the surface gently with a spray bottle to moisten without disturbing the seeds.
-
Place the bottle in a bright spot with indirect sunlight.
Creating a Mini Greenhouse
You can use the top portion of the bottle as a humidity dome. Invert it and place it back on top of the bottom half. This creates a closed environment that locks in warmth and moisture, speeding up germination. Remember to remove the cap to allow some air circulation and prevent mold.
Caring for Germinating Seeds
Carrot seeds typically take 10–20 days to sprout, so patience is required. During this time:
-
Moisture: Keep the soil evenly moist. Dry conditions will slow or prevent germination.
-
Light: Ensure the bottles are in a bright location, ideally near a sunny window.
-
Ventilation: Remove the top half occasionally to prevent excess humidity and fungal growth.
Once seedlings appear, thin them carefully by snipping weaker sprouts at the base. Leave only the strongest, spacing them about an inch apart.
Transplanting Seedlings
When the seedlings have grown to about 2–3 inches tall and developed several leaves, they are ready for transplanting. Carrots dislike root disturbance, so handle them carefully:
-
Prepare a garden bed or deep container with loose, well-draining soil.
-
Gently remove the seedlings from the bottle, keeping soil around the roots intact.
-
Plant them at the same depth as they were growing in the bottle.
-
Water gently to help them settle into their new home.
Alternatively, you can grow smaller carrot varieties directly to maturity in bottles, provided the bottle is deep enough to accommodate root growth.
Harvesting Your Carrots
Carrots are usually ready to harvest 60–80 days after planting, depending on the variety. Look for mature tops showing above the soil line. Gently loosen the soil around the root before pulling to avoid breakage.
Benefits of Bottle Seed Starting for Carrots
-
Reduces waste by reusing bottles.
-
Improves germination success rates.
-
Creates a sustainable gardening method for small spaces.
-
Provides healthy seedlings ready for transplanting.
-
Encourages eco-friendly gardening habits.
Conclusion
Starting carrots indoors with upcycled bottles is an innovative and sustainable way to ensure strong seedlings and reduce waste. By turning discarded bottles into mini greenhouses, you provide carrot seeds with the consistent warmth and moisture they need to sprout successfully. Once established, these seedlings can be transplanted outdoors or into larger containers for a full harvest.
This method proves that gardening doesn’t always require large plots of land or expensive equipment. With creativity and a commitment to sustainability, you can grow crisp, sweet carrots right from your kitchen windowsill using nothing more than seeds, soil, and a few bottles.


