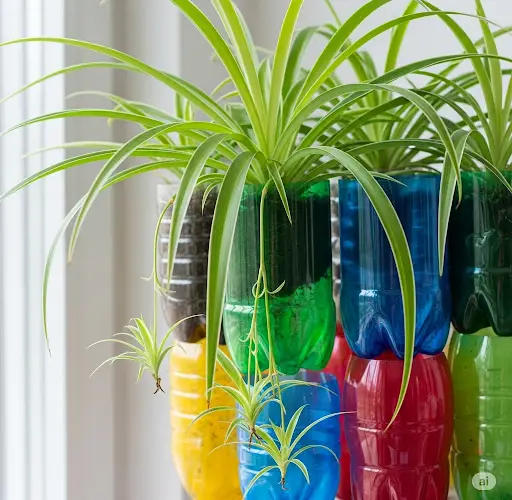
Spider plants (Chlorophytum comosum) are among the easiest and most forgiving houseplants you can grow. They’re well-loved for their cascading green-and-white leaves and their ability to purify indoor air. Many plant lovers grow them in bottles or other water-based setups because they’re low-maintenance and propagate effortlessly. But whether you’re growing spider plants in water or soil, trimming—or “cutting”—is essential for maintaining plant health, encouraging lush growth, and preventing overgrowth.
This guide shares practical tricks for cutting spider plants in bottles to ensure they stay vibrant, manageable, and beautiful all year round.
Why Cut or Trim Spider Plants?
Regular trimming offers several benefits:
-
Prevents overcrowding in the bottle or container.
-
Encourages new, healthy leaf growth by removing old or damaged foliage.
-
Boosts root health by eliminating excess plantlets or shoots.
-
Maintains an attractive shape and prevents legginess.
Spider plants grow quickly and produce long, arching stems with baby plants (called “spiderettes”) that can soon take over your space if left unchecked.
When to Cut a Spider Plant in a Bottle
You can cut spider plants at any time of year, but the best period is spring through early summer, when the plant is in its active growth phase. However, if you’re simply removing yellowing leaves or trimming roots, you can do this as needed.
If your spider plant in a bottle is becoming root-bound or developing algae due to decaying leaves, it’s definitely time to give it a trim.
Tools You’ll Need
-
Clean, sharp scissors or pruning shears
-
A container of clean water (if you’re propagating cuttings)
-
Optional: a cloth to wipe your tools with rubbing alcohol before cutting
Clean tools reduce the risk of transferring disease or bacteria to the plant, especially when working in water environments.
Step-by-Step Guide to Cutting Spider Plants in Bottles
1. Start with Damaged or Yellow Leaves
Remove any yellow, brown, or wilted leaves. These are not only unsightly but also use up the plant’s energy. Cut these leaves at the base where they meet the crown (center) of the plant.
Doing this regularly helps the plant redirect its energy toward new, healthy leaf production.
2. Remove Excess Spiderettes (Baby Plants)
Spider plants reproduce through long stems that carry plantlets at the ends. While they look decorative when cascading from the parent plant, too many can overwhelm the container or bottle and drain resources.
To remove them:
-
Use clean scissors to snip the stem connecting the baby plant to the main plant.
-
If the spiderette has its own roots, you can place it in a separate bottle of water to grow a new plant.
-
If you don’t want to propagate, simply discard the baby plant.
Trimming these also improves airflow and light penetration around the mother plant.
3. Trim Long or Leggy Leaves
If your spider plant is growing leaves that are excessively long or floppy, you can shorten them for a neater look. Cut each leaf just above a natural joint or near the tip if you’re only removing damage.
This is especially helpful in bottle-grown spider plants where space is limited, and a compact appearance is preferred.
4. Check and Prune the Roots (If Necessary)
In bottle setups, spider plant roots can become tangled or overgrown, which may lead to poor oxygen flow and algae buildup.
To prune the roots:
-
Gently remove the plant from the bottle.
-
Rinse the roots under water to remove slime or residue.
-
Use sterile scissors to trim away any blackened, mushy, or overly long roots.
-
Rinse the bottle thoroughly and refill with clean water before placing the plant back in.
Root trimming should only be done every few months, or when you notice overcrowding or root rot.
Maintenance Tips for Bottle-Grown Spider Plants
-
Change the water weekly to prevent bacterial buildup.
-
Use filtered or rainwater when possible to avoid chlorine and mineral buildup on roots.
-
Keep the plant in bright, indirect light for optimal growth.
-
Wipe the bottle regularly to keep algae and debris from clouding the water.
-
Avoid overfeeding – spider plants in water need only a tiny amount of liquid fertilizer monthly, if at all.
Final Thoughts
Trimming your spider plant, especially when grown in a bottle or water-only setup, is an essential part of plant care that promotes long-term health and beauty. Whether you’re removing old leaves, cutting off spiderettes, or refreshing the roots, regular maintenance keeps the plant vibrant and compact.
Spider plants are resilient and bounce back quickly after pruning. With these simple cutting tricks, you can enjoy a cleaner, greener, and more decorative indoor plant that thrives in even the smallest spaces.


