Too Surprised! How I Grow Potatoes for Lots of Tubers – Simple but Very Productive
Growing your own potatoes at home might seem like a challenge, but it’s actually one of the most rewarding and surprisingly simple gardening experiences. With the right method, even beginners can harvest a large number of tubers from just a few seed potatoes. Whether you have a backyard, balcony, or even just a small patio, you can grow potatoes successfully in containers, bags, or directly in the soil.
Here’s a straightforward, highly productive method to grow potatoes at home—with minimal effort and maximum yield.
Why Grow Potatoes at Home?
Potatoes are a staple food in many households, and growing them yourself has several benefits:
-
Cost-effective – grow kilos of potatoes from a small batch of seed potatoes
-
Chemical-free – control what goes into your soil and onto your food
-
Space-efficient – ideal for small spaces using bags, buckets, or vertical containers
-
Fun and rewarding – it’s like a treasure hunt when you harvest!
Most importantly, they’re easy to grow, even for first-time gardeners.
What You’ll Need
-
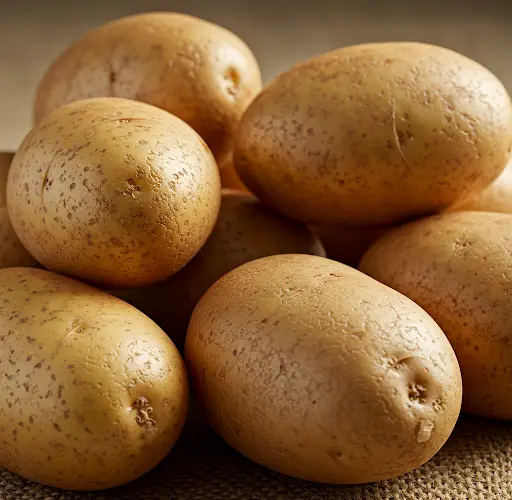
Seed potatoes (available at garden centers or from sprouted kitchen potatoes)
-
Containers: grow bags, plastic buckets, or sacks (at least 30–40cm deep)
-
Potting soil or a mix of garden soil and compost
-
A sunny spot with at least 6 hours of sunlight a day
-
Optional: organic fertilizer, straw or mulch for layering
Step-by-Step Guide to High-Yield Potato Growing
1. Select and Prepare Your Seed Potatoes
Start with certified seed potatoes to ensure they’re disease-free. If using sprouted kitchen potatoes, choose firm ones with strong “eyes” or sprouts.
Cut large potatoes into chunks with at least one or two eyes each. Let them dry for a day or two until the cut surfaces form a callus—this helps prevent rot.
2. Choose the Right Container or Planting Spot
Potatoes don’t need a lot of width, but they do need depth. Use:
-
Large plastic buckets with drainage holes
-
Special potato grow bags
-
Rice sacks or old shopping bags
-
Raised beds or directly in-ground
Make sure containers are deep enough to allow hilling or layering as the plants grow.
3. Plant the Potatoes
Fill your container with about 6–8 inches of soil. Place the seed potatoes cut-side down, sprout-side up, spaced a few inches apart. Cover with 3–4 inches of soil.
Water well after planting and place the container in a sunny location.
4. Hill the Plants Regularly
As the potato plants grow and reach 6–8 inches tall, cover them again with more soil or mulch, leaving just the top leaves exposed. This process is called hilling, and it encourages the plant to grow more tubers along the buried stem.
Repeat this every time the plant grows another 6 inches, until you reach the top of your container.
5. Watering and Feeding
Potatoes like consistent moisture but not waterlogged soil. Water when the top inch of soil feels dry. During the flowering stage, the plants need the most water to form healthy tubers.
Fertilize every two weeks with compost tea or a balanced organic fertilizer. Potatoes benefit from potassium-rich nutrients, which help tuber development.
Pro Tips for Bigger Yields
-
Use loose, well-draining soil – compacted soil can limit tuber growth.
-
Start with sprouted potatoes – they establish faster and produce earlier.
-
Don’t overwater – soggy soil leads to rot; moist, not wet, is best.
-
Rotate crops – don’t grow potatoes in the same spot each year to prevent disease build-up.
-
Mulch with straw or leaves – helps retain moisture and suppress weeds.
Signs It’s Time to Harvest
Once the potato plants flower, small new potatoes are forming and can be harvested. But for full-size potatoes, wait until the foliage turns yellow and begins to die back—usually about 2–3 weeks after flowering ends.
Stop watering at this stage to allow the tubers to mature and the skins to toughen up.
Harvesting the Potatoes
The most fun part! Gently dig into the soil with your hands or a small garden fork to uncover the hidden tubers. If grown in bags or buckets, simply tip them over and collect your potatoes.
Brush off excess soil but avoid washing them if you plan to store them—moisture can lead to spoilage. Let them air-dry in a cool, shady spot for a few hours.
Storing Your Harvest
Store mature potatoes in a cool, dark, well-ventilated place. Avoid plastic bags—use paper sacks or cardboard boxes instead. Keep them away from onions, which release gases that can speed up spoilage.
Properly stored, homegrown potatoes can last for several months.
Final Thoughts
Growing potatoes at home is easier than you think—and incredibly productive when done right. With a few sprouted potatoes, a couple of containers, and a little patience, you can enjoy a generous harvest of fresh, flavorful spuds that beat anything from the store.
This simple method doesn’t require a garden or special tools—just the willingness to try. Once you experience the satisfaction of digging up your first batch of homegrown potatoes, you’ll want to grow them year after year.