Simple Way to Revive an Orchid Stem at Home
Orchids are beautiful and delicate plants, but they can sometimes suffer from rot, disease, or damage. Many people might think that a rotting orchid stem is beyond saving, but with the right care and a simple method, you can revive your orchid and encourage it to grow healthy roots again. In this guide, I will share a straightforward way to restore a damaged orchid stem using natural ingredients that are easily available at home.
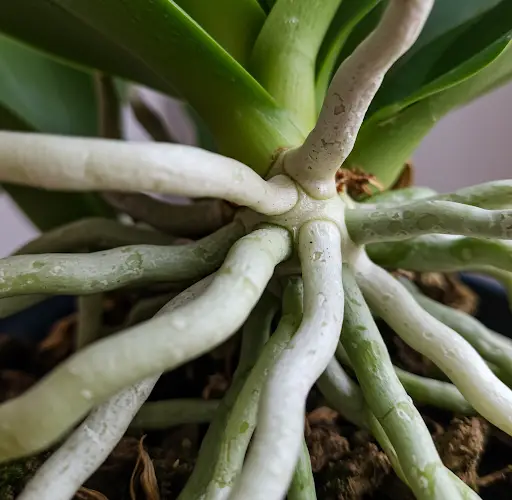
Step 1: Assessing the Orchid’s Condition
Before taking any action, carefully check the condition of your orchid stem. If the leaves are rotten, they may contain bacteria and fungi that can spread and further damage the plant. Do not rush to throw the orchid away; instead, take the time to examine it closely. If the stem is still firm and has some healthy tissue, it can still be saved.
Start by removing all the old planting material. This includes any moss, bark, or soil that may be clinging to the roots. Next, inspect the roots carefully and cut off any damaged, rotting, or dead sections using a clean pair of scissors or pruning shears. Be sure to sterilize your cutting tools before and after use to prevent spreading bacteria or fungi.
Step 2: Cleaning and Disinfecting the Orchid
After trimming the damaged parts, wash the remaining healthy roots thoroughly. You can do this by gently rinsing them under lukewarm water to remove any dirt or debris. Then, use a clean towel or tissue to carefully wipe off excess moisture and allow the plant to dry for a few minutes.
Once the orchid is clean, prepare a natural disinfecting solution. Take three tablespoons of rice and add them to one liter of water. Rice water is rich in vitamins and nutrients that help promote healthy root growth. Additionally, add one clove of garlic to the mixture. Garlic has powerful antibacterial and antifungal properties, which will help prevent infections and encourage the orchid’s recovery. Crush the garlic before adding it to the rice water to release its beneficial compounds.
Step 3: Soaking the Orchid in Nutrient-Rich Water
After preparing the garlic-infused rice water, strain it to remove any solid particles. Then, soak the orchid stem in this solution for about 30 minutes. This soaking process helps disinfect the plant, nourish the remaining healthy roots, and promote the growth of new roots.
Once the soaking process is complete, remove the orchid from the solution and check its roots. If they have turned a healthy green color, it means they have absorbed moisture and nutrients effectively. Place the orchid in a cool, shaded area for about a day to allow the base to dry completely. This step is crucial in preventing excess moisture buildup, which can lead to further rot.
Step 4: Preparing a New Growing Environment
For the next stage of restoration, you will need a plastic cup or container. Cut a small opening in the bottom for drainage. Then, take a piece of soft cotton or sponge and place it inside the cup. This will act as a moisture-retaining base to keep the orchid hydrated without making the roots too wet.
Carefully position the orchid inside the container, ensuring that the roots are touching the moist cotton or sponge. Add a small amount of water to the bottom of the cup, making sure the roots are just lightly touching the water. This setup allows the plant to absorb the necessary moisture while preventing overwatering, which can cause further damage.
Step 5: Maintaining Proper Care
To ensure successful recovery, check the orchid regularly and replace the water when it becomes dirty. Every three days, mist the base of the plant lightly to maintain the right level of moisture. It is essential to place the orchid in a well-lit, cool area with indirect sunlight. Avoid exposing it to direct sunlight, as this can stress the plant during its recovery phase.
Step 6: Observing Growth and Transplanting
After about 50 days, you should notice significant improvement in your orchid. If the method has been successful, the plant’s base will have developed new, healthy roots, and you may even see small new shoots emerging. This is a sign that the orchid is regaining strength and can now be transferred to a proper potting medium.
At this stage, you can replant the orchid in a fresh pot with suitable growing media such as bark, moss, or a specialized orchid mix. The newly grown roots will help the plant adapt to its new environment, and with continued care, the orchid will flourish once again.
Conclusion
Reviving an orchid stem at home does not require expensive tools or advanced gardening skills. By using simple household ingredients such as rice water and garlic, along with a careful step-by-step approach, anyone can restore a damaged orchid. This method not only helps the plant recover but also strengthens its roots, allowing it to thrive in the long run. With patience and proper care, your orchid will soon grow vibrant leaves and produce beautiful flowers once again.


