How to Revive a Phalaenopsis Orchid with Withered Roots
Orchids are delicate plants that require proper care to thrive. If your Phalaenopsis orchid has lost all its roots and only the stem and leaves remain, don’t be too quick to throw it away. If the leaves are still fresh, there is still a chance to revive your orchid. With the right technique and natural remedies, you can help your orchid regrow healthy roots and flourish once again. Follow this step-by-step guide to bring your orchid back to life using a natural treatment made from star anise.
Step 1: Prepare the Orchid
- Assess the Condition: Examine the orchid carefully. If the leaves are still green and firm, there is still hope for revival. Discard any rotten or dried-up leaves and roots to prevent the spread of disease.
- Wash the Orchid: Rinse the entire plant thoroughly with clean water to remove any debris or pathogens. Allow it to dry naturally in a shaded area before proceeding to the next step.
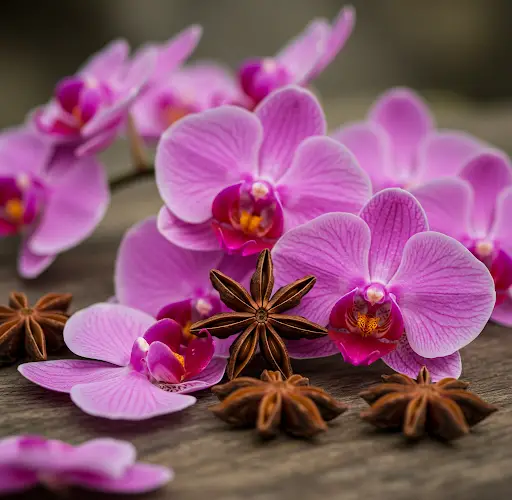
Step 2: Prepare the Star Anise Solution
Star anise is a natural ingredient packed with beneficial nutrients such as calcium, magnesium, potassium, sodium, copper, iron, and manganese. These elements help strengthen the roots, boost immunity, and prevent fungal infections. To prepare the solution:
- Place a handful of star anise in a plastic cup.
- Pour 800ml of boiling water over the star anise.
- Cover the cup and let the mixture steep for one hour.
- After an hour, strain the liquid to remove any residue, keeping only the infused water.
Step 3: Soak and Clean the Orchid
- Clean the Leaves: Dip a cotton pad into the star anise solution and gently wipe the top and bottom surfaces of the leaves. This helps remove dust, deter harmful insects, and prevent fungal infections.
- Soak the Orchid: Submerge the orchid in the star anise solution for 30 minutes. This will allow the plant to absorb beneficial nutrients and promote root regeneration.
- Dry the Plant: Remove the orchid from the solution, shake off excess liquid, and place it in a dry, well-ventilated area until it is completely dry.
Step 4: Planting the Orchid
- Take a plastic cup and place a piece of floral foam at the bottom. This will help retain some moisture while keeping the roots aerated.
- Add a layer of LECA (Lightweight Expanded Clay Aggregate) or another well-draining medium.
- Pour in a small amount of clean water, ensuring that it does not flood the plant.
- Secure the orchid’s stem to a support stick using clamps to keep it upright.
- Cover the top of the cup with a clear plastic lid to create a humid microenvironment. This helps stimulate root growth.
- Place the container in a cool, well-lit location, but avoid direct sunlight.
Step 5: Using the Remaining Star Anise Solution for Orchid Care
The leftover star anise solution can be diluted with 1.5 liters of water and used to support the recovery of other orchids. Here are three ways to apply it:
Method 1: Watering the Roots
- Pour the diluted star anise solution directly at the base of the orchid.
- The minerals in the solution will strengthen the roots, making them more resilient to environmental stress.
- Helps prevent fungal infections and repels harmful insects.
Method 2: Wiping the Leaves
- Soak a cotton pad in the solution and gently wipe both sides of the leaves.
- Regular cleaning helps keep leaves free from pests like aphids and mites.
- Promotes healthier, more vibrant foliage and encourages flower spike production.
Method 3: Misting the Entire Plant
- Fill a spray bottle with the diluted solution and lightly mist the orchid.
- This acts as a natural foliar fertilizer, helping the plant absorb nutrients through its leaves.
- The natural scent of star anise repels insects that could harm the orchid.
Step 6: Monitor and Care for the Reviving Orchid
- Apply the star anise treatment 1-2 times per month to maintain plant health and encourage root regrowth.
- Keep the orchid in a warm, humid environment with indirect sunlight.
- Avoid overwatering to prevent new root rot from occurring.
- After 45 days, you should start seeing new roots developing, and the plant will regain its strength.
- Once the roots are long enough, transfer the orchid to a proper potting medium like bark or sphagnum moss.
Results After 45 Days
By following these steps, you should see significant improvement in your orchid’s condition. The plant will begin to grow new, strong roots, and the leaves will appear firmer and healthier. After two months, the orchid should be fully recovered and ready to grow normally in its pot.
This natural method using star anise is highly effective for reviving weak orchids and encouraging healthy root development. With patience and consistent care, your Phalaenopsis orchid can thrive once again.
We hope this guide helps you successfully restore your orchids!


