How to Make a Powerful Homemade Liquid Fertilizer Using Fruit Peels
If you’re looking for a cost-effective, eco-friendly way to nourish your garden while reducing kitchen waste, making your own liquid fertilizer from fruit peels is a fantastic solution. This natural fertilizer is packed with essential nutrients like potassium, phosphorus, and trace minerals that promote strong plant growth, vibrant blooms, and bountiful harvests.
Whether you’re growing vegetables, fruit trees, or flowering plants, this DIY fertilizer is an easy and sustainable way to improve your garden’s health without relying on synthetic chemicals.
Why Use Fruit Peels for Fertilizer?
Fruit peels—such as those from bananas, oranges, apples, and other commonly eaten fruits—are loaded with nutrients beneficial for plant development. Instead of discarding them, you can harness their nutritional value by turning them into a liquid fertilizer. Not only does this help feed your plants, but it also reduces organic waste and contributes to a circular, zero-waste gardening routine.
Potassium, in particular, supports flowering and fruiting, while phosphorus helps with root development. When fermented in water, these nutrients become soluble and easily absorbed by plants, giving them a noticeable boost.
Step-by-Step Guide to Making Liquid Fertilizer from Fruit Peels
1. Collect and Chop Fruit Peels
Start by collecting fruit peels from your kitchen. Banana, orange, and apple peels are excellent choices, but you can use whatever is available based on the season and your local produce.
Chop the peels into small pieces. This helps speed up the decomposition and fermentation process, allowing nutrients to release into the water more quickly. The smaller the pieces, the faster and more effective the process will be.
2. Place Peels in a Container
Use a clean bucket or any container large enough to hold the mixture. Add the chopped fruit peels into the container, filling it about one-third of the way. Make sure there’s enough room for water and eventual fermentation bubbling.
3. Add Non-Chlorinated Water
Fill the container with rainwater or dechlorinated tap water. Chlorine in tap water can kill the beneficial microbes that play a crucial role in breaking down the peels. If you only have access to chlorinated water, let it sit uncovered for 24 hours to allow the chlorine to dissipate before using.
4. Introduce Garden Soil
This step may surprise you, but adding a few handfuls of your garden soil to the mixture significantly enhances the fermentation process. Soil is rich in natural microbes and bacteria that help break down the organic material, turning it into a nutrient-rich “tea” more efficiently. Stir the mixture thoroughly to ensure everything is well-combined.
5. Cover and Ferment
Cover the container loosely with a lid or a breathable cloth. The goal is to keep insects and debris out while still allowing some air circulation. Fermentation is an aerobic process, and proper airflow ensures healthy microbial activity.
Place the container in a warm, shaded area out of direct sunlight. Allow the mixture to ferment for at least 7 days. For a more concentrated fertilizer, you can leave it for up to 2 or 3 weeks. During this time, you may notice a slight smell, which is a normal sign that the fermentation is working.
Remember to stir the mixture every couple of days to help release gases and mix the ingredients thoroughly.
How to Use Your Liquid Fertilizer
Once the fermentation period is over, strain the liquid to separate the solids from the nutrient-rich fertilizer. Before applying it to your plants, you must dilute it to prevent overwhelming or burning plant roots.
Dilution Ratio:
-
1 part fermented liquid fertilizer
-
10 parts water
For example, if you have 1 cup of the concentrated fertilizer, mix it with 10 cups of water before use.
Application Methods:
-
Soil Drench: Pour the diluted fertilizer at the base of your plants to enrich the soil and feed the roots directly.
-
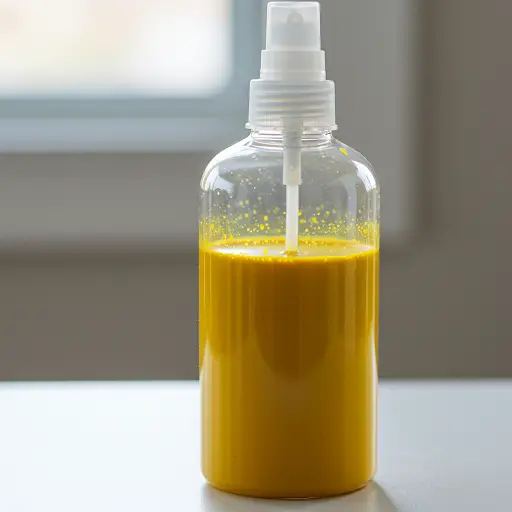
Foliar Spray: Fill a spray bottle and apply the diluted solution to the leaves and stems. Plants can absorb nutrients through their leaves, and this method also helps strengthen them against pests and diseases.
Benefits of Fruit Peel Fertilizer
-
Nutrient-Dense: Provides potassium, phosphorus, and other minerals that support overall plant health.
-
Eco-Friendly: Reuses organic waste and reduces the need for chemical fertilizers.
-
Cost-Effective: Utilizes ingredients you already have at home.
-
Safe and Organic: Gentle on plants, pets, and beneficial garden insects.
-
Improves Soil Health: Promotes microbial activity and better nutrient absorption.
Final Thoughts
This simple DIY liquid fertilizer is a wonderful way to turn your kitchen scraps into garden gold. By recycling fruit peels into a powerful nutrient solution, you not only boost your plant’s growth but also contribute to a more sustainable lifestyle.
Regular use of this organic fertilizer will result in greener leaves, stronger stems, and more productive plants—all without harming the environment. Give it a try in your garden, and enjoy the benefits of healthier, naturally nourished plants.