Spinach is one of the most nutritious and versatile leafy greens, and growing it in wooden crates is an excellent solution for urban gardeners with limited space. Whether you’re working with a balcony, patio, or small backyard, crate gardening offers a practical and productive way to grow your own spinach. With the right setup and care, you can enjoy continuous harvests of fresh, tender leaves all season long.
Here’s a complete guide to growing spinach in crates, from selecting materials to harvesting your greens.
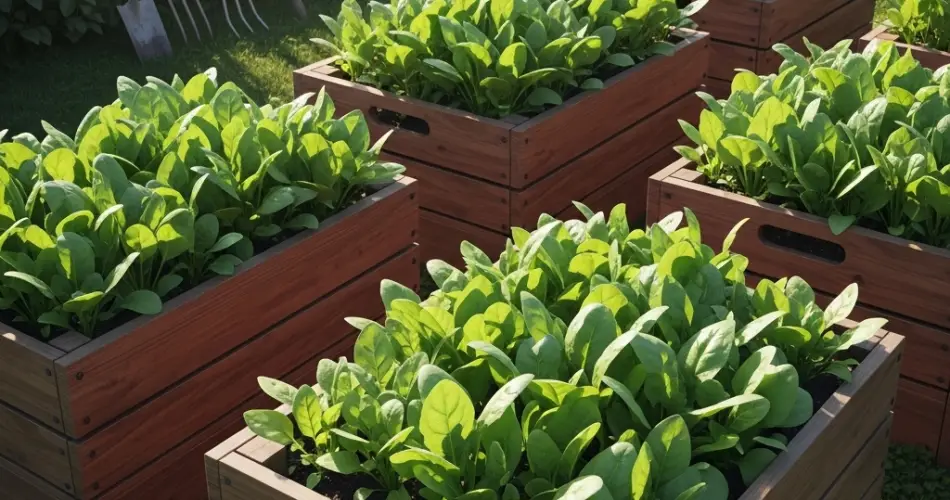
Why Use Crates for Spinach?
Wooden crates are ideal for spinach because this plant has a relatively shallow root system and doesn’t require deep soil. Crates are portable, space-saving, and can be placed just about anywhere with enough sunlight. They also allow for excellent drainage and can be reused for other vegetables later on.
Additionally, crate gardening allows for better control over soil quality and pests, which is a major advantage in urban environments.
What You Need to Get Started
To grow spinach in crates, gather the following materials:
-
Wooden crate (fruit crates or repurposed boxes work well)
-
Landscape fabric, burlap, or old cotton cloth
-
Quality potting mix enriched with compost
-
Spinach seeds (choose a variety suited to your climate)
-
Watering can or spray bottle
-
Organic fertilizer (optional)
Ensure that the crate is not chemically treated and has drainage holes at the bottom. If there are no holes, drill a few to allow excess water to escape.
Step 1: Prepare the Crate
-
Line the crate: Start by lining the inside with breathable fabric such as landscape cloth or burlap. This will keep the soil in place while allowing for proper drainage.
-
Add potting mix: Fill the crate with rich, well-draining potting mix. Aim for a soil depth of at least 6–8 inches to accommodate spinach roots.
-
Moisten the soil: Lightly water the soil before planting to make it evenly moist but not soggy.
Step 2: Sow the Seeds
Spinach can be sown directly into the crate. You can either scatter the seeds for baby leaf spinach or plant them in rows for full-size leaves.
-
Plant seeds about ½ inch deep and 2 inches apart.
-
Cover lightly with soil and gently water the surface.
-
Place the crate in a location that receives at least 4–6 hours of sunlight daily. Spinach prefers cool weather, so partial shade is ideal in warmer climates.
Germination typically takes 5–10 days, depending on temperature and seed variety.
Step 3: Provide Proper Care
Spinach is relatively low-maintenance but benefits from consistent moisture and good airflow.
-
Watering: Keep the soil consistently moist but not waterlogged. Crates may dry out quickly, so check daily.
-
Thinning: Once seedlings are 2–3 inches tall, thin them to allow about 4 inches of space between each plant. This helps prevent overcrowding and encourages healthy growth.
-
Fertilizing: If your soil lacks nutrients, you can feed your spinach with a diluted organic liquid fertilizer every 2–3 weeks.
Be cautious not to over-fertilize, as this can lead to excessive leaf growth and reduced flavor.
Step 4: Monitor for Pests and Disease
Crate-grown spinach is less prone to pests than ground-grown crops, but it’s still good to keep an eye out.
-
Aphids: These small pests can be removed with a strong stream of water or treated with neem oil.
-
Slugs: Less likely in crates, but if they appear, use crushed eggshells or diatomaceous earth around the base.
-
Mildew: Ensure good air circulation and avoid watering in the evening to reduce the risk of fungal disease.
Regularly removing damaged or yellowing leaves also helps keep the plant healthy.
Step 5: Harvesting Your Spinach
Spinach grows quickly and can be harvested as soon as the leaves reach a usable size—usually about 3–5 inches long.
-
Baby leaves: Begin harvesting individual leaves once they’re big enough to eat. Always take the outer leaves first and allow the center to keep producing.
-
Full harvest: If the plants are nearing the end of their cycle or beginning to bolt (produce flowers), you can cut the whole plant at the base.
With proper care, you can expect multiple harvests from a single crate throughout the growing season.
Step 6: Replant for Continuous Supply
To ensure a steady supply of spinach, consider succession planting every 2–3 weeks. After harvesting, remove old plants and refresh the soil by mixing in compost or organic matter before planting new seeds.
Crates can be reused multiple times as long as the structure remains intact. If you’re growing in a hot climate, try planting in early spring or fall to avoid bolting due to excessive heat.
Final Thoughts
Growing spinach in crates is a practical, affordable, and highly rewarding method for urban gardeners. With just a small investment of time and materials, you can enjoy fresh, pesticide-free greens at your fingertips. This method fits perfectly into balconies, terraces, and even sunny windowsills, turning small spaces into productive garden zones.
By following this step-by-step guide, you’ll have a lush and leafy spinach harvest, no matter how limited your space may be.


