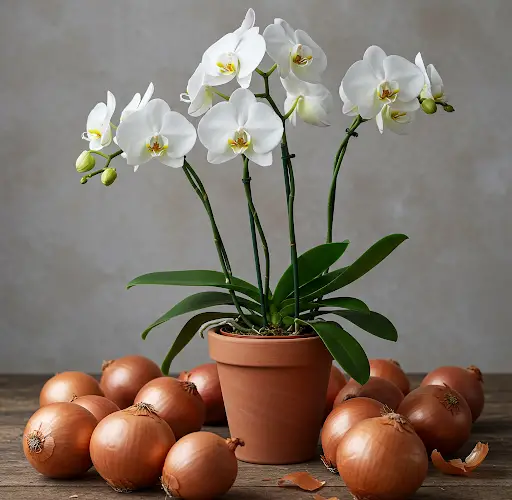
How to Revive a Dying Orchid Using Onion Peel Solution
Orchids are delicate and beautiful plants, but they require specific care to thrive. Sometimes, due to neglect or improper growing conditions, orchids can begin to deteriorate, losing their roots and showing signs of distress. Fortunately, even orchids that appear to be dying can be revived with patience and the right techniques. In this article, I will walk you through the process of rescuing an orchid that was on the verge of death, using a natural onion peel solution to stimulate root growth and eliminate harmful bacteria.
Step 1: Identifying and Preparing the Orchid for Recovery
Many people discard orchids when they start to decline, thinking they are beyond saving. However, if the leaves are still green, there is hope for revival. The first step is to remove all the old planting material, including the potting medium and any debris attached to the plant. After this, carefully examine the root system to assess the extent of the damage.
Using a pair of sterilized scissors or pruning shears, cut off all the damaged, rotten, or dried-out roots. This step is crucial, as unhealthy roots can spread infections and prevent new root growth. Once the damaged parts are removed, rinse the remaining roots with clean water to remove any residual dirt or debris.
Step 2: Preparing the Onion Peel Solution
Onion peel is an excellent natural remedy for reviving orchids because it contains antifungal and antibacterial properties. To prepare the solution:
- Take the outer skin (peels) of one or two onions and place them in a jar.
- Boil two liters of water and pour it over the onion peels in the jar.
- Let the mixture brew until the water cools completely.
- Once the liquid has cooled, strain it to remove any sediment and onion peels.
This solution will act as a natural disinfectant and growth stimulant for the orchid.
Step 3: Using Onion Water to Treat the Orchid
After preparing the onion water, the next step is to soak sphagnum moss in it for about 30 minutes. Sphagnum moss helps retain moisture and creates a suitable environment for new root development.
In addition to soaking the moss, use a soft cloth or cotton pad to clean the leaves of the orchid with the onion solution. This will help eliminate fungi and bacteria that might be lingering on the plant’s surface. Once the leaves are cleaned, soak the entire orchid in the onion water for another 30 minutes. This process not only disinfects the plant but also stimulates the growth of new roots, giving the orchid a second chance at life.
Step 4: Creating a Recovery Environment for the Orchid
To further aid the recovery process, you can recycle a plastic container into a mini greenhouse for the orchid. This setup will provide the necessary humidity and moisture without requiring frequent watering. Follow these steps to set up the recovery box:
- Take a plastic box and place a layer of small pebbles at the bottom. The pebbles will help with drainage and prevent excessive water accumulation.
- Spread the pre-soaked sphagnum moss on top of the pebbles to create a moist, airy substrate for the orchid.
- Position the orchid in the container, ensuring that its base is in contact with the moss.
- Add a small amount of water to the bottom of the container, just enough to maintain humidity. The water level should not touch the roots directly to prevent rot.
- Cover the container with a vented lid to maintain humidity while allowing some airflow.
This enclosed environment will keep the orchid hydrated and encourage it to develop new roots without the risk of overwatering.
Step 5: Monitoring and Patience
Once the orchid is placed in its recovery setup, it is crucial to monitor its progress. Keep the container in a warm, well-lit area but away from direct sunlight, which could cause overheating. There is no need to water the orchid during this stage, as the enclosed environment will provide enough moisture.
After about a month, you should start seeing significant improvements. New roots will emerge, and the orchid will appear more vibrant and healthy. As the roots grow stronger, they will absorb more nutrients and water, speeding up the recovery process.
Step 6: Transferring the Orchid to a Pot
Once the orchid has developed a sufficient number of strong roots, it is ready to be transferred into a pot. Choose a well-draining potting mix, such as a combination of bark, charcoal, and perlite, to provide proper aeration for the roots. Place the orchid in a pot with ample space for its roots to grow and water it lightly. Gradually transition the orchid to an outdoor or normal indoor growing environment, ensuring it receives the right balance of light, humidity, and ventilation.
Conclusion: The Power of Natural Remedies in Orchid Care
This simple yet effective method proves that even a seemingly lifeless orchid can be revived with patience and proper care. By using a natural onion peel solution, you can disinfect the plant, stimulate root growth, and create an ideal environment for recovery. With time and the right conditions, your orchid will flourish once again, producing strong roots and beautiful blooms.
If you found this guide helpful, consider sharing it with fellow orchid enthusiasts so they too can benefit from these natural restoration techniques. Happy gardening!