Growing your own potatoes doesn’t require a sprawling garden or heavy machinery. With wooden crates, you can produce a healthy crop right in your backyard, even in limited spaces. This rustic method combines practicality and charm while giving you control over soil quality and growing conditions. Whether you’re aiming for buttery new potatoes or hearty storage varieties, crate farming offers an efficient, tidy, and highly rewarding approach.
Why Choose Wooden Crates for Potatoes?
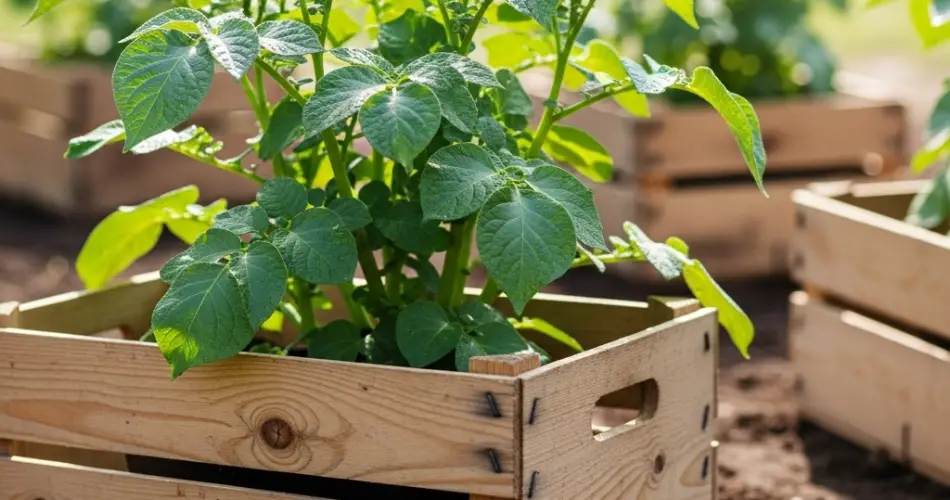
Potatoes are underground crops that thrive in loose, well-drained soil. Traditional in-ground planting can be challenging if your soil is compacted, rocky, or poorly draining. Wooden crates solve these problems by creating an elevated, contained space where you control every factor—from soil composition to watering.
Benefits of growing potatoes in crates:
-
Space efficiency for small backyards, patios, or balconies.
-
Improved soil control for better yields.
-
Better drainage, reducing the risk of rot.
-
Ease of harvesting, with minimal digging required.
-
Pest reduction, since the elevated structure deters some ground-dwelling insects.
Choosing the Right Crate
Potatoes need depth to develop healthy tubers. Select a sturdy, untreated wooden crate at least 14–16 inches deep and wide enough to support multiple plants.
Crate preparation:
-
Drill drainage holes if the crate doesn’t already have them.
-
Line the inside with burlap or landscape fabric to hold soil while allowing water to escape.
-
Place the crate on bricks or blocks to improve air circulation and prolong the life of the wood.
Selecting Potato Varieties
Different potato types suit different culinary needs and growing spaces.
-
Early varieties (e.g., Red Norland, Yukon Gold): Fast-maturing, great for fresh eating.
-
Mid-season varieties (e.g., Kennebec, Purple Majesty): Balanced storage and flavor.
-
Late varieties (e.g., Russet Burbank): Ideal for long storage.
For small crates, early varieties are the easiest to manage, as they require less time and hilling.
Preparing the Soil
Potatoes grow best in loose, nutrient-rich soil. A heavy mix can hinder tuber development.
Recommended crate mix:
-
40% high-quality garden soil
-
40% compost for nutrients
-
20% sand or perlite for aeration
Avoid excessive nitrogen fertilizers, which produce lush foliage but small tubers.
Planting Step-by-Step
-
Sprout seed potatoes by placing them in a cool, bright spot until they develop small green shoots (chitting).
-
Fill the crate with 4–6 inches of prepared soil.
-
Place seed potatoes, eyes facing up, about 8 inches apart.
-
Cover with 3–4 inches of soil.
As potato plants grow, hill them by adding more soil around the stems every time they reach about 6–8 inches tall. This encourages more tuber production and prevents sunlight from greening the potatoes.
Watering and Sunlight Needs
Potatoes need steady moisture but dislike waterlogged conditions.
-
Water deeply 1–2 times per week, depending on weather.
-
Keep soil evenly moist during tuber formation.
-
Position crates where they get 6–8 hours of sunlight daily.
Inconsistent watering can lead to irregular-shaped or cracked tubers.
Fertilizing for Strong Growth
Feed your potato plants with a low-nitrogen, high-potassium fertilizer after the plants are about 6 inches tall. Potassium encourages tuber formation, while too much nitrogen leads to excessive leaf growth.
Pest and Disease Management
Crates naturally reduce some pest risks, but you should still watch for:
-
Colorado potato beetles: Handpick or use organic sprays.
-
Aphids: Spray with water or neem oil.
-
Blight: Space crates apart for good airflow and avoid wetting foliage.
Rotating crops each year can also help prevent soil-borne diseases.
Harvesting Your Potatoes
-
For new potatoes: Harvest when plants flower. Gently dig through the top layer of soil to remove small, tender tubers while leaving the rest to mature.
-
For storage potatoes: Wait until the plants yellow and die back. This ensures maximum size and thicker skins for longer storage.
To harvest, simply tip the crate and sift through the soil—a much easier process than digging in the ground.
Storing Your Harvest
-
Allow potatoes to cure in a cool, dark, well-ventilated place for 1–2 weeks.
-
Store them at 40–50°F in a dark, dry location.
-
Avoid refrigeration, which can turn starch into sugar and alter flavor.
Reusing the Crate
After the season, empty the crate and compost the used soil, especially if there were any signs of disease. Brush out debris and store the crate in a dry location until next planting season.
Final Thoughts
Rustic crate potato farming is a smart and space-efficient way to enjoy fresh, homegrown tubers without the challenges of traditional in-ground planting. With the right soil mix, regular hilling, and consistent watering, you can look forward to a flavorful, abundant harvest—straight from your backyard to your table.


