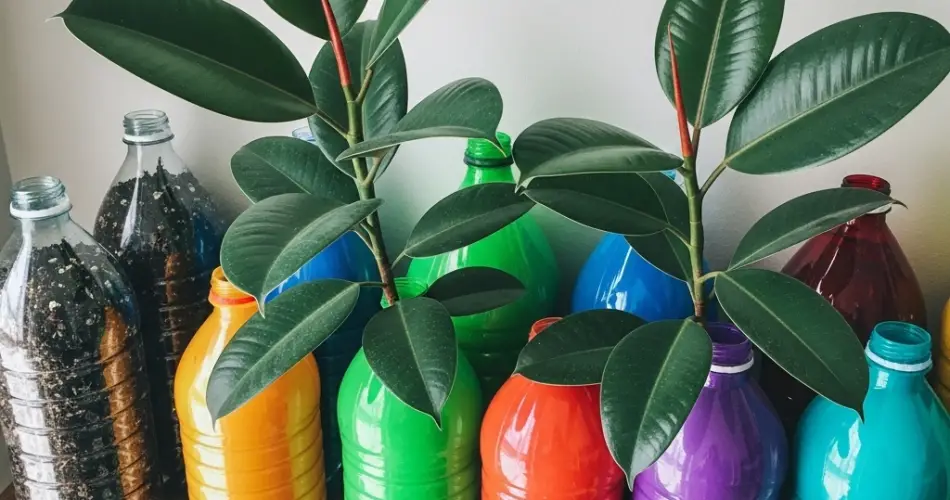
The Rubber Plant (Ficus elastica) is a popular houseplant admired for its glossy, broad leaves and sturdy growth. It adds a touch of tropical elegance to any indoor space while remaining easy to care for. One of the most rewarding ways to multiply your rubber plant collection is through propagation—and using plastic bottles makes the process simple, sustainable, and cost-effective.
In this article, you’ll learn how to propagate rubber plant cuttings in plastic bottles. This method is beginner-friendly, environmentally conscious, and ideal for anyone looking to grow new plants without investing in fancy tools or containers.
Why Use Plastic Bottles for Propagation?
Plastic bottles are often thrown away after a single use, but they can be repurposed into practical plant containers. Here’s why they’re ideal for propagating rubber plant cuttings:
-
Affordable and Accessible: Plastic bottles are easy to find and cost nothing to reuse.
-
Customizable: You can cut, shape, and modify them to suit your needs.
-
Root Visibility: Transparent bottles let you observe root development.
-
Moisture Control: They help create a mini greenhouse effect to maintain humidity.
Using plastic bottles not only helps the environment but also offers an efficient setup for nurturing cuttings through the early stages of growth.
Materials You’ll Need
Before starting the propagation process, gather the following items:
-
A healthy rubber plant cutting (4–6 inches long, with at least one node)
-
A clean, empty plastic bottle (500 ml to 1 liter)
-
Sharp scissors or a utility knife
-
Potting mix or water (depending on the propagation method)
-
Rooting hormone (optional but helpful)
-
Spray bottle for misting
-
Small stones or perlite (optional, for improved drainage)
-
A plastic wrap or another bottle top (to create a humidity dome)
Step-by-Step Guide: Propagating in Plastic Bottles
There are two main methods of propagating rubber plant cuttings using bottles: in water and in soil. Both are effective, so choose the one that suits your preference.
Method 1: Water Propagation in Bottles
Step 1: Prepare the Cutting
-
Cut a healthy stem from your rubber plant, ideally with one leaf and one node.
-
Let the cutting sit for an hour to allow the sap to dry and prevent rot.
-
(Optional) Dip the cut end in rooting hormone.
Step 2: Prepare the Bottle
-
Use a transparent plastic bottle and cut the top third off to create an open container.
-
Fill it halfway with filtered or distilled water.
-
Place the cutting in the bottle, ensuring the node is submerged but the leaf stays above water.
Step 3: Create a Mini Greenhouse
-
Cover the top of the bottle with a plastic wrap or the inverted bottle top.
-
This helps maintain humidity around the cutting.
-
Poke small holes in the cover for airflow.
Step 4: Place in Indirect Light
-
Position the bottle in a warm spot with bright, indirect sunlight.
-
Change the water every 5–7 days to keep it clean and oxygenated.
Method 2: Soil Propagation in Bottles
Step 1: Prepare the Bottle
-
Cut a plastic bottle in half.
-
Poke small drainage holes in the bottom half to avoid waterlogging.
-
Add a layer of stones or perlite for drainage, then fill with well-draining potting mix.
Step 2: Plant the Cutting
-
Dip the base of the cutting in rooting hormone.
-
Plant it into the soil, ensuring at least one node is buried.
Step 3: Create Humidity
-
Use the top half of the bottle as a humidity dome. Place it over the base and mist inside lightly.
-
This maintains moisture without overwatering.
Step 4: Monitor and Wait
-
Keep the cutting in indirect light and check the soil regularly.
-
Mist when the soil starts to dry out.
-
In 4–6 weeks, roots should begin to develop.
Post-Propagation Care
Once your cutting develops healthy roots (typically after 6–8 weeks), you can:
-
Transplant into a pot with well-draining soil if it started in water.
-
Keep it in the same container, gradually removing the dome for air adjustment.
-
Avoid direct sun for the first few weeks after transplanting.
-
Water sparingly, as overwatering can damage new roots.
Troubleshooting Tips
-
Cutting turning black or mushy? Likely caused by rot. Start over with a new cutting and ensure proper air circulation.
-
No roots after several weeks? Be patient—some cuttings take longer. Check temperature and light conditions.
-
Leaves wilting or yellowing? Ensure the node is not too deep in water or soil and that the cutting is receiving enough light.
Final Thoughts
Propagating rubber plant cuttings in plastic bottles is a fun, affordable, and sustainable gardening project. It’s a great way to expand your plant collection, share with friends, or simply learn more about how plants grow. With minimal tools and care, you can successfully root new rubber plants and enjoy the process of watching life take root—literally.
Whether you’re a beginner or a plant enthusiast looking for a simple propagation method, using recycled plastic bottles is both eco-conscious and effective. Give it a try and watch your rubber plant cuttings grow into healthy new plants.


