Oregano is one of the most popular culinary herbs, prized for its bold, earthy flavor that enhances everything from pasta sauces and roasted vegetables to soups and marinades. While you can always buy oregano at the store, there’s something uniquely satisfying about growing your own supply at home. The best part is that you don’t need a garden or expensive equipment—just a healthy oregano cutting and an empty plastic bottle. With this simple and sustainable method, you can root oregano cuttings in water bottles and enjoy a steady source of free herbs right in your kitchen or on your balcony.
Why Root Oregano Cuttings in Bottles?
Propagation through cuttings is one of the easiest and fastest ways to multiply oregano plants. Unlike starting from seeds, which can take longer and yield inconsistent results, using cuttings ensures your new plant has the same flavor and growth traits as the parent.
Water bottle propagation has some unique advantages:
-
Cost-effective: All you need is a used bottle, fresh water, and a cutting.
-
Eco-friendly: Repurposing bottles helps reduce plastic waste.
-
Beginner-friendly: Even first-time gardeners can succeed with this method.
-
Space-saving: Bottles fit neatly on windowsills, countertops, or balconies.
Selecting Healthy Cuttings
The success of oregano propagation depends heavily on the quality of your cuttings. Choose a parent plant that is healthy, green, and free from pests or diseases.
Here’s how to prepare the best cuttings:
-
Select stems that are about 4–6 inches long and not too woody. Younger, flexible stems root more easily.
-
Cut just below a leaf node (the small joint where leaves grow from the stem).
-
Remove the lower leaves, leaving only a few pairs at the top. This prevents leaves from sitting in water and rotting.
-
If available, you can dip the cut end in natural rooting hormone (like cinnamon or aloe vera gel) to encourage faster root growth, though this step is optional.
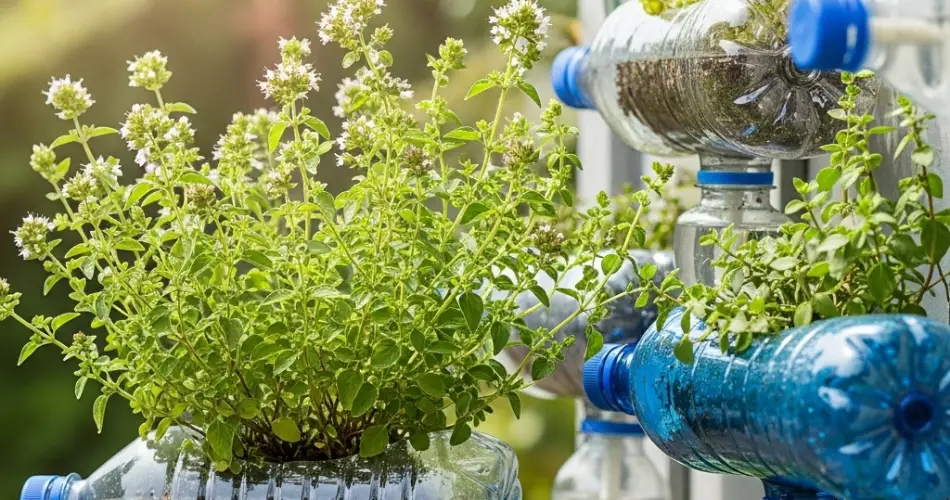
Setting Up the Water Bottle
Now comes the fun part—preparing your bottle for propagation. A standard 500 ml or 1-liter bottle works well.
-
Rinse the bottle thoroughly to remove any residue.
-
Cut the top portion of the bottle to create a wider opening, making it easier to insert cuttings.
-
Fill the bottle halfway with clean, room-temperature water.
-
Place the prepared oregano cuttings in the water, ensuring that at least one leaf node is submerged while the upper leaves remain above the surface.
Position the bottle in a bright location, such as a windowsill, where it can receive indirect sunlight. Direct sun may cause the water to heat up too much, which could damage the cuttings.
Encouraging Root Growth
Roots typically begin to appear within 7–14 days. During this time, it’s important to:
-
Change the water every 2–3 days to keep it fresh and oxygenated.
-
Check for root development by observing the submerged nodes.
-
Avoid overcrowding by placing only a few cuttings in each bottle, giving them space to grow.
Once the roots reach about one inch long, the oregano cuttings are ready to be transplanted into soil.
Transplanting Oregano into Soil
While oregano can survive in water for some time, it thrives best when moved into soil. Transplanting ensures the plant develops strong roots and grows into a full, productive herb.
To transplant:
-
Prepare a container with drainage holes and fill it with well-draining potting soil. A mix of standard potting soil with added sand or perlite works well.
-
Make a small hole in the soil and gently place the rooted cutting inside. Cover the roots with soil and press down lightly.
-
Water the soil thoroughly, allowing excess water to drain.
-
Place the pot in a sunny spot where the plant can receive at least 6 hours of sunlight daily.
Caring for Your New Oregano Plant
After transplanting, oregano needs only minimal care to thrive. This hardy herb does well in containers, making it perfect for balconies, patios, or even kitchen windowsills.
-
Watering: Let the soil dry slightly between waterings. Oregano prefers drier conditions, and overwatering can cause root rot.
-
Pruning: Regularly pinch back the tips of the plant to encourage bushier growth. This also provides you with fresh sprigs for cooking.
-
Feeding: Oregano doesn’t need heavy fertilization. A light dose of compost tea or diluted organic fertilizer once a month during the growing season is enough.
Harvesting and Using Fresh Oregano
Within a few weeks, your new oregano plant will begin producing enough leaves for harvest. Snip stems as needed, always cutting just above a leaf node to encourage new growth.
Fresh oregano can be used immediately in your favorite dishes, or it can be dried for later. To dry, simply hang small bundles upside down in a cool, dark place until the leaves are crisp. Crumble and store them in an airtight jar for use year-round.
Final Thoughts
Propagating oregano in water bottles is one of the simplest and most rewarding ways to grow fresh herbs at home. This method requires minimal supplies, reuses materials you likely already have, and produces healthy plants ready to flavor your cooking.
Whether you’re an experienced gardener or just starting out, rooting oregano cuttings in bottles is a sustainable, cost-free, and enjoyable way to keep your kitchen stocked with this versatile herb. With just a bit of patience, you’ll soon have an endless supply of fresh oregano right at your fingertips.


