Reusing Plastic Bottles into Self-Watering Flower Pots | DIY Garden
Turning plastic bottles into self-watering flower pots is a fantastic way to recycle while making gardening easier and more efficient. These DIY self-watering planters ensure your plants receive consistent moisture, reducing the need for daily watering. Perfect for busy gardeners, indoor plants, or those in dry climates, this project is simple, cost-effective, and environmentally friendly.
In this guide, we will walk you through how to make self-watering flower pots using plastic bottles, along with tips to maximize plant growth and sustainability.
Why Choose Self-Watering Planters?
Using self-watering flower pots offers numerous benefits:
- Conserves Water: Reduces water waste by providing only what the plant needs.
- Saves Time: Ideal for those who travel or forget to water plants regularly.
- Prevents Overwatering: Helps maintain balanced soil moisture levels.
- Eco-Friendly: Repurposes plastic waste, reducing environmental impact.
- Encourages Healthy Roots: Allows plants to absorb water at their own pace, promoting strong root development.
Materials You’ll Need
Before getting started, gather the following materials:
- Plastic bottles (1-liter, 2-liter, or larger, depending on plant size)
- A sharp knife or scissors
- Drill or hot needle (for making drainage holes)
- Cotton string or wicking fabric
- Potting soil
- Small stones or pebbles (optional, for better drainage)
- Seeds or small plants of your choice
- Acrylic paint, markers, or decorative materials (optional, for customization)
Step-by-Step Instructions to Make Self-Watering Flower Pots
Step 1: Prepare the Plastic Bottles
- Clean and Remove Labels: Wash the plastic bottles thoroughly and remove any labels or adhesive.
- Cut the Bottle: Using scissors or a knife, cut the bottle in half. The bottom half will hold the water, and the top half will serve as the planting container.
- Make a Wick Hole: Drill or poke a small hole in the bottle cap using a hot needle or drill.
Step 2: Insert the Wick
- Cut a piece of cotton string or wicking fabric, ensuring it is long enough to reach the water reservoir at the bottom.
- Thread the wick through the hole in the cap, leaving one end hanging inside the top half and the other extending into the water.
- Screw the cap back onto the bottle.
Step 3: Assemble the Planter
- Flip the top half of the bottle (with the cap and wick) upside down and place it inside the bottom half.
- Ensure the wick is submerged in water to allow continuous moisture absorption.
Step 4: Add Soil and Plants
- Fill the top section with potting soil, ensuring the wick is buried inside the soil to distribute moisture evenly.
- Plant your seeds or small plants and gently pat the soil down.
- Water lightly from the top to help the wick start absorbing moisture.
Choosing the Best Plants for Self-Watering Planters
Self-watering planters work well for a variety of plants, including:
- Herbs: Basil, mint, parsley, and chives thrive in this system.
- Leafy Greens: Lettuce, spinach, and kale grow well with consistent moisture.
- Flowers: Marigolds, petunias, and pansies add beauty to your garden.
- Houseplants: Spider plants, pothos, and peace lilies benefit from self-watering containers.
Tips for Maintaining Self-Watering Flower Pots
- Monitor Water Levels: Refill the reservoir when the water level drops.
- Use Quality Soil: Lightweight, well-draining potting soil ensures proper growth.
- Clean the Wick Regularly: Prevent clogging by rinsing the wick every few weeks.
- Avoid Waterlogging: Ensure excess moisture doesn’t accumulate by adding a few drainage holes.
- Position Plants Properly: Place sun-loving plants in bright areas and shade-loving plants accordingly.
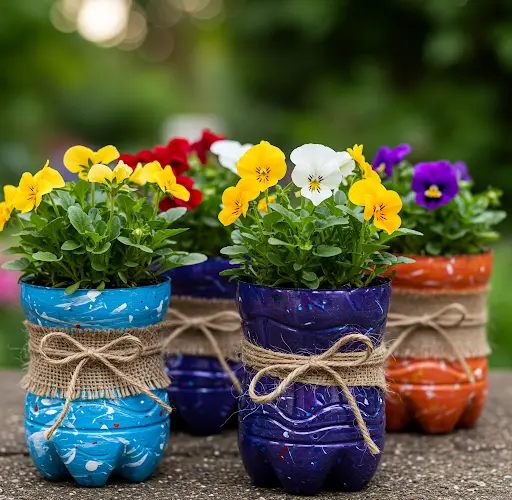
Creative Ways to Customize Your Planters
Make your DIY self-watering flower pots visually appealing by:
- Painting the Bottles: Use acrylic paints to add colors or patterns.
- Decorating with Fabric: Wrap the bottles in burlap or decorative paper.
- Labeling Plants: Write plant names on the bottles using waterproof markers.
- Adding Hanging Hooks: Attach strings to create hanging planters.
Environmental Benefits of Upcycling Plastic Bottles
By repurposing plastic bottles, you are contributing to:
- Reducing Plastic Waste: Fewer bottles end up in landfills and oceans.
- Conserving Resources: Less demand for new plastic products.
- Promoting Sustainable Gardening: Encourages eco-friendly practices at home.
Conclusion
Creating self-watering flower pots from plastic bottles is a simple yet impactful way to make gardening more sustainable and hassle-free. With just a few materials and minimal effort, you can ensure your plants stay hydrated while reducing plastic waste. Whether you’re growing herbs, flowers, or leafy greens, this DIY project is perfect for any garden enthusiast looking for an innovative, water-efficient solution.
Start crafting your self-watering planters today and enjoy healthier, thriving plants with less effort!


