Growing carrots at home doesn’t require a traditional garden bed. With creativity and a few repurposed plastic bottles, you can cultivate sweet and crunchy carrots right on your balcony, windowsill, or porch. This method is ideal for urban gardeners, allowing you to recycle plastic waste while growing fresh produce in small spaces.
Here’s a complete guide to growing carrots in reused plastic bottles—from preparation to harvest—so you can enjoy homegrown vegetables even without a yard.
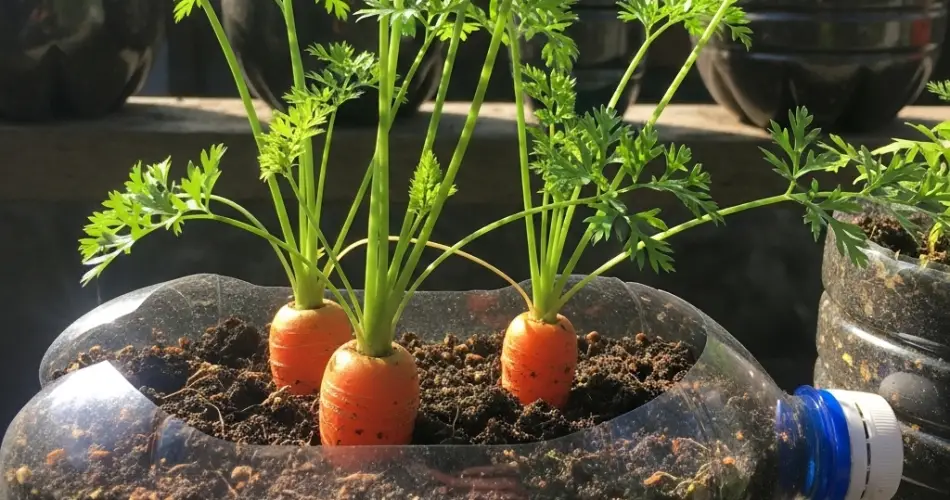
Why Grow Carrots in Bottles?
Plastic bottles, especially 1.5 to 2-liter soda bottles, make surprisingly effective mini-planters. They’re readily available, easy to modify, and help reduce plastic waste. Carrots adapt well to vertical gardening if the containers are deep enough to support their root development.
Benefits of growing carrots in bottles:
-
Space-saving and lightweight
-
Great for balconies, windowsills, and small patios
-
Encourages recycling and sustainability
-
Allows better control over soil quality
-
Protects young seedlings from pests on the ground
What You’ll Need
Before planting, gather the following materials:
-
1.5 to 2-liter plastic bottles (transparent or colored)
-
Craft knife or scissors
-
Screwdriver or hot nail (for making holes)
-
Twine or wire for hanging (optional)
-
Good-quality potting soil
-
Carrot seeds (preferably small or short-rooted varieties like ‘Parisian’, ‘Little Finger’, or ‘Thumbelina’)
-
Watering can or spray bottle
Optional:
-
Compost or vermicast
-
Sand or perlite to improve drainage
Preparing the Bottle Planters
-
Clean the Bottles:
Wash the bottles thoroughly and remove any labels. This prevents residue buildup and helps you observe root development in clear bottles. -
Cut the Bottle:
Cut a large rectangular window on the side of the bottle (about 4–5 inches long and 2 inches wide). This space will be used to add soil and for the carrot tops to grow out. -
Drainage Holes:
Poke 4–6 small holes in the bottom of the bottle to allow water to escape. Drainage is essential to prevent root rot. -
Optional Hanging Setup:
If you want to hang the bottles vertically, punch two holes near the neck and thread twine or wire through to create a hanging loop.
Preparing the Soil
Carrots grow best in loose, well-draining soil free of rocks or compacted materials. For bottle growing:
-
Mix potting soil with fine compost and a little sand or perlite.
-
Avoid using heavy garden soil, which may hinder root growth.
-
The soil should be slightly moist and fluffy—easy for roots to penetrate.
Planting Carrot Seeds
-
Fill the Bottles:
Add soil through the cut-out section, leaving about 1 inch of space at the top. -
Sow the Seeds:
Sprinkle 4–5 seeds evenly across the surface and lightly cover them with a thin layer of soil (about ¼ inch deep). -
Water Gently:
Use a fine spray to moisten the soil. Avoid flooding the bottle, especially during the early stage. -
Thinning:
Once the seedlings are 2 inches tall, thin them out by snipping weaker sprouts. Leave about 2 inches of space between each seedling to give roots room to grow.
Choosing the Right Location
Carrots need full sun—at least 6 hours of light daily. Place your bottles:
-
On a sunny balcony ledge
-
Hanging from railings or mounted on a wall
-
On windowsills with good light exposure
If sunlight is limited, rotate the bottles every few days or consider using a grow light.
Maintenance and Care
-
Watering:
Keep the soil consistently moist but not soggy. Carrots need steady moisture to grow properly. Dry soil can lead to split roots or poor development. -
Fertilization:
If your soil is rich in compost, additional fertilization is minimal. If needed, apply a balanced liquid fertilizer once every two weeks. Avoid high-nitrogen formulas that encourage leaf growth over roots. -
Pest Control:
Carrots are relatively pest-resistant when grown off the ground. Watch out for aphids or fungal problems if the air circulation is poor. Good spacing and sun exposure help prevent issues.
Harvesting Carrots
Carrots typically mature in 60 to 75 days, depending on the variety. You’ll know they’re ready when you see the top of the carrot pushing through the soil and the shoulders are about 1 inch wide.
To harvest:
-
Gently loosen the soil by squeezing the bottle sides or tapping it lightly.
-
Grip the carrot top and pull it out slowly to avoid snapping.
-
Wash them clean, trim the greens, and enjoy!
You can also harvest baby carrots earlier for a tender and sweeter snack.
Replanting and Rotation
After harvesting, reuse the bottle by replacing the old soil or rejuvenating it with compost. Rotate crops with leafy greens or herbs to maintain soil health if growing multiple cycles.
Carrot tops can also regrow greens in water, though they won’t form new roots. The greens are edible and can be added to salads or pesto.
Final Thoughts
Reusing plastic bottles to grow carrots is a creative, space-efficient, and sustainable way to enjoy fresh vegetables at home. Even with limited space and budget, you can transform your environment into a productive garden with just a few containers and a bit of care.
Whether you’re gardening on a balcony, windowsill, or small patio, this method provides a rewarding experience and a steady supply of homegrown, crunchy carrots.


