Grow Healthy Green Vegetables Using an Old Drum
Growing your own green vegetables at home is both rewarding and practical. But what if you don’t have much space or want to reuse old items creatively? One great solution is to turn an old drum into a productive vegetable planter. With a little effort, an unused drum can become a sustainable, space-saving garden that yields fresh, nutritious greens for your table.
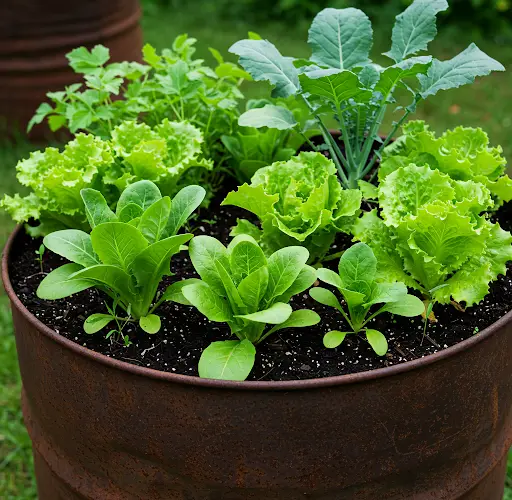
This method is especially useful for people living in urban areas or those with limited ground space. Drums are large, durable, and capable of holding ample soil, making them perfect for growing a wide range of leafy vegetables such as lettuce, mustard greens, spinach, bok choy, and kale.
Why Use an Old Drum for Growing Vegetables?
Recycling an old drum for gardening offers several benefits:
-
Reduces waste by repurposing unused items.
-
Maximizes growing space, especially if the drum is modified for vertical planting.
-
Improves soil control, allowing you to grow in nutrient-rich, pest-free soil.
-
Perfect for small areas such as balconies, rooftops, patios, or small gardens.
-
Retains moisture well, reducing watering frequency.
With the right design, one drum can support dozens of healthy vegetable plants in a small footprint.
Choosing the Right Drum
Start with a plastic or metal drum that holds around 100 to 200 liters. Make sure it has never stored toxic chemicals—food-grade barrels are best. Plastic drums are lighter and easier to cut, while metal ones are more durable but can rust over time.
Clean the drum thoroughly to remove any residue before using it for planting.
Preparing the Drum for Planting
There are two popular designs:
-
Standard Vertical Planter
-
Tower-style Vertical Garden (with pockets or holes for planting)
We’ll focus on a vertical garden model, which maximizes space and looks attractive too.
1. Mark and Cut Planting Holes
-
Using a marker, draw evenly spaced holes (3–4 inches in diameter) around the sides of the drum. Start a few inches from the bottom and continue up in staggered rows.
-
You can create 20–30 planting pockets depending on drum size.
-
Use a jigsaw or sharp knife to cut out the holes. Sand any rough edges.
2. Add Drainage Holes
Drill several small holes in the bottom of the drum to prevent waterlogging. This is essential for healthy root growth.
3. Prepare the Soil Mix
For green leafy vegetables, use a light, nutrient-rich, and well-draining soil mix. A good blend includes:
-
50% garden soil or cocopeat
-
30% compost or aged manure
-
20% sand or rice husks for aeration
Mix well and fill the drum layer by layer, tamping gently as you go to remove large air pockets.
Planting Your Vegetables
You can grow leafy greens directly from seeds or transplant young seedlings into the planting holes.
For Seeds:
-
Pre-soak seeds overnight for quicker germination.
-
Place 2–3 seeds per hole, cover lightly with soil, and water gently.
-
Once sprouted, thin to the healthiest seedling per hole.
For Seedlings:
-
Carefully transplant seedlings into each pocket.
-
Gently firm the soil around roots and water well after planting.
The top of the drum can also be used to grow extra vegetables or herbs, like coriander or green onions.
Care and Maintenance
Watering:
Drums retain moisture well but check daily, especially in hot weather. Water from the top and let it trickle down, or install a vertical watering pipe with side holes in the center to distribute water evenly.
Sunlight:
Place the drum in an area that receives at least 4–6 hours of sunlight per day. Most leafy greens grow best in partial to full sun.
Fertilizing:
Feed your plants every 10–14 days using organic liquid fertilizers like compost tea or fish emulsion to promote lush leaf growth.
Mulching:
Add a layer of dried grass, rice husks, or shredded leaves around the base of each plant to retain moisture and suppress weeds.
Pest Control:
Keep an eye out for aphids or caterpillars. Use neem oil spray or natural insect deterrents if needed.
Harvesting
Most green vegetables are ready for harvest in 30 to 45 days, depending on the type and growing conditions. Use clean scissors to cut the outer leaves, allowing the inner leaves to continue growing. This cut-and-come-again method keeps your plants producing longer.
By harvesting only what you need, your vegetables stay fresh and the plant continues to grow—providing a steady supply of greens for your kitchen.
Creative Ideas
-
Paint or decorate the drum to brighten up your space.
-
Add wheels or a stand if you need to move the drum for sunlight.
-
Use multiple drums to create a full-scale container garden on a patio or terrace.
Conclusion
Transforming an old drum into a green vegetable garden is a smart, sustainable way to grow your own food—no matter how much space you have. This technique is low-cost, eco-friendly, and highly productive. With a single drum, you can enjoy fresh, pesticide-free vegetables at your fingertips while helping reduce plastic or metal waste.
Whether you’re a gardening novice or an urban farming enthusiast, this DIY method offers a fun and rewarding way to turn everyday items into flourishing sources of healthy food.