Recycle Plastic Waste into a Unique and Beautiful Cabbage Garden
Plastic waste is one of the biggest environmental issues we face today—but with a little creativity, it can be transformed into something useful, sustainable, and even beautiful. One brilliant example is turning discarded plastic containers into a productive cabbage garden. Not only does this help reduce waste, but it also allows you to grow fresh, healthy vegetables in limited spaces.
Whether you have a backyard, a balcony, or just a small sunny corner, this method brings together eco-conscious living and home gardening in a way that’s practical, fun, and deeply satisfying.
Why Grow Cabbage in Recycled Plastic Containers?
-
Eco-friendly: Reduces the amount of plastic waste ending up in landfills.
-
Low-cost gardening: No need to buy expensive pots or planters.
-
Space-saving: Ideal for urban dwellers with little or no garden space.
-
Customizable design: You can shape and arrange your containers however you like.
-
High yield: Cabbage grows well in containers if given proper care.
This is a great project for gardeners of all experience levels and a fun way to teach children about sustainability and food growing.
Materials You’ll Need
To get started, gather the following:
-
Used plastic containers (such as large water bottles, paint buckets, or cooking oil jugs)
-
Sharp scissors or a utility knife
-
A small hand drill or screwdriver (for drainage holes)
-
Potting mix rich in organic matter
-
Compost or slow-release fertilizer
-
Cabbage seedlings or seeds
-
Watering can
-
Sunny space (cabbage loves full sun, ideally 6+ hours daily)
Optional: paint or decorative elements to beautify your recycled containers.
Step-by-Step Guide to Building Your Recycled Plastic Cabbage Garden
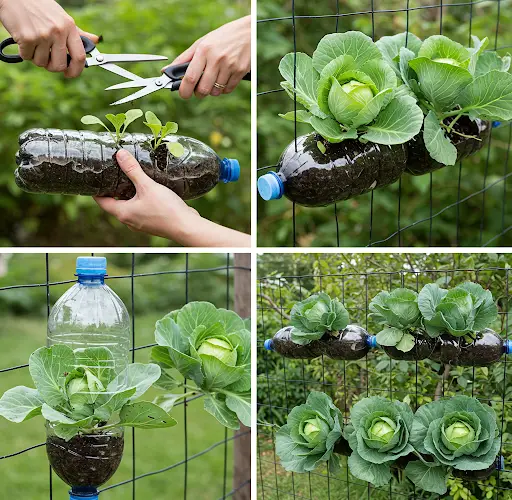
1. Prepare Your Plastic Containers
Select containers large enough to accommodate cabbage roots, which grow deep and wide. Ideal size: at least 12 inches in diameter and 10–12 inches deep.
-
Wash containers thoroughly to remove any residue.
-
Use scissors or a knife to cut an opening at the top, wide enough for planting.
-
Drill or poke 4–5 drainage holes at the bottom to prevent waterlogging.
-
If you’d like, paint or decorate the outside of the containers for a colorful, garden-friendly appearance.
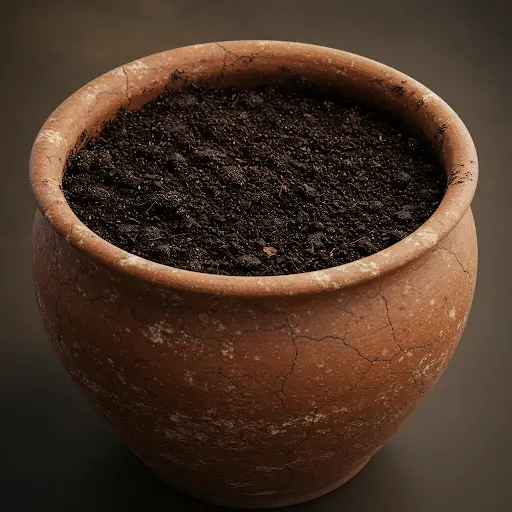
2. Fill with Potting Mix
Fill each container with a mixture of potting soil and compost. A loose, well-draining soil is key for cabbage growth.
-
Use a ratio of 2 parts potting mix to 1 part compost.
-
Add a handful of organic fertilizer or well-rotted manure to enrich the mix.
Make sure the containers are placed where they’ll receive full sunlight. If you’re using a balcony or rooftop, place trays under the containers to catch excess water.
3. Planting the Cabbage
If you’re using seedlings:
-
Transplant one cabbage seedling per container to give it ample space to grow.
-
Gently press the soil around the base to stabilize the plant.
If planting from seeds:
-
Sow 2–3 seeds in the center of the container, about 1/2 inch deep.
-
Once they germinate and grow a few inches tall, thin to one healthy seedling per pot.
Water immediately after planting to help the roots settle in.
4. Watering and Sunlight Needs
Cabbage needs consistent moisture, especially during the head-forming stage.
-
Water deeply every 2–3 days, or daily in hot weather.
-
Avoid letting the soil dry out completely, but also ensure the drainage holes prevent standing water.
Place your containers in a location that gets 6–8 hours of sunlight each day. If growing in a very hot climate, provide some shade during the harshest afternoon sun.
5. Fertilizing and Maintenance
Feed your cabbage plants every 2–3 weeks with compost tea or a balanced liquid fertilizer. You can also top-dress with compost halfway through the growing cycle to support head development.
Keep an eye out for common pests like cabbage worms, aphids, or snails. Use natural methods like neem oil or companion planting with herbs such as mint or basil to deter pests.
Remove any yellowing leaves to keep the plant healthy and encourage proper airflow.
6. Harvesting Your Cabbage
Depending on the variety, cabbage is ready to harvest in 70–100 days. You’ll know it’s time when:
-
The head is firm to the touch and has reached full size.
-
Outer leaves begin to curl or change color slightly.
Cut the cabbage head at the base with a sharp knife, leaving the outer leaves intact if you want the plant to possibly regrow smaller heads.
Tips for Success
-
Start with fast-growing varieties like Golden Acre or Copenhagen Market if you’re a beginner.
-
Recycle creatively: Stack containers vertically to save space and create a green wall.
-
Label your plants: Especially if you’re growing different cabbage varieties.
-
Replant the base: After harvesting, you can sometimes get a second, smaller crop from the leftover stem.
Final Thoughts
Transforming plastic waste into a thriving cabbage garden is a rewarding experience that combines sustainability with self-sufficiency. Not only are you reducing your environmental footprint, but you’re also growing your own food in a way that’s affordable and accessible.
This simple method can be applied to many leafy vegetables, but cabbage is especially satisfying thanks to its large, beautiful heads and nutritional value. With some recycled containers, good soil, and sunshine, you can turn everyday trash into something truly remarkable—fresh food that nourishes both your body and the planet.