Roses are often seen as difficult plants to propagate, but with the right method, even beginners can succeed. One of the simplest and most effective ways to propagate roses is using plain water. This technique is surprisingly easy, and when done correctly, rose cuttings can begin to sprout and root in as little as 24 to 48 hours.
If you’re short on gardening supplies or want a clean, soil-free method to grow more roses, water propagation is a fantastic solution. Here’s how to do it step by step—and why it works so well.
Why Water Propagation Works
Water propagation allows you to monitor root development closely and gives cuttings a clean, consistent environment to stimulate root growth. Water provides constant moisture, and with the right balance of oxygen and light, rose cuttings can thrive even without soil.
This method also reduces the risk of soil-borne diseases, root rot from overwatering, or nutrient imbalances. It’s ideal for indoor gardeners, apartment dwellers, or anyone wanting to grow roses without the mess.
What You’ll Need
To get started, gather the following simple materials:
-
Healthy rose cuttings (6–8 inches long, taken from semi-hardwood stems)
-
A clean glass jar or vase
-
Room-temperature distilled or filtered water
-
Sharp pruning shears or a knife
-
A light source (indirect sunlight or a grow light)
-
Optional: rooting hormone or natural alternatives like honey
Step-by-Step Guide to Water Propagation
1. Select and Prepare the Cutting
Choose a healthy, disease-free rose stem that has recently flowered and begun to harden (semi-hardwood). Cut a 6–8 inch section just below a leaf node at a 45-degree angle.
Remove all flowers, buds, and lower leaves. Leave only the top one or two leaves to reduce water loss through transpiration. If you want to improve your chances, lightly scrape the bottom inch of the stem to expose the green cambium layer—this encourages root growth.
You can also dip the end in a rooting hormone or honey before placing it in water to speed up the process.
2. Place the Cutting in Water
Fill a clean glass jar or vase with about 3 inches of room-temperature water. Insert the cut end of the rose stem so that at least one or two nodes are submerged. These submerged nodes are where roots are most likely to emerge.
Ensure the leaves are not touching the water, as this can lead to decay or bacterial growth.
3. Find the Right Location
Place the jar in a spot that gets bright, indirect sunlight—like a windowsill that doesn’t get harsh afternoon sun. Direct sun can cause the cutting to overheat or dry out, while too little light will slow root development.
If natural light is limited, consider using a small LED grow light placed a few inches above the cutting.
4. Change Water Regularly
To keep the environment clean and oxygen-rich, change the water every 2–3 days. This helps prevent bacterial buildup and gives the stem a fresh oxygen supply.
You can also add a drop or two of hydrogen peroxide (food-grade, diluted) to help keep the water sterile.
5. Watch for Root Development
In ideal conditions, you may notice tiny root nubs forming in as little as 24 to 48 hours. While full root systems take a few weeks to develop, water propagation often starts faster than soil methods.
Once roots reach 1–2 inches in length, the cutting can be transplanted into soil or a potting mix.
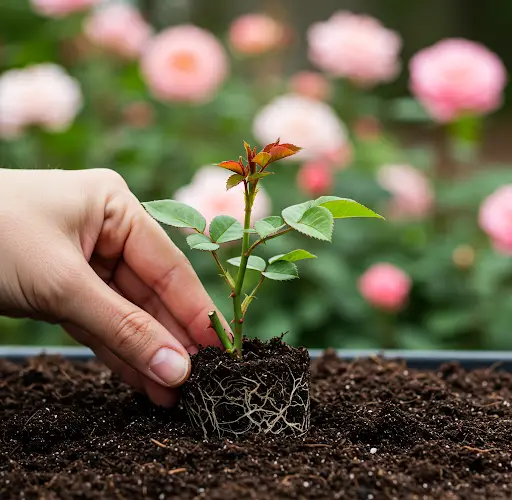
6. Transplanting the Cutting
When the roots look healthy and strong (usually after 2–3 weeks), prepare a small pot with well-draining soil. Make a hole in the center and carefully place the rooted cutting inside. Firm the soil around it and water gently.
Keep the newly planted rose in a shaded area for a few days to allow it to adjust before moving it to a sunnier location.
Tips for Success
-
Use clear containers so you can monitor root growth and water clarity.
-
Avoid overcrowding: Propagate one cutting per jar to prevent fungal problems.
-
Keep the container clean: Wash it thoroughly between uses.
-
Humidity helps: Cover the cutting with a plastic dome or bag (vented) to trap humidity if your home is very dry.
Enjoy Blooms All Year Long
Once your rose cutting is established in soil, you can treat it like any other rose bush—feed it with balanced fertilizer, water regularly, and prune as needed. With the right care, your propagated rose can begin producing blooms within the same growing season.
This simple method of water propagation is a great way to multiply your roses, share plants with friends, or rescue a beloved variety. It’s low-cost, low-mess, and perfect for small-space gardening.
Final Thoughts
Propagating roses in water is not only possible but remarkably effective. With just a glass of clean water and a healthy cutting, you can witness new roots forming almost overnight. Whether you’re new to gardening or a seasoned grower, this technique offers a fast and rewarding way to expand your rose collection naturally.
Give it a try—and enjoy the thrill of watching your roses root and thrive with minimal effort.


